How to Make Summer Sausage at Home: A Complete Step-by-Step Guide
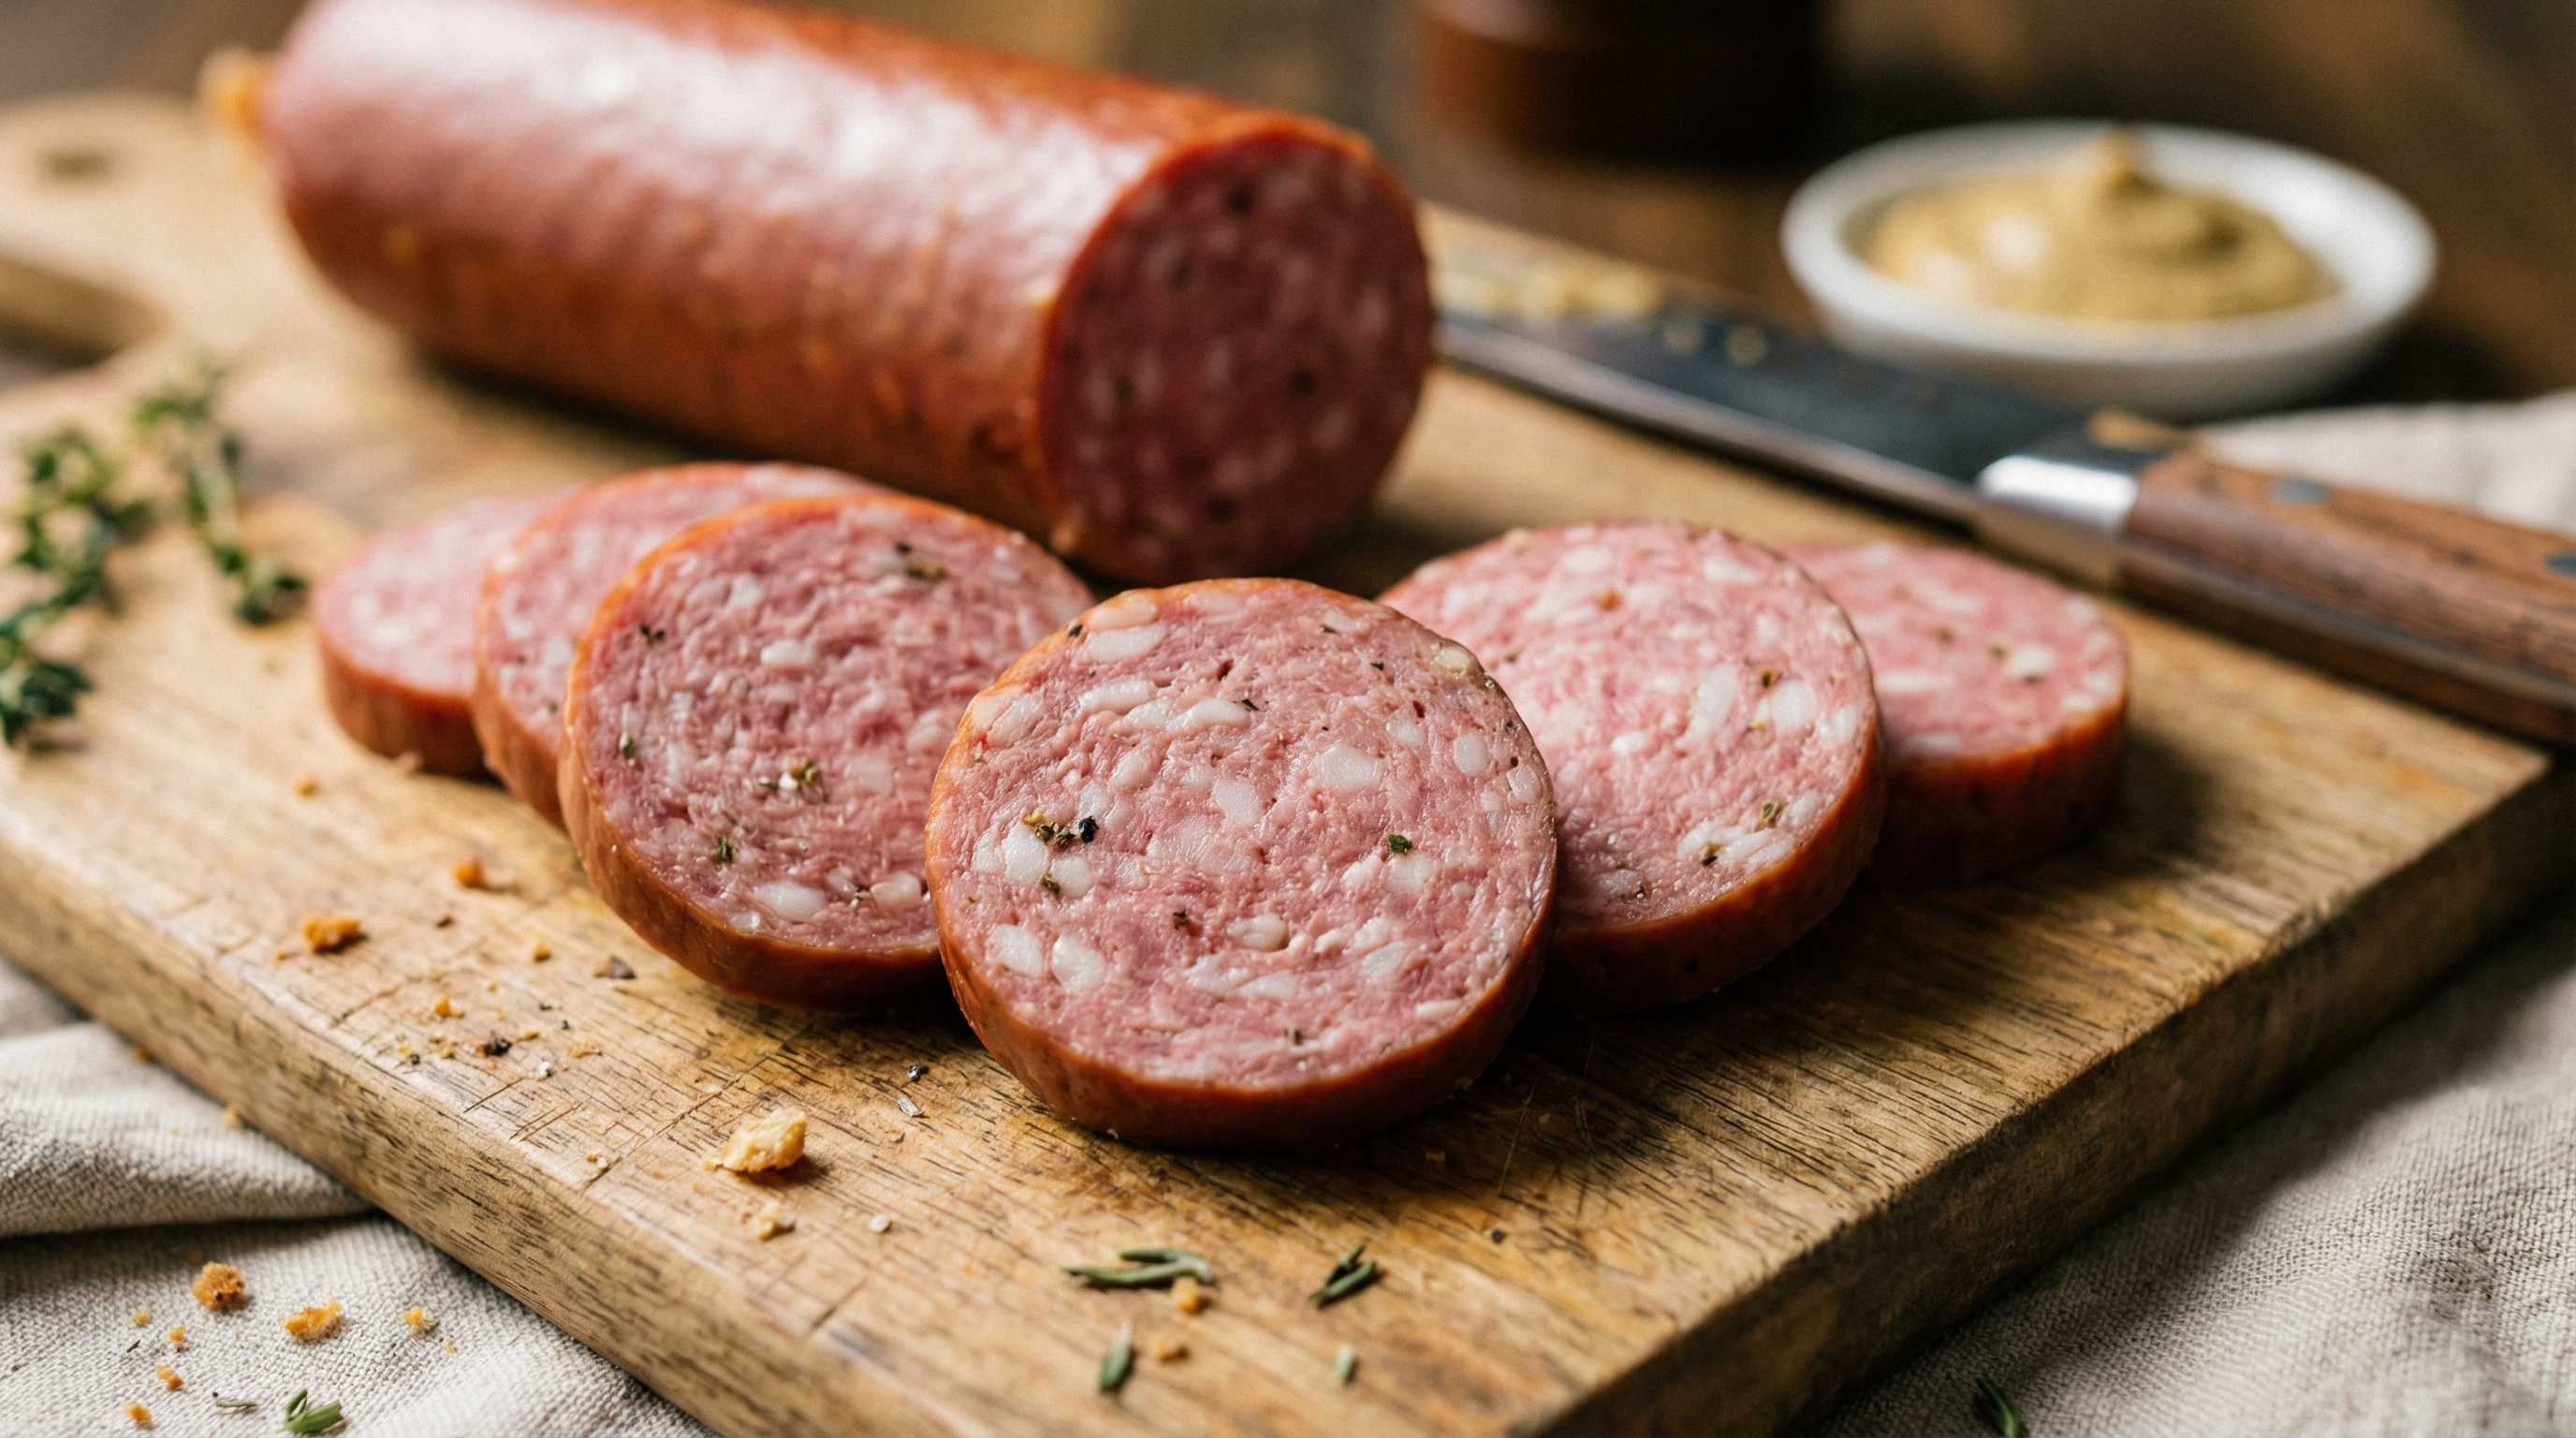
Summer sausage sits in a sweet spot between beginner-friendly and genuinely impressive. Unlike dry-cured salami that demands weeks of patience and a precisely controlled curing chamber, summer sausage is a semi-dry sausage that gets smoked to an internal temperature of 155–160°F. You can go from raw meat to finished product in a single day. And the result — tangy, smoky, sliceable, and shelf-stable — rivals anything you’d find in a specialty shop.
The process combines elements of sausage making, curing, fermenting, and smoking. That sounds like a lot, but each step is straightforward once you understand why it matters. This guide covers everything from meat selection through final storage, with no steps skipped and no hand-waving over the tricky parts.
What Makes Summer Sausage Different
Summer sausage belongs to the semi-dry sausage family. That puts it between fresh sausages (like bratwurst, which must be refrigerated and cooked before eating) and fully dry-cured sausages (like salami, which hang for weeks losing moisture). Semi-dry sausages are fermented to lower their pH, then cooked or smoked to a safe internal temperature.
The fermentation step is what gives summer sausage its characteristic tang. Beneficial bacteria — either naturally present or added as a starter culture — consume sugars and produce lactic acid. This drops the pH below 5.0, creating an environment hostile to harmful pathogens. Combined with the curing salt (sodium nitrite) and the final cooking temperature, you get a product that’s safe to eat and remarkably stable at room temperature for extended periods.
Historically, summer sausage earned its name because it could survive summer temperatures without refrigeration — a critical trait before the age of electric cooling. German and Eastern European immigrants brought their recipes to the American Midwest, where summer sausage became a regional staple. Wisconsin, in particular, claims it as a cultural touchstone.
Essential Equipment
You don’t need a professional setup, but a few specific tools are non-negotiable. Here’s what you actually need versus what’s nice to have.
Must-Have Equipment
- Meat grinder: A dedicated grinder or a stand mixer grinder attachment. You need a coarse plate (3/8″) and a fine plate (3/16″). Electric grinders save enormous effort on batches over five pounds.
- Sausage stuffer: A vertical stuffer produces the most consistent results. Avoid using the grinder’s stuffing tube — it compresses the meat a second time and creates a dense, smeared texture.
- Digital scale: Accurate to 0.1 grams for curing salt measurements. This is a food safety requirement, not a suggestion. Eyeballing curing salt is dangerous.
- Smoker: Any smoker that can hold 130–180°F will work. Electric smokers excel here because they maintain low temperatures reliably. Pellet smokers, kettle grills with indirect setup, and offset smokers all work too.
- Instant-read thermometer: For checking internal temperature during the smoke. A leave-in probe thermometer is even better — you can monitor without opening the smoker door.
- Large mixing tub or bowl: You’ll be mixing several pounds of ground meat with seasonings. A restaurant-style bus tub works perfectly.
Nice to Have
- pH meter or strips: Confirms fermentation is working if you’re using a starter culture. Target pH is 4.7–5.0 after fermentation.
- Fibrous casings (3″ diameter): These are the standard for summer sausage. They’re inedible but hold their shape beautifully during smoking and create that classic round cross-section.
- Vacuum sealer: For long-term storage of finished sausage.
Ingredients: The Foundation
This recipe makes approximately 10 pounds of summer sausage. Scale proportionally if you’re making more or less.
Meat
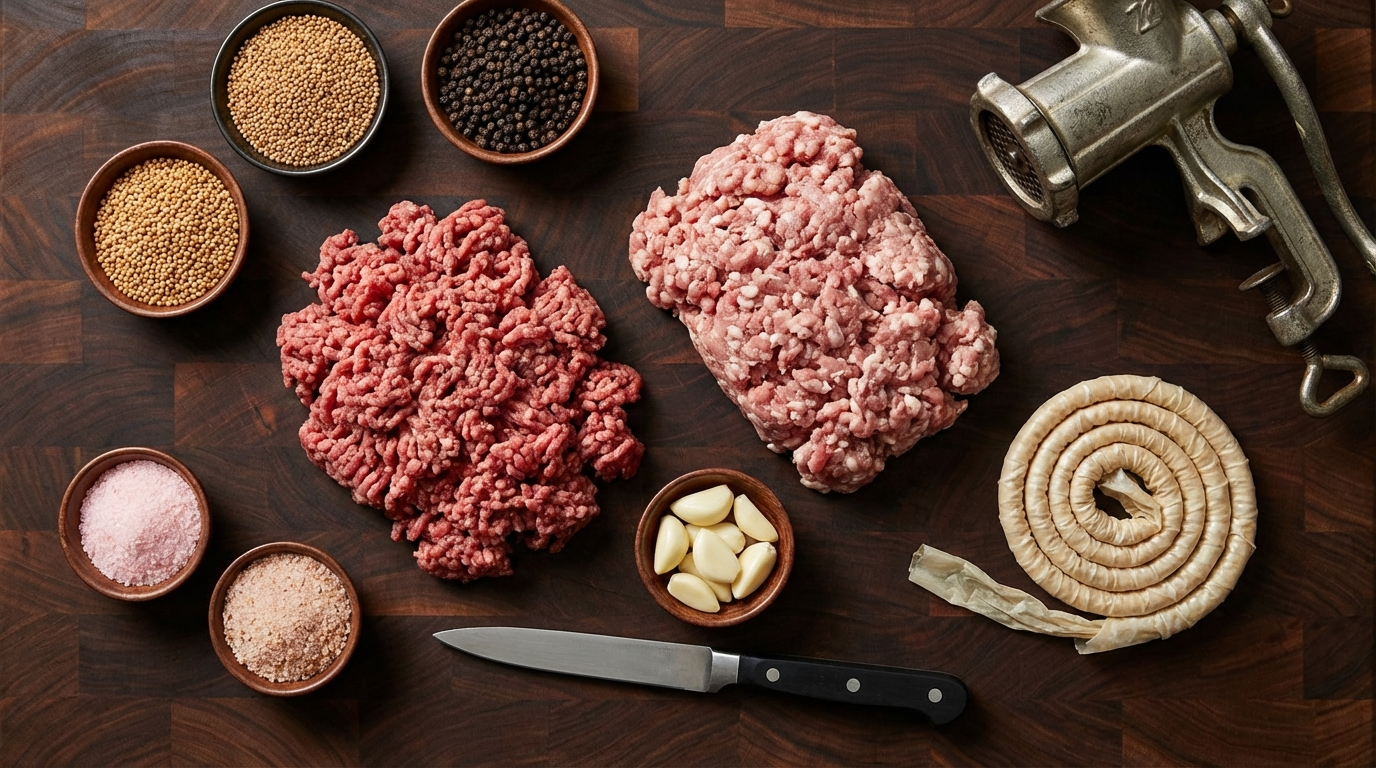
7 pounds lean beef (80/20 ground beef or boneless chuck): Beef provides the backbone flavor. Chuck roast, trimmed and ground yourself, gives you the freshest result and lets you control the fat ratio precisely.
3 pounds fatty pork (pork shoulder or pork butt): Pork adds moisture, richness, and a smoother texture. The fat from pork shoulder renders at lower temperatures than beef fat, which helps create that characteristic creamy mouthfeel.
The 70/30 beef-to-pork ratio is traditional. Some recipes go 80/20 or even all-beef, but straight beef produces a drier, firmer sausage. The pork fat makes a noticeable difference.
Curing and Seasoning
- Cure #1 (Prague Powder #1 / Insta Cure #1): 1 level teaspoon per 5 pounds of meat (2 teaspoons total for this recipe). This is 6.25% sodium nitrite mixed with salt. It prevents botulism, maintains the pink color, and contributes to the cured flavor. Do not substitute or omit. Measure by weight if possible: 2.5 grams per kilogram of meat.
- Kosher salt: 3 tablespoons (Diamond Crystal) or 2 tablespoons (Morton). Salt is the primary preservative and seasoning.
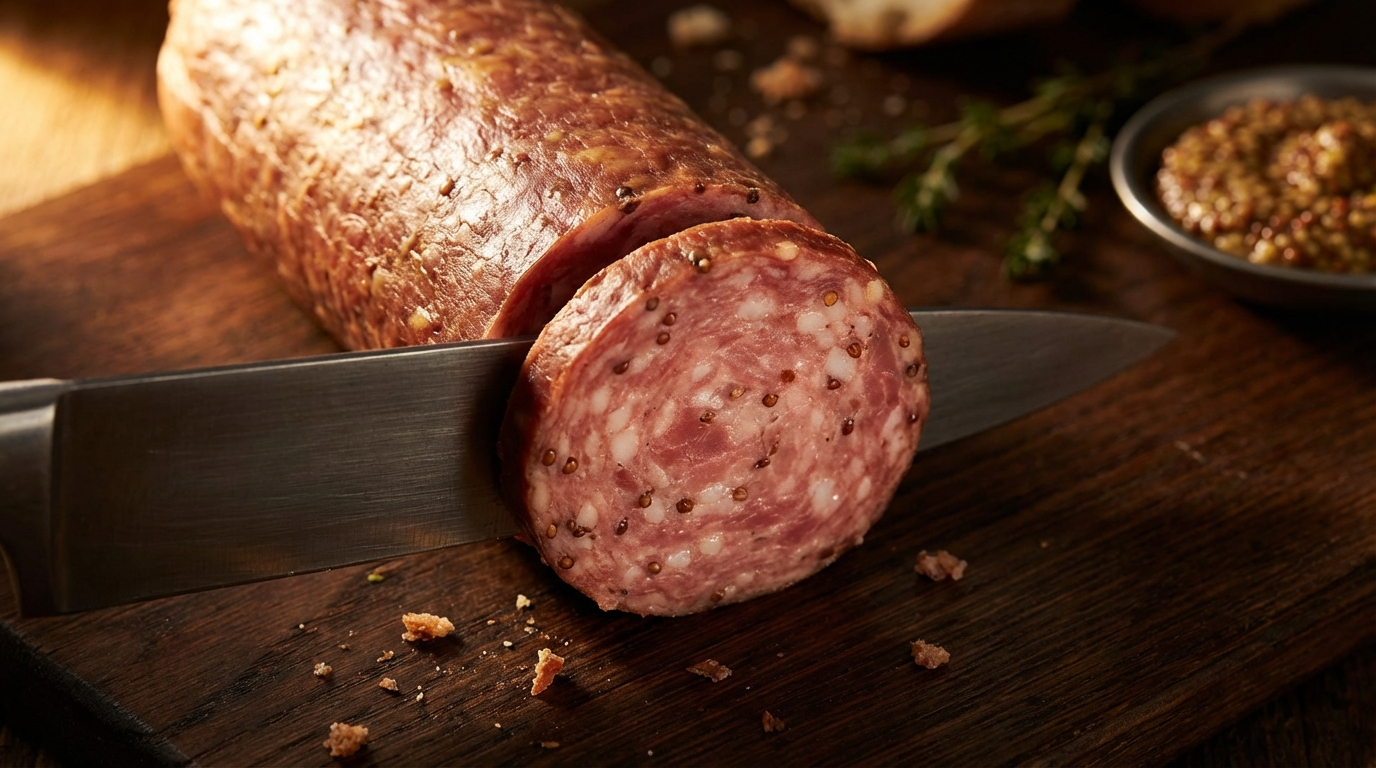
- Black pepper: 2 tablespoons, coarsely ground. The signature spice of summer sausage.
- Mustard seed: 2 tablespoons, whole. These show up as yellow flecks in the finished cross-section and add a subtle sharp heat.
- Garlic powder: 1 tablespoon. Fresh garlic can cause off-flavors during fermentation; powder is more reliable here.
- Sugar (dextrose preferred): 1 tablespoon. Feeds the starter culture during fermentation. Dextrose ferments more predictably than table sugar, but either works.
- Starter culture (optional but recommended): Bactoferm F-RM-52 or similar fast-acting culture. One packet treats 100 pounds of meat, so you’ll use about 1/10 of a packet. The culture guarantees consistent fermentation and tang.
A Note on Curing Safety
Cure #1 is essential for summer sausage. The smoking process involves holding meat in the 40–140°F danger zone for several hours — exactly the conditions where Clostridium botulinum thrives. Sodium nitrite prevents botulinum toxin production. This is not optional. If the idea of curing salt makes you uncomfortable, summer sausage is not the right project. Stick with fresh sausages that get cooked immediately.
Step 1: Grinding
Cut your beef and pork into 1–2 inch cubes. Spread them on a sheet pan and freeze for 30–45 minutes until the meat is firm but not frozen solid. Cold meat grinds cleanly; warm meat smears and creates a mushy texture.
Grind the meat through the coarse plate (3/8″) first. If you want a finer texture, run it through the fine plate (3/16″) next. Traditional summer sausage uses a medium-to-fine grind. I prefer grinding once through coarse for a more rustic texture with visible meat particles.
Keep everything cold throughout the process. If the meat starts feeling warm or soft, put it back in the freezer for 15 minutes before continuing.
Step 2: Mixing and Seasoning
Combine the ground meat with all your seasonings in a large mixing tub. If you’re using a starter culture, dissolve it in a quarter cup of distilled water first, then add it to the meat.
Mix thoroughly by hand for 3–5 minutes. You’re not just distributing the seasonings — you’re also developing myosin, the sticky protein that binds the sausage together. The meat should feel tacky and slightly sticky when it’s mixed enough. If you pick up a handful and turn your hand over, it should cling for a second before falling.
Don’t undermix. Poorly mixed summer sausage crumbles when sliced instead of holding together in clean rounds. The binding from myosin extraction is what gives you those perfect deli-style slices.
Step 3: Stuffing
Fibrous casings (3-inch diameter) are the standard for summer sausage. Soak them in warm water for 30 minutes before stuffing — this makes them pliable and easier to work with.
Load your stuffer and pack the meat firmly, eliminating air pockets. Air trapped inside creates voids where bacteria can grow and fat can pool during smoking. If you see air bubbles, prick them with a sterilized needle or sausage pricker.
Fill each casing to about 18–24 inches long. Tie the open end with butcher’s twine. The sausages should feel firm and uniform — no soft spots or visible air pockets.
If you don’t have a stuffer or casings, you can form the seasoned meat into logs (about 3 inches in diameter) and wrap them tightly in plastic wrap, then aluminum foil. They won’t have the classic casing look, but the flavor will be identical.
Step 4: Fermentation
If you’re using a starter culture, hang or place the stuffed sausages in a warm environment (85–90°F) for 12–18 hours. A turned-off oven with just the light on often holds around 80–90°F — check with a thermometer. Some people use a large cooler with a light bulb or heating pad inside.
During fermentation, the bacteria consume the sugar and produce lactic acid. You’ll notice the sausages develop a slightly tangy smell. If you have pH strips or a meter, check that the pH has dropped to 5.0 or below. This acidification is what gives summer sausage its signature tang and contributes to preservation.
If you’re skipping the starter culture, you can skip this step entirely. Your summer sausage will be less tangy but still perfectly safe thanks to the curing salt and the final cooking temperature. Many home recipes skip fermentation and produce excellent results.
Step 5: Smoking
The smoking schedule for summer sausage is a gradual temperature ramp. You’re not blasting it with heat — you’re slowly drying the surface, building smoke flavor, and cooking the interior without rendering out the fat.
The Smoking Schedule
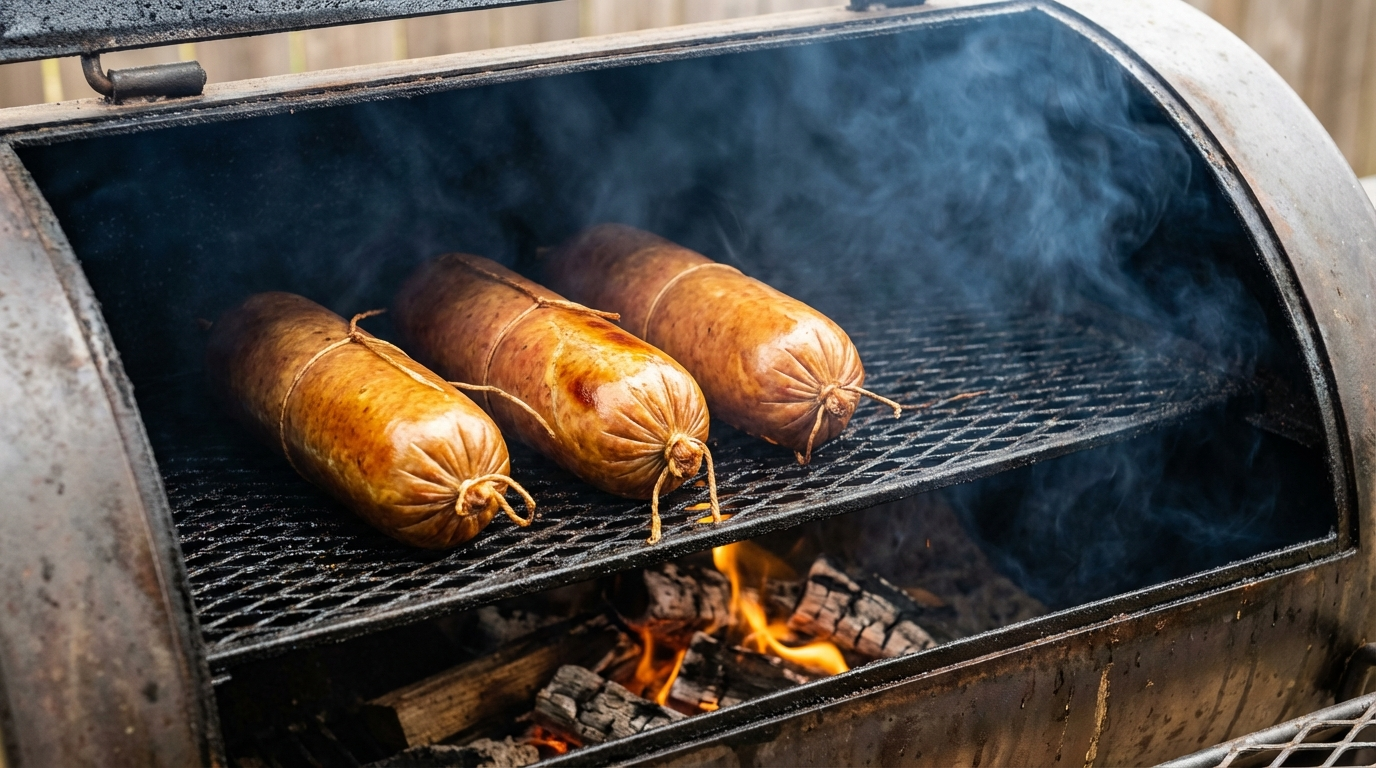
- Hour 1–2: 130°F, no smoke. This dries the casing surface. A dry surface absorbs smoke better and develops better color. Leave the smoker vent wide open.
- Hour 3–4: 150°F, add smoke. Add your wood — hickory is traditional for summer sausage. Apple or cherry work if you prefer a milder flavor. Light smoke only; you don’t want billowing white clouds.
- Hour 5+: 170–180°F, continue smoke. Hold here until the internal temperature of the sausage reaches 155–160°F. This is the critical number. Below 155°F and the sausage isn’t fully cooked. Above 165°F and the fat begins rendering out, creating greasy pockets and a crumbly texture.
The total smoking time is typically 6–10 hours depending on the diameter of your sausages and how accurately your smoker holds temperature. Thicker sausages take longer. A leave-in probe thermometer eliminates all guesswork.
Fat-Out: The Biggest Mistake
Fat-out happens when the internal temperature rises too fast and the fat melts before the protein structure sets. The result is greasy, crumbly sausage with visible pools of rendered fat under the casing. It’s the most common failure in summer sausage making.
Prevention is simple: follow the gradual temperature ramp. Don’t rush. Don’t crank the smoker to 200°F because you’re impatient. The slow progression lets the proteins set around the fat particles, trapping them in place.
Step 6: The Ice Bath
This step surprises most first-timers, but it’s critical. As soon as the sausage hits 155–160°F internal, pull it from the smoker and plunge it directly into an ice water bath.
The rapid cooling serves two purposes:
- Stops carryover cooking: The sausage’s internal temperature will continue rising after you remove it from the smoker. Without the ice bath, it can climb past 165°F and cause fat-out even after the smoker does everything right.
- Tightens the texture: Rapid cooling firms the fat and protein, creating a tighter, more sliceable texture. Slow-cooled summer sausage tends to be softer and crumblier.
Hold the sausages in the ice bath until the internal temperature drops to 100–110°F. This usually takes 15–20 minutes. Then hang them at room temperature for 1–2 hours to let the casings dry before refrigerating.
Step 7: Resting and Storage
Summer sausage improves with rest. After the ice bath and drying period, refrigerate the sausages overnight before slicing. This lets the flavors meld and the texture firm up completely.
For storage, you have several options:
- Refrigerated, whole: Keeps 2–3 months easily. The intact casing protects against drying and contamination.
- Vacuum-sealed: Extends refrigerator life to 4–6 months. Also freezes beautifully for up to a year.
- Room temperature (unopened): Properly made summer sausage with a pH below 5.0 and water activity below 0.90 can be stored at room temperature for weeks. This is the traditional approach. However, if you skipped the starter culture and fermentation step, refrigerate it — the pH may not be low enough for room-temperature safety.
Flavor Variations
Once you’ve mastered the basic recipe, summer sausage is endlessly customizable. Here are variations worth trying:
- Cheddar jalapeño: Add 1 pound of high-temp cheddar cheese (cubed into 1/4-inch pieces) and 1/2 cup of diced pickled jalapeños during mixing. High-temp cheese is specially formulated to hold its shape during smoking — regular cheddar melts into greasy puddles.
- Garlic and herb: Double the garlic powder and add 1 tablespoon each of dried sage and dried thyme. Omit the mustard seed.
- Venison summer sausage: Replace the beef with venison. Because venison is extremely lean, increase the pork to 40% of the total weight or add additional pork fat. Venison summer sausage without enough fat will be dry and crumbly.
- Smoked pepper: Replace the black pepper with an equal amount of smoked paprika for a deeper, more complex heat.
Troubleshooting Common Problems
Sausage Is Crumbly When Sliced
Either undermixed (not enough myosin extraction), or fat-out occurred during smoking. Next time, mix longer until the meat is sticky and tacky. Follow the temperature ramp precisely — no shortcuts.
Too Tangy or Sour
Fermentation went too long or the temperature was too high. Reduce fermentation time to 12 hours or lower the fermentation temperature to 80°F. If you don’t want tang at all, skip the starter culture entirely.
Sausage Is Dry
Not enough fat in the meat blend, or the internal temperature went too high during smoking. Check that your beef-to-pork ratio includes at least 20–25% fat overall. Pull the sausage at exactly 155–160°F internal — every degree above that costs you moisture.
Air Pockets in the Finished Sausage
Air was trapped during stuffing. Pack the stuffer more firmly and prick visible air bubbles before smoking. Air pockets don’t affect safety (the curing salt handles that), but they’re unsightly and can collect rendered fat.
Casing Won’t Peel Off
The sausage may have dried too much during smoking or storage. Fibrous casings should peel away cleanly when the sausage is at room temperature. If they stick, run the sausage under warm water briefly to loosen the casing.
From Smoker to Charcuterie Board
Summer sausage is one of the most versatile items you can put on a charcuterie board. Slice it into thin rounds and fan them across the board alongside hard cheeses, whole-grain mustard, cornichons, and crackers. The tangy, smoky flavor pairs beautifully with aged cheddar, Gouda, and Swiss.
It also makes an excellent gift. Vacuum-sealed summer sausage with a handwritten label looks professional and tastes better than anything from a mail-order catalog. If you’re making charcuterie gifts, check our guide to the best meats for a charcuterie board for more pairing ideas.
Quality ingredients make the difference between good and exceptional summer sausage. For premium beef and pork that’s cut for charcuterie, The Meatery carries exactly what you need.
Frequently Asked Questions
How long does homemade summer sausage last?
Refrigerated and whole in its casing, summer sausage keeps 2-3 months. Vacuum-sealed, it lasts 4-6 months refrigerated or up to a year frozen. Properly fermented summer sausage (pH below 5.0) can be stored at room temperature for several weeks unopened.
Do you need curing salt for summer sausage?
Yes, Cure #1 (Prague Powder #1) is essential for summer sausage. The smoking process holds meat in the 40-140°F danger zone for several hours, which is where Clostridium botulinum thrives. Sodium nitrite prevents botulism toxin production. This is a food safety requirement, not optional.
What temperature do you smoke summer sausage to?
Smoke summer sausage to an internal temperature of 155-160°F. Start your smoker at 130°F and gradually increase to 170-180°F over several hours. Never exceed 160°F internal — above 165°F, the fat renders out creating a greasy, crumbly texture called fat-out.
Can you make summer sausage without a smoker?
Yes. You can bake summer sausage in an oven at 200°F until it reaches 155-160°F internal. You won't get smoke flavor, but the fermentation tang and seasoning still produce excellent sausage. Some people add liquid smoke to the meat mixture to approximate the smoky taste.
Why is my summer sausage crumbly?
Two common causes: undermixing (the meat proteins didn't develop enough bind) or fat-out (internal temperature rose too fast, melting the fat before proteins set). Mix until the meat is tacky and sticky, and follow a gradual temperature ramp during smoking — never rush it.
More Charcuterie Guides
What Is Pink Curing Salt? Sodium Nitrite Explained for Home Charcuterie
Pink curing salt is the most essential — and most misunderstood — ingredient in meat curing. This guide explains what it is, why it's pink, how sodium nitrite prevents botulism, proper usage rates, and whether you can cure meat without it.
10 min readHow Long Does Charcuterie Last? Storage Guide for Cured Meats & Cheese
Understanding proper charcuterie storage ensures you enjoy it at peak quality while avoiding food safety risks.
10 min read