How to Make Mortadella at Home: Italy's Iconic Emulsified Sausage
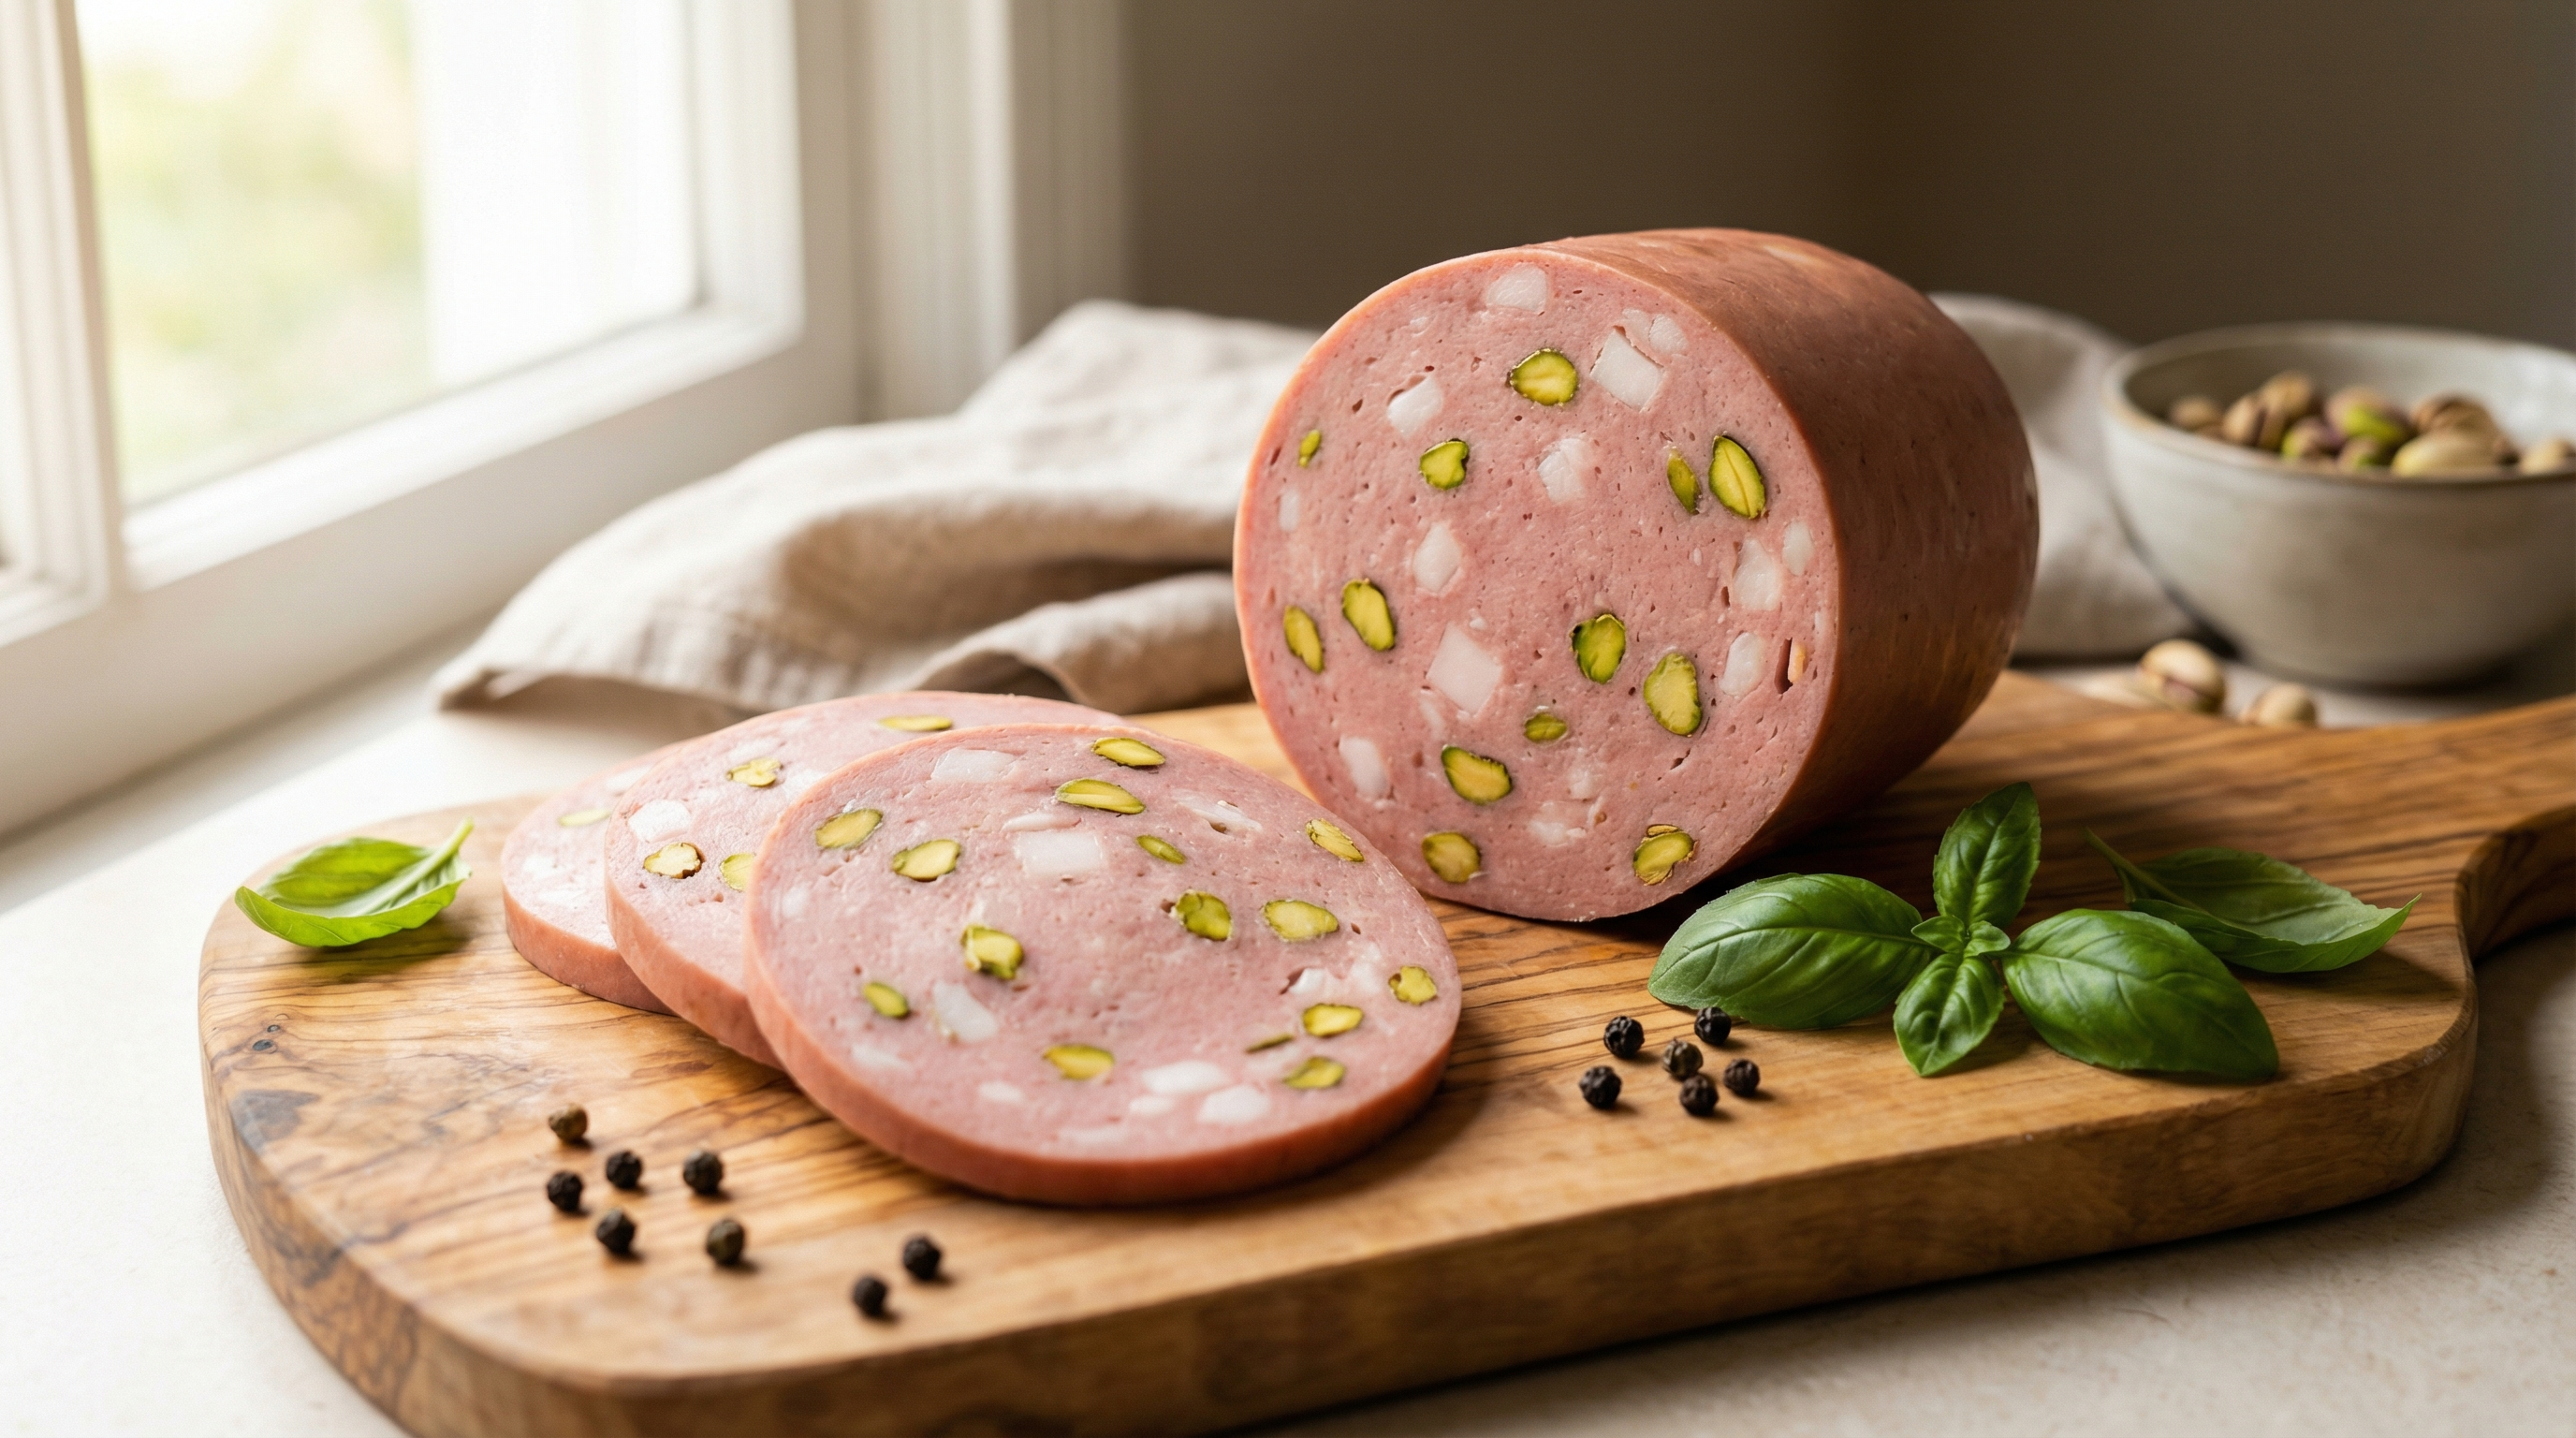
Mortadella is the original Bologna — literally. This massive, silky-smooth emulsified sausage from Emilia-Romagna is one of the oldest and most revered charcuterie products in the world, with roots stretching back to Roman times. And despite what American “bologna” might have done to its reputation on this side of the Atlantic, real mortadella is an entirely different creation: aromatic, delicate, studded with pistachios and cubes of pure white fat that melt on your tongue.
Making mortadella at home is the charcuterie equivalent of a boss fight. It’s not the hardest technique — there’s no fermentation, no weeks of curing, no mold management. But it demands precision. The emulsion must be smooth and stable, the cooking temperature must be exact, and the cooling process can’t be rushed. Get those three things right, and you’ll produce something that embarrasses any deli counter mortadella you’ve ever tried.
This guide covers everything you need to make authentic mortadella in a home kitchen, from meat selection through slicing.
What Makes Mortadella Special
Mortadella di Bologna holds PGI (Protected Geographical Indication) status in Europe, meaning authentic mortadella must meet specific production standards. But the technique itself isn’t geographically locked — you can make excellent mortadella anywhere with the right ingredients and method.
What sets mortadella apart from other sausages is the emulsion. While most sausages are coarsely or finely ground, mortadella is emulsified into a completely smooth paste — similar to a hot dog or weisswurst, but taken to an extreme level of refinement. The lean pork is ground so fine that the proteins form a stable matrix that traps fat and moisture, producing that characteristic silky, almost creamy texture when sliced thin.
The signature visual comes from two additions folded into the emulsion after processing: cubes of pure pork back fat (lardello) that appear as white mosaic pieces in every slice, and whole pistachios that dot the pink canvas with green. Some regional variations include black peppercorns, myrtle berries, or even truffles, but the classic Bologna version keeps it simple: fat cubes and pistachios.
Unlike most charcuterie, mortadella is cooked rather than cured. It’s slowly poached in a low oven or water bath until the internal temperature reaches exactly 70°C (158°F), then rapidly cooled. This cooking method is why mortadella has a shelf life measured in weeks rather than months — but it also means you can eat it the day after making it, no waiting required.
Ingredients and Equipment
Mortadella requires precise ratios. The emulsion is sensitive to temperature and proportion, so weigh everything rather than measuring by volume. This recipe makes approximately 3 kg (6.5 lbs) of finished mortadella.
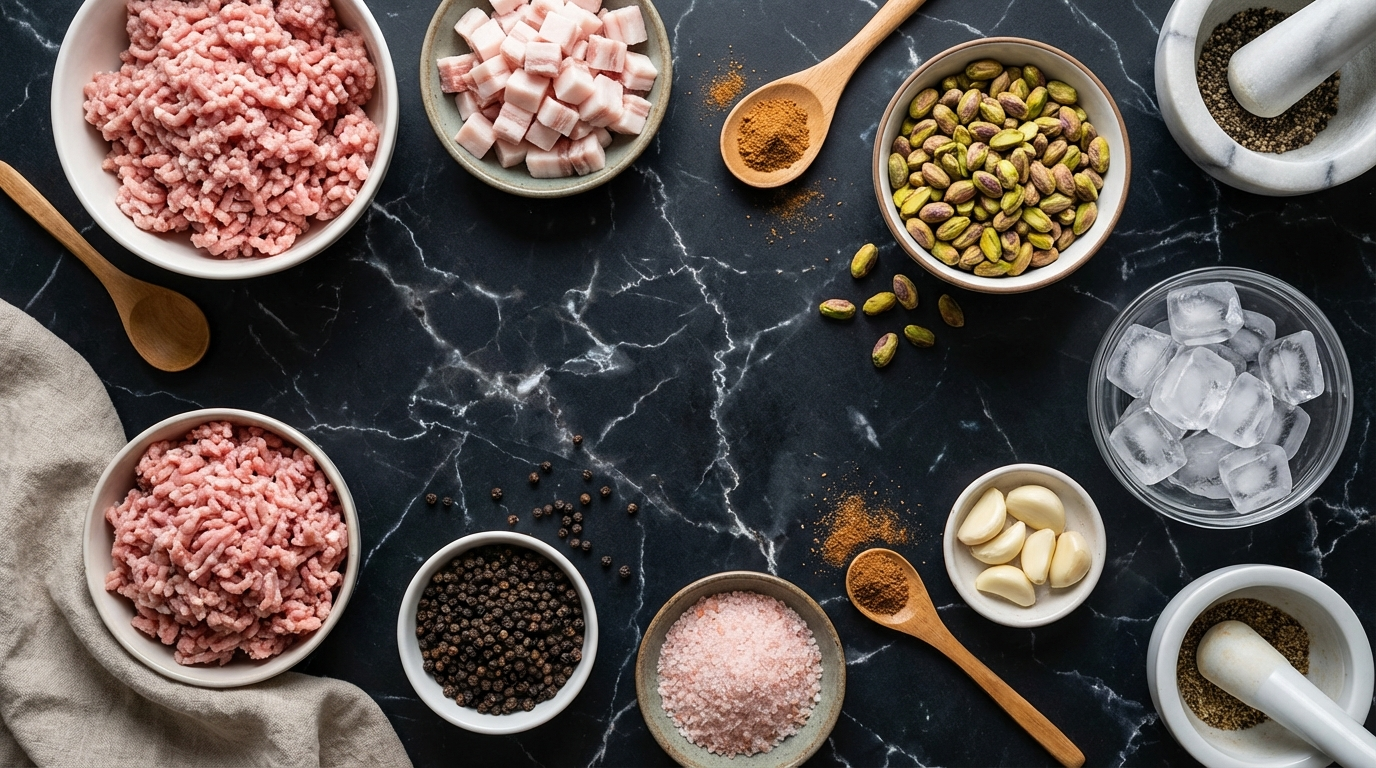
Meat and Fat
- 2 kg (4.4 lbs) pork shoulder, lean portions — trim visible fat and sinew. The lean component must be genuinely lean for a clean emulsion. Aim for 90% lean meat from the shoulder.
- 500g (1.1 lbs) pork back fat for emulsion — this fat gets ground into the emulsion itself, contributing to the smooth texture. It should be firm, white back fat, not soft belly fat.
- 300g (10.6 oz) pork back fat for lardello cubes — cut into 8-10mm cubes. These are the visible white pieces in every slice. Freeze the cubes after cutting so they hold their shape when folded into the warm emulsion.
Seasonings
- 56g fine sea salt — 2% of total meat and emulsion fat weight
- 6g Cure #1 (Prague Powder #1) — 0.25% of total weight. Cure #1 is correct here (not Cure #2) because mortadella is cooked, not dry-cured. See our curing salts guide for the difference.
- 3g ground mace — the signature spice of mortadella. Not nutmeg, though they’re related. Mace is the lacy covering of the nutmeg seed and has a more delicate, floral quality.
- 2g ground white pepper — white rather than black for a cleaner look in the emulsion
- 2g ground coriander
- 1g garlic powder — or 2 fresh cloves, minced to a paste
- 0.5g ground anise seed — optional but traditional. Just a whisper — you shouldn’t be able to identify it, only miss it when it’s gone.
- 100g shelled pistachios — raw, unsalted. Sicilian pistachios are traditional and worth seeking out for their vivid green color and sweet flavor.
- 200-300g ice or ice water — critical for keeping the emulsion cold during processing. The exact amount depends on your processing speed and ambient temperature.
Casings and Equipment
- Synthetic fibrous casings, 100-120mm diameter — mortadella is traditionally enormous (some commercial versions weigh 100+ kg), but for home production, a 100-120mm casing produces a manageable log about 30cm long. Fibrous casings are preferred because they hold their shape during the long poach.
- Food processor — a powerful one (at least 10-cup capacity). This is the heart of the operation. A weak food processor will overheat before achieving a smooth emulsion.
- Meat grinder — for the initial grind before emulsification
- Sausage stuffer — with a large-diameter horn to match your casings
- Digital probe thermometer — accurate to ±1°C. You’re cooking to an exact internal temperature, so precision matters.
- Large stockpot or roasting pan — for the water bath poaching method
- Oven with reliable temperature control — alternatively used for dry-heat poaching
Building the Emulsion
The emulsion is where mortadella succeeds or fails. You’re extracting myosin from the lean pork, which creates a protein gel that traps fat in stable suspension. If the mixture gets too warm, the fat separates and you get a grainy, broken sausage. If it’s not processed enough, you get a coarse texture. The goal is a paste so smooth that you cannot detect any individual fiber or grain.
Step 1: Pre-Chill Everything
Put the lean pork, the emulsion back fat (not the lardello cubes), the grinder parts, and the food processor bowl in the freezer for 30-45 minutes before you start. The meat should be partially frozen — firm but not rock-solid. Working with cold ingredients is the single most important variable in emulsion sausages.
Step 2: First Grind
Run the partially frozen lean pork and emulsion back fat through the meat grinder using the fine plate (3mm or 1/8 inch). Mix the salt, Cure #1, and all dry spices into the ground meat immediately after grinding. The salt starts extracting myosin on contact, so the sooner it’s incorporated, the better your emulsion will bind.
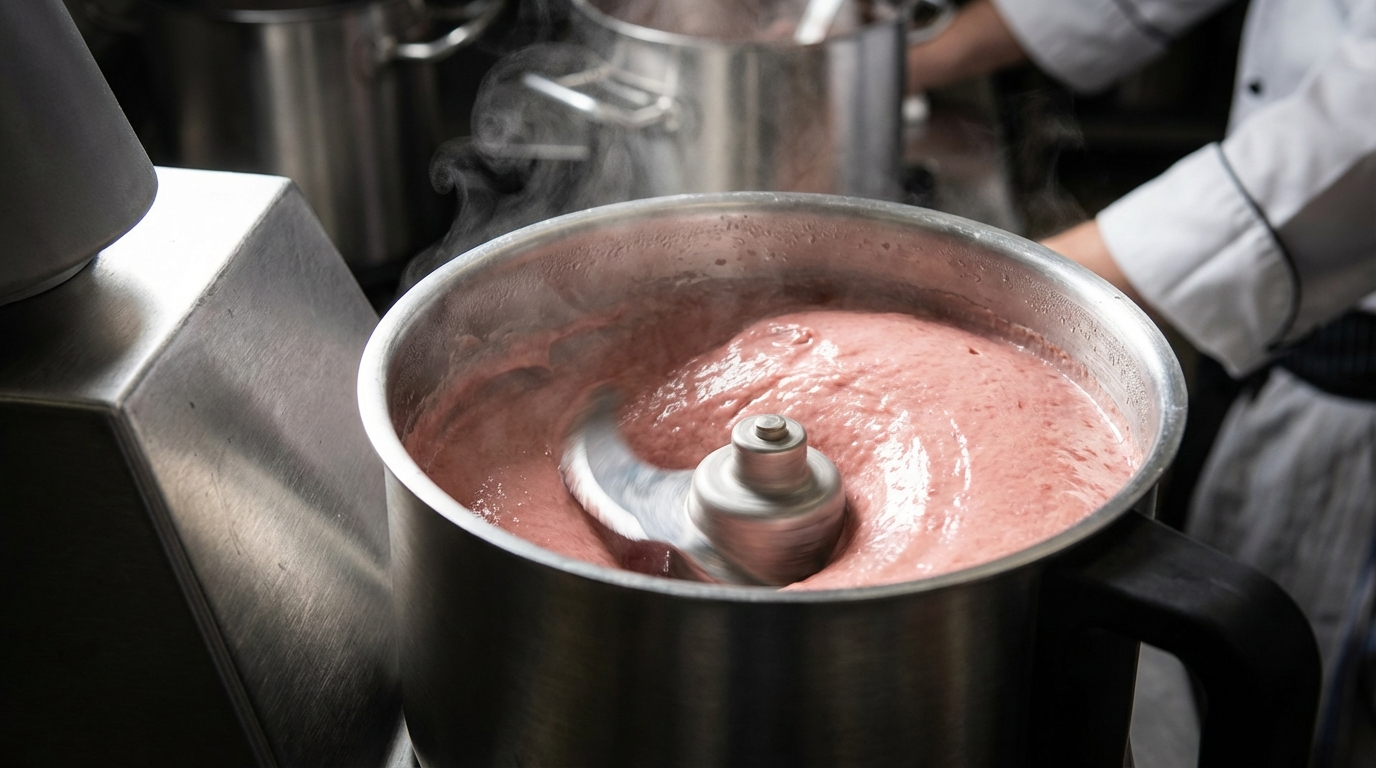
Step 3: Emulsify in Batches
Load the food processor about half full with the seasoned ground meat. Add a handful of ice. Process on high for 2-3 minutes, scraping down the sides once halfway through. You’re looking for a completely smooth, sticky paste that holds together when you press a spoonful between your fingers. It should feel tacky, like it’s trying to glue your fingers together — that’s the myosin at work.
Monitor the temperature with your probe thermometer. The emulsion must stay below 10°C (50°F) at all times during processing. If it approaches that threshold, add more ice and keep going. Process each batch for at least 4 minutes total — most home food processors need the full time to achieve proper smoothness.
Combine all batches in a large bowl. Do a quick test: take a small spoonful and drop it in warm water. If it floats and holds together, your emulsion is stable. If it sinks or falls apart, process it longer with more ice.
Step 4: Fold In the Garnishes
This is the moment mortadella becomes mortadella. Take the frozen lardello cubes and blanch them in boiling water for 30 seconds, then immediately plunge into ice water. This firms the surface so they hold their shape when folded into the emulsion, and it also ensures they’re clean. Pat them completely dry.
Fold the blanched fat cubes and raw pistachios into the emulsion by hand, using a spatula or your hands. Work gently — you’re distributing them evenly, not kneading. The emulsion is already built; aggressive mixing now will overwork it and introduce air pockets.
Stuffing and Cooking
With the emulsion prepared and garnished, you’re ready for the final construction. This is where patience becomes your primary ingredient.
Stuffing
Soak your fibrous casings in warm water for at least 30 minutes before stuffing. Load the sausage stuffer and pack the emulsion in firmly, pressing out any air pockets. Air is the enemy of emulsified sausages — any pocket trapped inside will expand during cooking and create ugly voids in your finished mortadella.
Stuff firmly but not to the point of bursting. Tie off both ends with butcher’s twine, and prick the casing in several places with a sterilized pin to allow any remaining trapped air to escape during cooking. Some makers also tie the mortadella at intervals like a roast to help it hold a uniform cylindrical shape.
Cooking Method: Water Bath Poach
The traditional and most reliable method for home mortadella is a water bath poach. This gives you the most precise temperature control.
- Preheat your oven to 80°C (176°F) — or the lowest stable setting your oven can hold. You’re using the oven only to maintain the water temperature.
- Place the stuffed mortadella in a deep roasting pan and fill with water heated to 77°C (170°F). The water should completely submerge the sausage.
- Insert the probe thermometer into the center of the thickest part of the mortadella. Set a target alarm for 70°C (158°F).
- Transfer to the oven and cook until the internal temperature reaches 70°C. For a 100-120mm diameter mortadella, this typically takes 3-5 hours. Do not rush it by raising the oven temperature — the gentle, slow cook is what creates the uniform, silky texture throughout.
- Check the water level every hour and top up with hot water if needed. The mortadella must stay submerged.
Some home charcutiers use a sous vide setup instead, which is excellent if you have a container large enough. Set the circulator to 72°C (162°F) and cook for the same duration, monitoring internal temperature the same way.
Alternative: Dry Oven Method
If a water bath isn’t practical, you can cook mortadella in a dry oven set to 93°C (200°F) with a pan of water on the rack below for humidity. This method takes longer (5-7 hours for the same size) and carries more risk of uneven cooking, but it works. The steam from the water pan prevents the casing from drying out and cracking.
Cooling, Storing, and Serving
Cooling is the final critical step, and rushing it is the most common mistake home mortadella makers commit. Improper cooling leads to a crumbly texture, separated fat, and reduced shelf life.
The Ice Bath
The moment the internal temperature hits 70°C, remove the mortadella from the oven and plunge it immediately into an ice bath. The goal is to drop the internal temperature below 4°C (40°F) as quickly as possible. For a 100-120mm mortadella, this takes about 45-60 minutes in a proper ice bath (50/50 ice and water).
Rapid cooling does three things: it stops carryover cooking, it tightens the emulsion structure as the fats solidify evenly, and it moves the sausage quickly through the danger zone (4-60°C) where bacterial growth is fastest. This is food safety, not just technique.
Resting
After the ice bath, pat the mortadella dry and refrigerate it for at least 12 hours before slicing. This rest period allows the internal structure to fully set and the flavors to meld. Mortadella actually improves over the first 2-3 days in the refrigerator as the spices bloom and the texture firms to its final silky consistency.
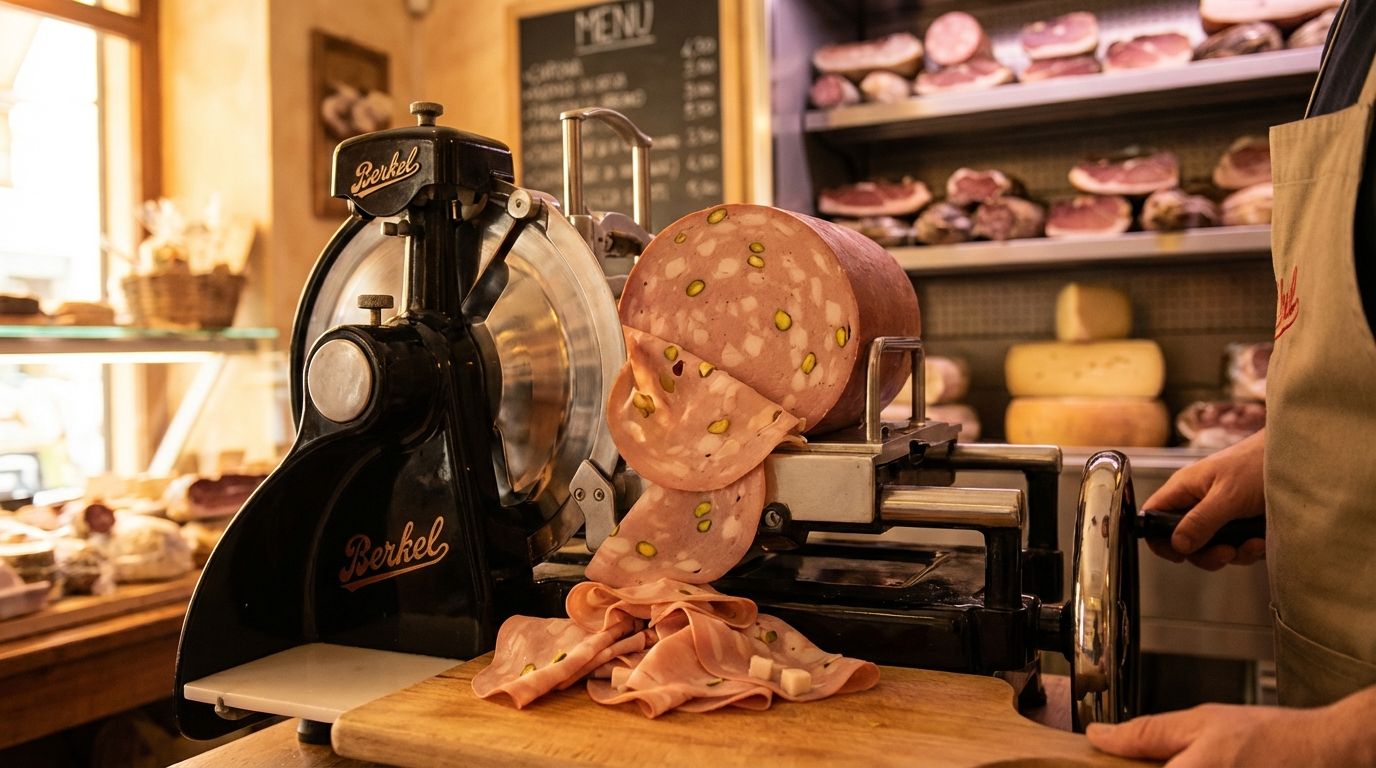
Slicing
Real mortadella is sliced thin — ideally on a deli slicer at 1-2mm thickness. If you don’t have a slicer, use your sharpest knife and aim for the thinnest slices you can manage. Thick slices aren’t bad, but they’re a different experience — the thin slices are where the silky emulsion texture really sings.
Storage
Whole, uncut mortadella keeps for 2-3 weeks refrigerated. Once sliced, wrap tightly in plastic wrap or vacuum seal and consume within 7-10 days. Mortadella freezes well for up to 3 months — slice before freezing and separate slices with parchment paper for easy thawing.
Serving Ideas
- Classic: Paper-thin slices on warm focaccia or ciabatta, nothing else needed
- Mortadella mousse: Blend mortadella with cream cheese and pistachios for an incredible spread
- Cubed in tortellini filling: The traditional use in Bologna — mortadella is the soul of tortellini en brodo
- On a charcuterie board: Fold slices into roses or roll into tubes alongside other cured meats
- Fried: Thick-cut slices pan-fried until crispy on the outside, warm and silky inside — an underrated preparation
Troubleshooting Common Issues
Even experienced sausage makers encounter problems with emulsified products. Here are the most common mortadella failures and how to prevent them.
- Grainy or crumbly texture: The emulsion broke during processing, almost always because the mixture got too warm. Keep everything below 10°C, use more ice, and process in smaller batches.
- Fat pockets or pools: The fat cubes weren’t cold enough when folded in, or the cooking temperature was too high. Freeze the lardello cubes solid and never let the cooking water exceed 80°C.
- Rubbery texture: Overcooked. The internal temperature went above 72°C. A more accurate thermometer solves this — even 2-3 degrees above target makes a noticeable difference in texture.
- Air pockets/voids: Not enough care during stuffing. Pack the stuffer tightly, tamp down air, and prick the casing before cooking.
- Bland flavor: Under-seasoned or not enough rest time. Mortadella needs a full 24 hours of refrigeration for flavors to develop. If it’s still bland after resting, increase the mace and white pepper next time.
- Gray color instead of pink: Cure #1 wasn’t mixed in thoroughly, or it was omitted. The nitrite in Cure #1 is what gives mortadella (and all cured meats) their pink color and distinctive cured flavor.
Frequently Asked Questions
What is the difference between mortadella and bologna?
Authentic mortadella is an Italian PGI product made with high-quality pork, visible fat cubes, pistachios, and aromatic spices like mace and anise. American bologna is a simplified, industrialized version with finely ground meat, no visible fat cubes, no pistachios, and much simpler seasoning. The texture, flavor, and ingredient quality are significantly different.
Do I need a meat grinder and food processor to make mortadella?
Yes, both are strongly recommended. The grinder does the initial breakdown, and the food processor creates the smooth emulsion that defines mortadella's texture. Some people use a stand mixer with a grinder attachment for the first step, but the food processor is essential for achieving the silky-smooth paste. A powerful food processor (at least 700 watts) makes a significant difference.
Can I make mortadella without curing salt?
Technically yes, but the result won't taste or look like mortadella. Cure #1 provides the characteristic pink color, the distinctive cured flavor, and important preservation against botulism during the long, low-temperature cook. Without it, you'll get a gray-brown sausage with a different flavor profile — essentially a fancy hot dog.
How long does homemade mortadella last?
Whole, uncut mortadella keeps 2-3 weeks refrigerated. Once sliced, consume within 7-10 days if wrapped tightly. It freezes well for up to 3 months — slice before freezing and separate with parchment paper for easy portioning.
Why did my mortadella turn out grainy?
A grainy texture means the emulsion broke, almost always due to the mixture getting too warm during processing. Keep all ingredients below 10°C (50°F), use plenty of ice during emulsification, process in smaller batches, and make sure your food processor is powerful enough. Pre-freezing the grinder and processor bowl helps significantly.
More Charcuterie Guides
What Is Pink Curing Salt? Sodium Nitrite Explained for Home Charcuterie
Pink curing salt is the most essential — and most misunderstood — ingredient in meat curing. This guide explains what it is, why it's pink, how sodium nitrite prevents botulism, proper usage rates, and whether you can cure meat without it.
10 min readHow Long Does Charcuterie Last? Storage Guide for Cured Meats & Cheese
Understanding proper charcuterie storage ensures you enjoy it at peak quality while avoiding food safety risks.
10 min read