Texas-Style Brisket: The Complete Pitmaster's Guide
I've cooked thousands of briskets in my life. Literally thousands. Started when I was fourteen years old on the overnight shift at Delgado's BBQ in Lockhart, and I haven't stopped since. Some were perfect — that magical combination of tender, juicy, and smoky that makes grown men close their eyes when they take a bite. Some were mediocre. A handful were downright bad, especially in those early years when I was still learning to read the fire.
Here's what I can tell you after three decades: brisket isn't hard. It's not some mysterious black art that only a chosen few can master. But it does require understanding — understanding the meat, the fire, the smoke, and most importantly, the patience to let all three do their work without you messing things up.
This guide covers everything I know about cooking a whole packer brisket Texas-style. If you follow these steps and pay attention to your fire, you'll cook a brisket that'll make your neighbors show up uninvited.
Selecting Your Brisket
Everything starts at the meat counter. You can't cook a great brisket from a bad piece of meat, and you can't fix poor quality with technique. Here's what to look for.
Grade Matters
For brisket, USDA grade matters more than almost any other cut. The intramuscular fat — the marbling — is what keeps your brisket moist during a 12-16 hour cook. Without it, you're fighting an uphill battle.
- USDA Prime: This is the gold standard for brisket. Abundant marbling throughout both the flat and point. If you can find Prime whole packers, buy them. Period.
- Upper Choice / Certified Angus Beef: A solid option that's more widely available. Look for the best marbling you can find within Choice — there's a wide range.
- Select: I'd pass. Select briskets don't have enough fat to survive a long cook. You'll end up with dry, tough meat no matter what you do.
Size and the Bend Test
I like a whole packer in the 14-16 pound range. Big enough to have a thick flat with good fat coverage, small enough to fit most home smokers without cramming. When you pick it up from the middle, look for a brisket that bends — it should drape over your hand like a saddle. A stiff brisket usually means less intramuscular fat. A floppy one means the fat is distributed well and the meat will render better during the cook.
Check the flat thickness too. Run your hand along the flat end — if it tapers to less than an inch, that thin section will overcook and dry out before the thick part of the flat is done. You want even thickness across the flat, ideally 1.5 inches or more at the thinnest point.
Trimming
Trimming is where most backyard cooks either skip entirely or go way overboard. Both are mistakes.
The goal of trimming is aerodynamics and even cooking. You want the brisket to have a relatively uniform shape so smoke and heat flow evenly across the surface. You also want to remove any hard fat that won't render during the cook — that stuff just sits there and blocks bark formation.
Fat Cap
Trim the fat cap to about a quarter inch. I know some folks leave it thick, thinking it'll "baste" the meat. It won't — fat doesn't penetrate muscle fibers. What a thick fat cap does is prevent bark from forming on that side and block smoke penetration. A quarter inch protects the meat from drying out without blocking flavor.
The Point-Flat Seam
There's a big vein of hard fat between the point and the flat. You can't remove all of it without separating the two muscles, and you shouldn't. But do trim the fat that's accessible around the edges where the point meets the flat. Smooth out any thick deposits so the surfaces are relatively even.
Edges and Thin Spots
Square off any thin flaps of meat around the edges — they'll just burn and turn into carbon. Round off any sharp corners. The whole brisket should have a smooth, somewhat uniform shape when you're done. Think torpedo, not starfish.
Seasoning
In Texas, we keep it simple. The classic Central Texas rub is equal parts coarse black pepper and kosher salt. That's it. I know that sounds too simple, but after 30 years, I can tell you it works better than any 15-ingredient rub I've ever tried. The salt seasons the meat, the pepper creates bark, and the smoke does the rest.
I use 16-mesh black pepper — coarser than table grind, finer than cracked. And Diamond Crystal kosher salt, which has a lighter, flakier crystal than Morton. If you use Morton, cut the salt amount by about a third.
Apply the rub generously. You want complete, even coverage on all surfaces. I season the brisket at least an hour before it goes on the smoker, sometimes the night before. The salt needs time to dissolve and penetrate — this is essentially a dry brine.
Some pitmasters add garlic powder or a touch of paprika. I won't argue with that. But if you're just starting out, master salt and pepper first. You can add complexity later once you know what the base flavor should taste like.
Fire and Smoke Setup
I cook on an offset smoker, and everything in this section assumes that setup. If you're using a pellet grill, kamado, or Weber Smokey Mountain, the temperatures and times are the same — you just manage the fire differently. Check my offset smoker guide for details on fire management.
Wood Selection
For brisket, I use post oak. It's the traditional Texas wood — medium smoke flavor, not too heavy, not too light. Post oak gives brisket that classic Central Texas taste that millions of people have fallen in love with at places like Franklin, Kreuz, and Louie Mueller.
Hickory works too, especially if you can't get post oak in your area. It's a bit stronger than oak, so you might want to mix it — 70% oak, 30% hickory is a good blend. Avoid mesquite for brisket unless you really know what you're doing. Mesquite burns hot and the flavor can turn bitter during a long cook. For more details, check my wood selection guide.
Temperature
I cook brisket at 250°F measured at the grate, right where the meat sits. Not 225°F — I know that's the number everyone quotes, but I've found 250°F produces better bark and doesn't significantly change the cook time. The brisket spends less time in the stall, and the slightly higher heat helps render the fat cap more completely.
Some competition cooks run even hotter — 275°F or above. That works too, but it's less forgiving. At 250°F, you have a wider margin of error, which matters when you're still learning.
The Cook
Placement
Fat cap down if your heat source is below the meat (most offsets), fat cap up if heat comes from above. The fat cap acts as a heat shield. On my offset, the firebox is to the left and heat travels across the bottom of the cook chamber, so I put the point (the thicker end) toward the fire and the fat cap facing down.
The First Phase: Bark Building (Hours 1-5)
For the first several hours, the brisket is building bark and absorbing smoke. During this phase, don't touch it. Don't open the lid to peek. Don't spritz. Don't mop. Just let it cook. Every time you open that lid, you lose heat and extend the cook time.
Maintain thin blue smoke — clean combustion, not billowing white smoke. If you see thick white or gray smoke, your fire needs more airflow. That's dirty smoke, and it'll make your brisket taste acrid and bitter.
The Stall (Hours 5-9, roughly)
Somewhere around 150-170°F internal, the brisket's temperature will plateau. This is the stall — evaporative cooling from moisture leaving the meat surface keeps the temperature from rising. It can last 2-4 hours, and it makes new cooks panic.
Don't panic. You have two options:
- Wait it out: The old-school approach. Just keep your fire steady and let the brisket push through the stall naturally. This takes longer but gives you more bark.
- Wrap it: The Texas crutch. Once you hit the stall and the bark is set (it should feel firm and dark), wrap the brisket in butcher paper (pink/peach, unwaxed) or aluminum foil. Butcher paper lets some moisture escape so you keep more bark. Foil traps all moisture — faster, but softer bark.
I wrap in butcher paper at around 165°F internal. It's the right balance between speed and bark quality.
The Final Push (Hours 9-14)
After the stall breaks, the internal temp starts climbing again. From about 180°F to the finish, the collagen in the brisket is converting to gelatin. This is where brisket transforms from tough to tender. It's the most important phase of the cook.
Don't rush it. Keep your pit steady at 250°F and let the brisket get there on its own time.
When to Pull
This is where experience matters more than any thermometer. I pull brisket at around 203°F internal in the thickest part of the flat — but temperature is just a guideline, not a rule. The real test is the probe test: slide a thermometer probe or a toothpick into the flat. It should slide in with almost no resistance, like poking warm butter. If there's any tug or resistance, it needs more time.
I also check the flat by feel. Pick up the brisket with a gloved hand — it should be jiggly, almost floppy. The whole thing should bend and wave when you move it. If it feels stiff, it's not done.
Different briskets finish at different temperatures. I've pulled them as low as 197°F and as high as 208°F. The probe test tells you more than any number.
The Rest
This is non-negotiable. A brisket that goes straight from the smoker to the cutting board will lose a river of juice when you slice it. The rest period lets the muscle fibers relax and reabsorb moisture.
Wrap the finished brisket in butcher paper (if it isn't already), then wrap that in a towel, and place it in a cooler (no ice) or a Cambro. Rest for a minimum of one hour. Two hours is better. I've held briskets in a Cambro for up to six hours and they come out perfect — still 150°F+ and incredibly tender.
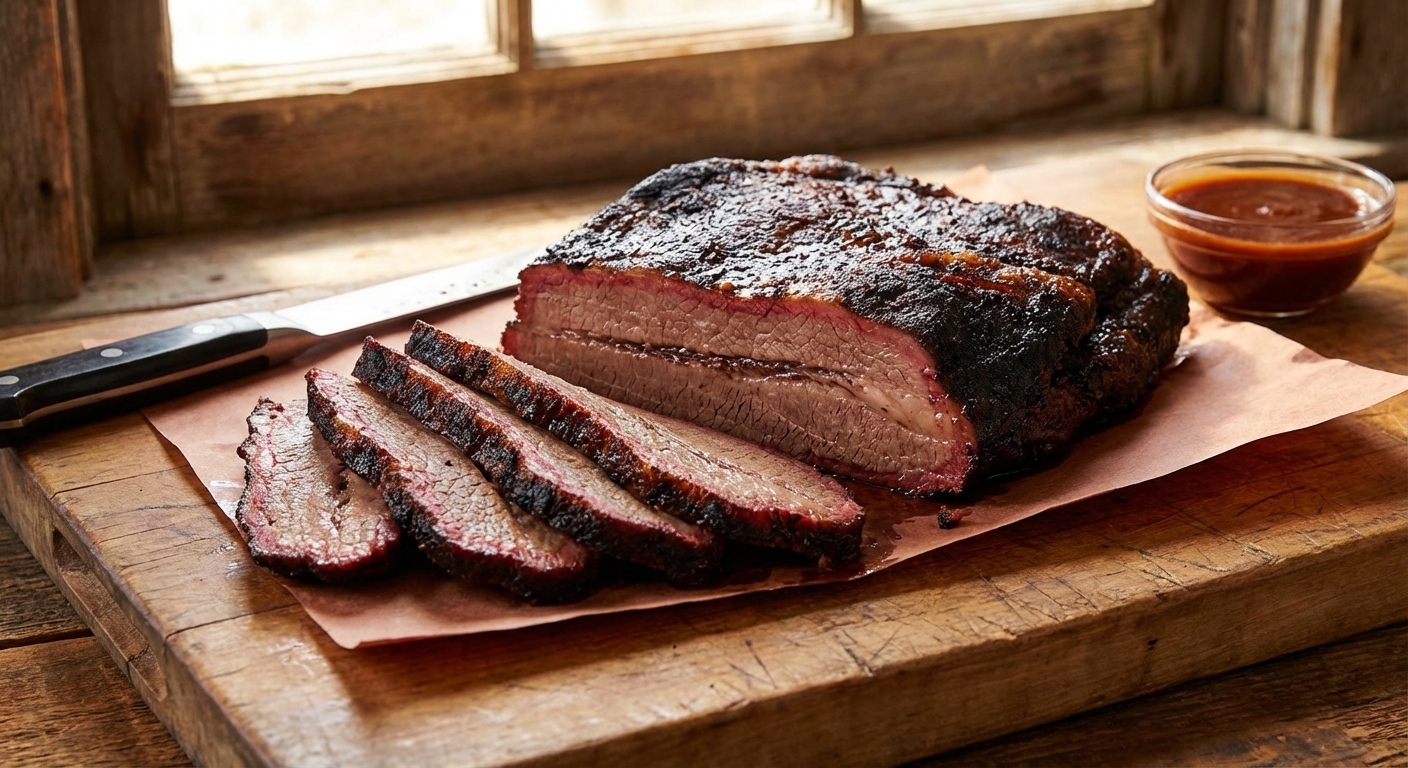
Slicing
Slice against the grain, always. The flat and point have different grain directions, so when you get to the seam between them, you'll need to rotate the brisket about 90 degrees. Slice the flat into pencil-width slices — about 1/4 inch. The point can be sliced a bit thicker, or chopped for burnt ends.
Use a sharp, long slicing knife. A dull knife tears the meat instead of cutting it, and you lose juice and presentation.
Common Mistakes
- Cooking by time instead of temperature. "One hour per pound" is a rough estimate, not a rule. Cook to probe tenderness, not the clock.
- Opening the lid too often. Every peek adds 15-20 minutes to your cook time. Trust your thermometer probes.
- Running dirty smoke. If you can't see through the smoke, you're putting off-flavors on the meat. Clean fire, clean smoke.
- Skipping the rest. I've seen people spend 14 hours cooking a brisket and then slice it immediately. All that juice pours out onto the cutting board. Rest it.
- Buying Select grade. You can't fix a lean brisket with technique. Spend the extra money on Choice or Prime — or go all-in with a wagyu brisket from The Meatery for the ultimate cook.
Frequently Asked Questions
What temperature do you cook brisket at?
I cook at 250°F measured at the grate where the meat sits. This produces better bark than 225°F and pushes through the stall faster without being so hot that you lose your margin of error. Some competition cooks go to 275°F, which works but is less forgiving for beginners.
How long does it take to smoke a brisket?
A 14-16 pound whole packer typically takes 10-14 hours at 250°F, but time varies significantly based on the individual brisket, your smoker, weather, and whether you wrap. Cook to probe tenderness (around 203°F internal), not time. Always plan extra time and hold in a cooler — you can't rush a brisket.
Should I wrap my brisket?
I wrap in pink butcher paper around 165°F internal, once the bark is set. Paper lets some moisture escape so you keep bark texture while shortening the stall. Foil works too but softens the bark more. You can also skip wrapping entirely — it takes longer and gives you a thicker, crunchier bark.
Fat cap up or fat cap down?
It depends on your smoker. If heat comes from below (most offset smokers), cook fat cap down — the fat shields the meat from direct heat. If heat comes from above, fat cap up. The fat doesn't "baste" the meat either way; it acts as a heat shield.
What wood is best for brisket?
Post oak is the traditional Texas choice and what I use exclusively. It gives a medium smoke flavor that doesn't overpower the beef. Hickory is a good second choice — a bit stronger. Avoid mesquite for brisket; it burns too hot and can turn bitter during a 12+ hour cook.
More Charcuterie Guides
What Is Pink Curing Salt? Sodium Nitrite Explained for Home Charcuterie
Pink curing salt is the most essential — and most misunderstood — ingredient in meat curing. This guide explains what it is, why it's pink, how sodium nitrite prevents botulism, proper usage rates, and whether you can cure meat without it.
10 min readHow Long Does Charcuterie Last? Storage Guide for Cured Meats & Cheese
Understanding proper charcuterie storage ensures you enjoy it at peak quality while avoiding food safety risks.
10 min read