Meat Injection Techniques for BBQ: The Complete Guide
Meat Injection Techniques for BBQ: The Complete Guide
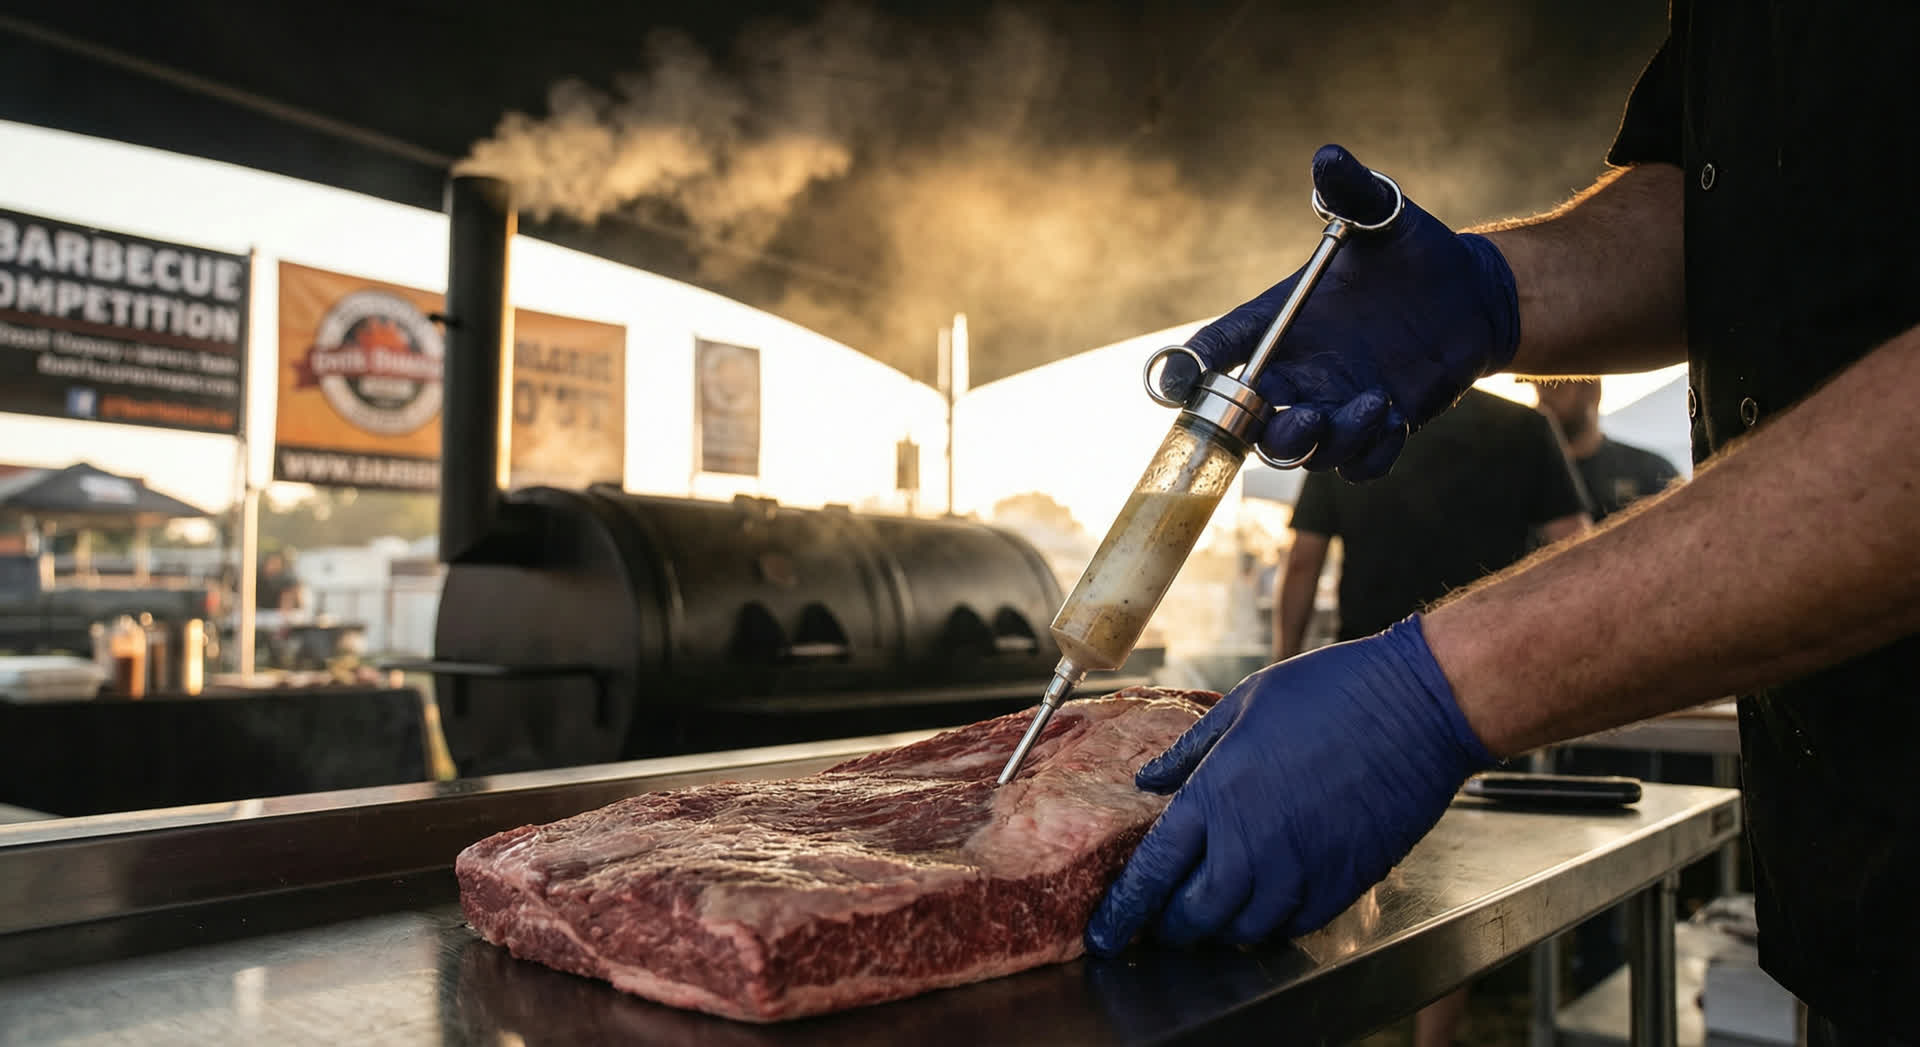
I'll tell you something that separates backyard grillers from competition pitmasters: injection. While amateurs argue about dry rubs versus wet marinades, professionals are pumping flavor and moisture deep into the interior of their briskets and pork shoulders hours before they hit the smoker.
After fifteen years of competing in sanctioned barbecue competitions and teaching hundreds of people the craft, I can tell you unequivocally that injection is the single most effective method for influencing the interior flavor and texture of large cuts destined for low-and-slow cooking. Surface marinades? They penetrate maybe 1/8 inch at best. Injection? You're delivering flavor compounds directly into the center of a 14-pound brisket.
Let me show you exactly how injection works, which recipes deliver results, proper technique for every major BBQ protein, and the critical timing that makes the difference between a blue ribbon and an honorable mention.
Injection vs. Marinade: Understanding the Difference
Before we dive into technique, let's establish why injection beats traditional marination for large cuts of meat.
How Marinades Work (and Don't)
Traditional wet marinades—liquid mixtures of acid, oil, and aromatics—penetrate meat through diffusion. Molecules from the marinade slowly migrate into the meat, driven by concentration gradients. Sounds great in theory. In practice? The science shows that even after 24 hours, marinade penetration is limited to the outermost 1/8 to 1/4 inch of meat.
The reason is simple: muscle tissue is dense. The tightly packed muscle fibers, connective tissue, and fat create a physical barrier that slows diffusion to a crawl. Acids in marinades (vinegar, citrus juice, wine) can actually make penetration worse by denaturing surface proteins, which tighten and create an even denser barrier.
For thin cuts like chicken breast or flank steak, this shallow penetration is acceptable. For a 12-pound pork shoulder? The interior will never see a molecule of your carefully crafted marinade.
How Injection Works
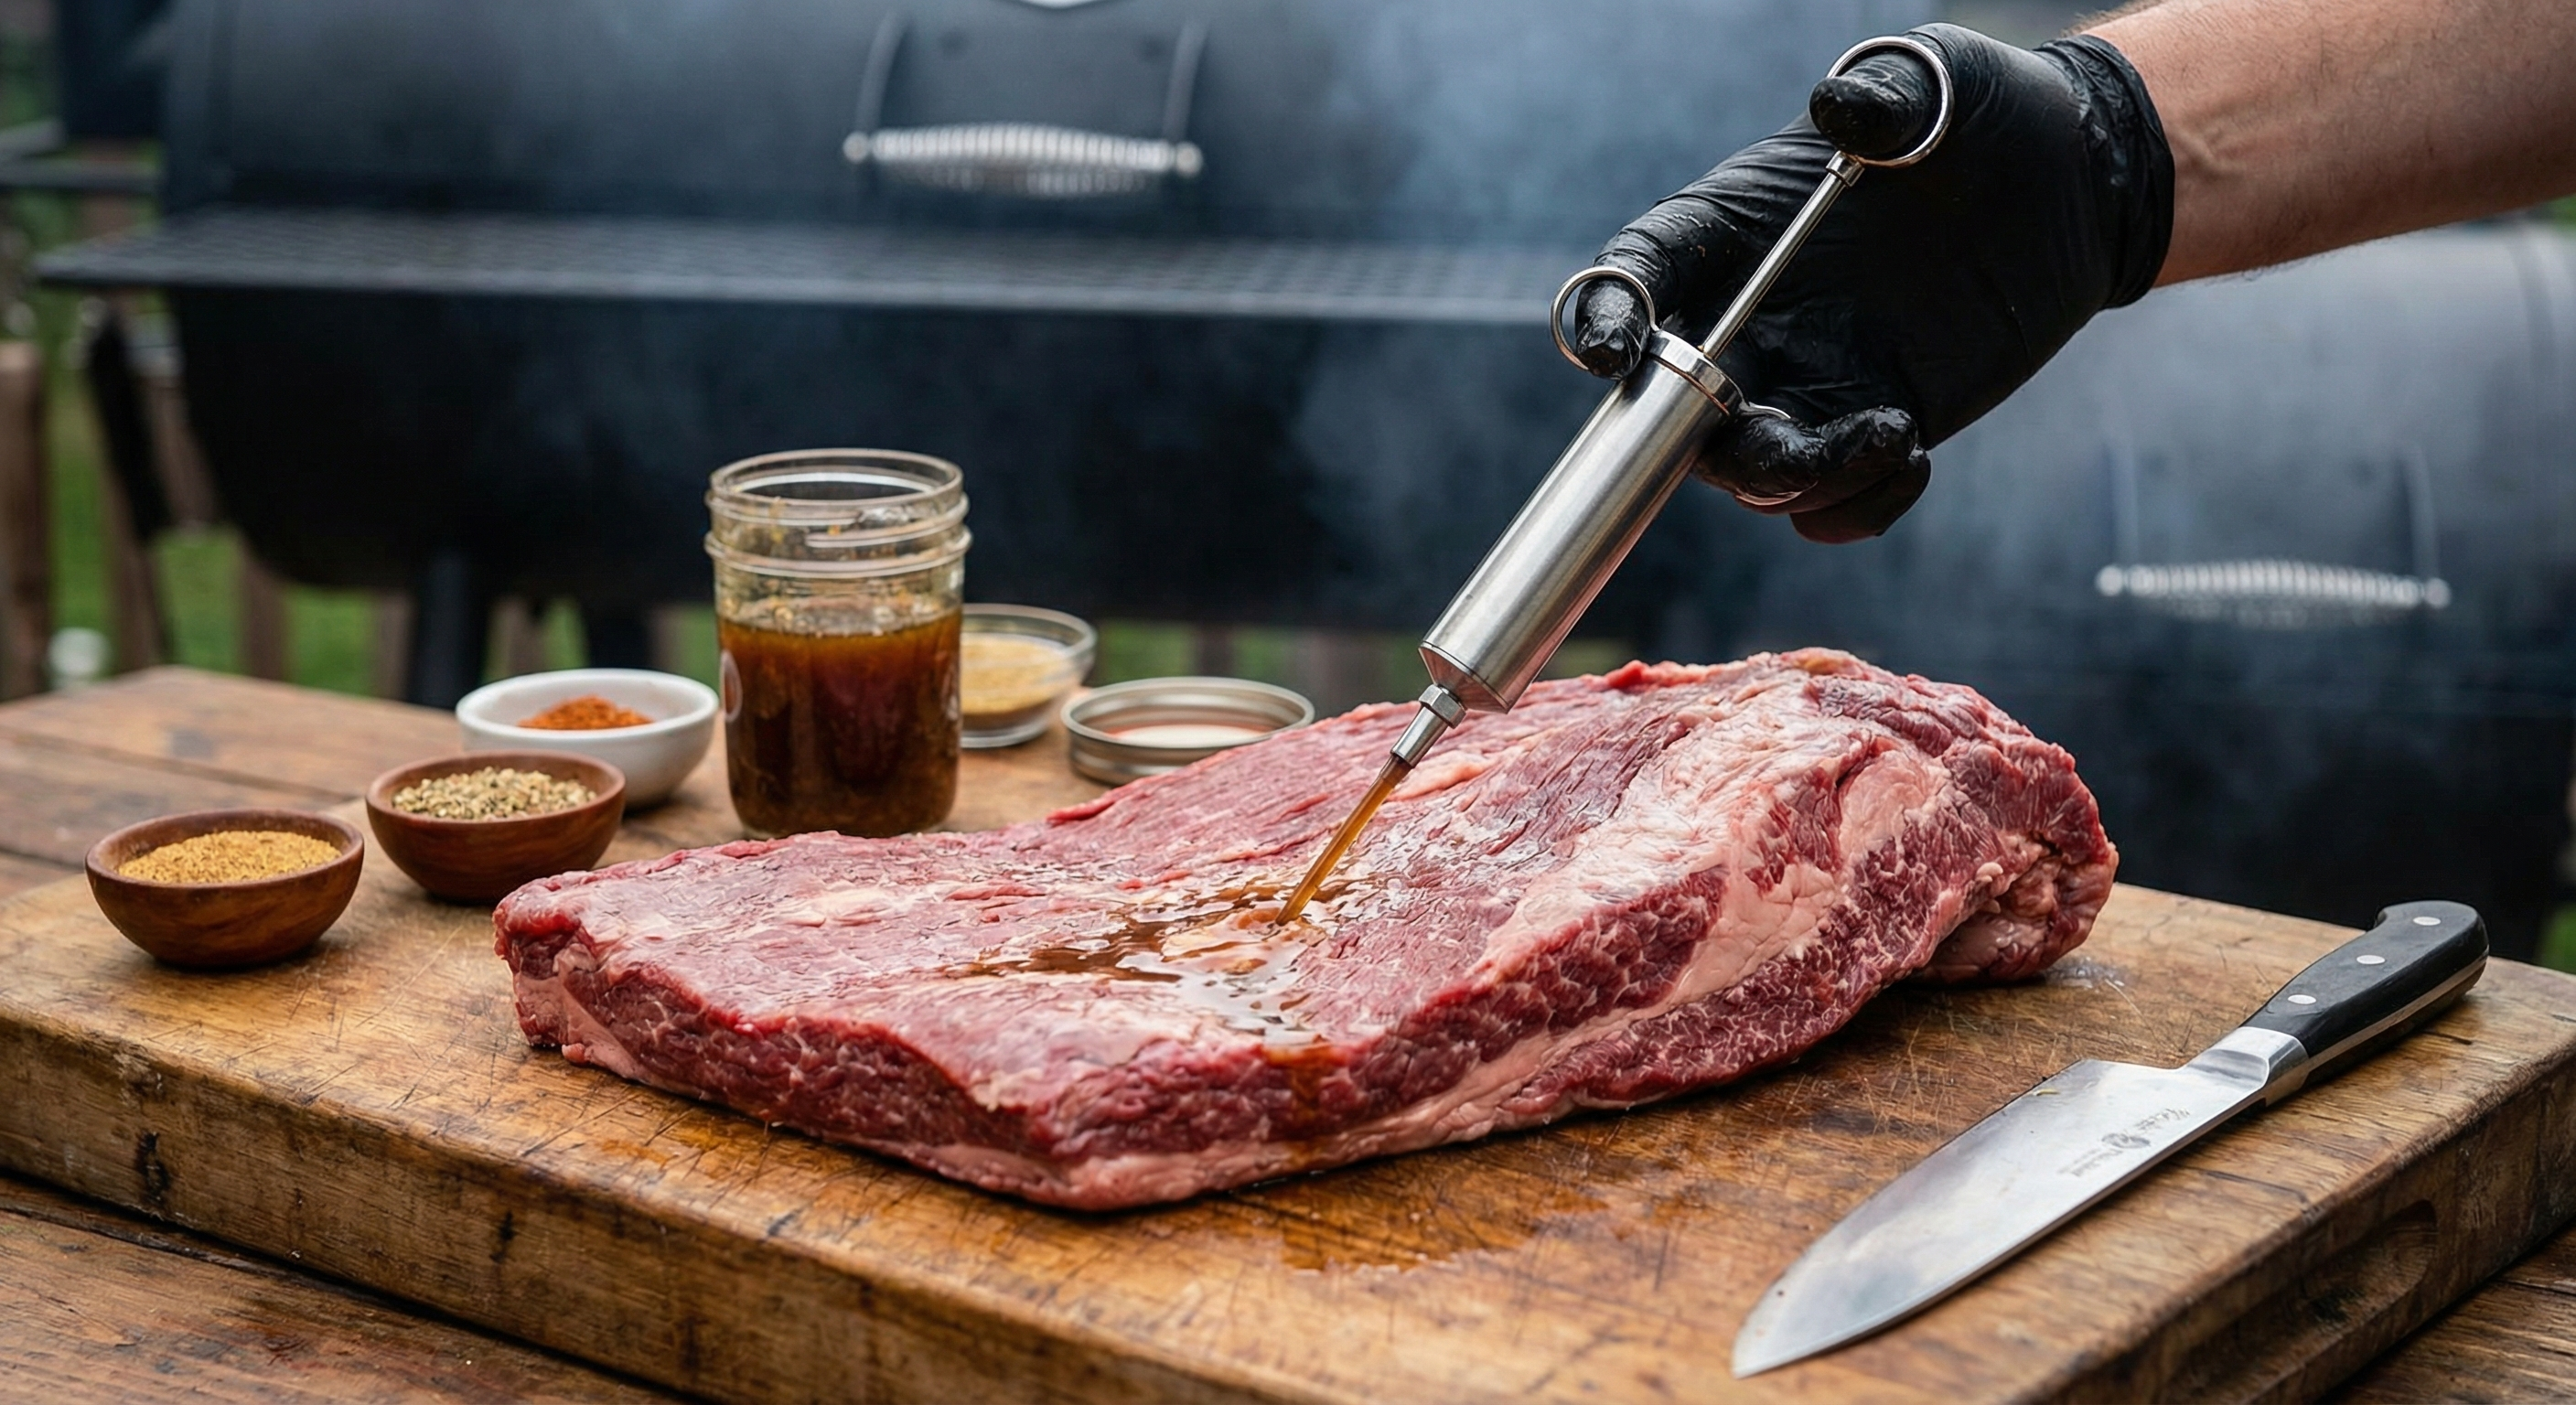
Injection bypasses the diffusion problem entirely. Using a large-gauge needle, you physically deliver liquid directly into the interior of the meat. The injection solution spreads through muscle fibers, connective tissue, and fat deposits, distributing flavor and moisture where it's needed most.

The advantages are substantial:
- Deep penetration: Flavor reaches the center of even the largest cuts
- Moisture retention: Injected liquids increase the meat's moisture content, providing a buffer against drying during long cooks
- Tenderization: Certain injection ingredients (phosphates, salt) can improve texture by modifying protein structure
- Speed: Injection works in hours, not days
- Precision: You control exactly where and how much liquid goes into the meat
This is why every serious competition team uses injection. When you're cooking a $60 Berkshire pork butt for a $10,000 prize, you don't leave flavor distribution to chance.
Equipment: What You Need
Meat Injector Types
Not all injectors are created equal. Here's what works:
1. Standard Syringe-Style Injector
The most common type, resembling an oversized medical syringe with a large-gauge needle. Capacity typically ranges from 2-4 ounces. These work well for home use and most cuts.
Best for: Pork shoulder, turkey, chicken, small briskets (under 10 pounds)
2. Trigger-Style Injector
Features a pistol-grip trigger mechanism that allows for one-handed operation and more precise control over injection volume. Often includes a reservoir bottle that holds more liquid, reducing refill frequency.
Best for: Large briskets, multiple cuts, competition cooking where speed matters
3. Multi-Needle Injector
Professional-grade equipment featuring multiple needles that inject several locations simultaneously. Significantly faster for large-scale operations but overkill for most home use.
Best for: Commercial operations, catering, or if you're injecting 20+ briskets
Needle Considerations
Needle gauge and hole pattern matter:
- 14-16 gauge: Large enough to prevent clogging from garlic bits or herbs, small enough to avoid creating large punctures that leak
- Multiple side holes: Distribute liquid more evenly than a single end hole. Look for needles with 6-12 small holes along the sides.
- Length: 6-inch needles work for most applications. Get a 10-inch needle if you regularly cook very large cuts.
- Material: Stainless steel is durable and doesn't react with acidic ingredients
Most quality injectors come with interchangeable needles. I keep three on hand: standard multi-hole, single-hole for thin injections, and a marinade needle with larger holes for thicker solutions.
Additional Equipment
- Fine-mesh strainer: Strain your injection solution to remove particles that could clog the needle
- Large bowl or pitcher: For mixing and holding injection solution
- Disposable gloves: Keeps things sanitary and prevents cross-contamination
- Large zip-top bags or vacuum sealer: For holding injected meat during the resting period

Injection Recipes: What Actually Works
I've tested dozens of injection formulas over the years. These are the recipes that consistently deliver results.
Recipe 1: Classic Butter-Based Injection (Pork & Poultry)
This is my go-to for pork shoulder and turkey. The butter adds richness and helps retain moisture, while the seasonings penetrate deep into the meat.
Ingredients:
- 1 cup (2 sticks) unsalted butter, melted
- 1/2 cup apple juice or apple cider vinegar
- 1/4 cup Worcestershire sauce
- 2 tablespoons brown sugar
- 1 tablespoon kosher salt
- 1 tablespoon garlic powder
- 1 teaspoon black pepper
- 1/2 teaspoon cayenne pepper (optional)
Instructions: Combine all ingredients while butter is still warm. Whisk until sugar and salt dissolve completely. Strain through fine-mesh strainer. Use while still liquid (butter solidifies when cold). Makes enough for one 8-10 pound pork shoulder or one 12-14 pound turkey.
Why it works: Butter carries fat-soluble flavor compounds deep into the meat. Apple juice provides sweetness and acidity that balances richness. Salt improves moisture retention through protein modification.
Recipe 2: Competition Beef Injection (Brisket)
This formula is based on what wins competitions. It's savory, slightly salty, and enhances the natural beef flavor without overwhelming it.
Ingredients:
- 2 cups low-sodium beef broth
- 1/4 cup Worcestershire sauce
- 1/4 cup soy sauce
- 2 tablespoons beef base or bouillon (dissolved)
- 2 tablespoons melted butter
- 1 tablespoon garlic powder
- 1 tablespoon onion powder
- 2 teaspoons black pepper
- 1 teaspoon MSG (optional but recommended)
Instructions: Heat beef broth to dissolve beef base completely. Add remaining ingredients and whisk until combined. Cool to room temperature and strain. Makes enough for one 12-15 pound packer brisket.
Why it works: Beef broth reinforces natural beef flavor. Soy sauce and Worcestershire add umami depth. MSG (if you're comfortable using it) amplifies savory notes significantly. The combination creates a flavor profile that reads as "more beefy" rather than "injected with something."
Recipe 3: Creole Butter Injection (Turkey & Chicken)
Inspired by Cajun cooking traditions, this injection adds bold, aromatic flavor to poultry.
Ingredients:
- 1 cup (2 sticks) unsalted butter, melted
- 1/2 cup chicken broth
- 3 tablespoons Creole seasoning (Tony Chachere's or similar)
- 2 tablespoons hot sauce (Crystal or Frank's)
- 1 tablespoon lemon juice
- 1 tablespoon garlic powder
- 2 teaspoons onion powder
- 1 teaspoon dried thyme
Instructions: Combine all ingredients while butter is melted. Stir until Creole seasoning is fully dissolved. Strain and use while still liquid. Makes enough for one 12-14 pound turkey or two whole chickens.
Why it works: The combination of butter and hot sauce creates a New Orleans-style flavor profile that penetrates throughout the bird. Creole seasoning provides complex spice notes that surface rubs can't deliver to the interior meat.
Recipe 4: Phosphate-Enhanced Injection (Competition Secret)
This is what many competition teams use but don't advertise. Food-grade phosphates improve moisture retention and create a "juicier" texture.
Ingredients:
- 2 cups water or broth (beef for brisket, chicken for poultry, vegetable for pork)
- 1/4 cup kosher salt
- 2 tablespoons sodium phosphate (food-grade tetrasodium pyrophosphate)
- 2 tablespoons brown sugar or honey
- 1 tablespoon garlic powder
- 1 tablespoon onion powder
- Any additional spices to match your rub profile
Instructions: Heat liquid to dissolve salt and phosphate completely. Add remaining ingredients. Cool to room temperature and strain thoroughly. Phosphate particles must be completely dissolved or they'll clog your needle.
Why it works: Sodium phosphate raises the pH of muscle tissue, which increases the meat's water-holding capacity. This is the same technology commercial processors use to create "enhanced" pork and chicken. The result is noticeably juicier meat that stays moist through extended cooking.
Note: Some competition circuits and organizations prohibit phosphates or consider them "artificial." Check rules before using in sanctioned events. For backyard cooking, they're legal and effective.

Recipe 5: Simple Broth Injection (Beginner-Friendly)
If you're new to injection, start here. This formula is forgiving, impossible to mess up, and delivers noticeable results.
Ingredients:
- 2 cups low-sodium broth (beef, chicken, or vegetable depending on protein)
- 1/4 cup melted butter
- 2 tablespoons Worcestershire sauce
- 1 tablespoon kosher salt
- 1 tablespoon garlic powder
- 2 teaspoons black pepper
Instructions: Warm broth slightly, add butter and Worcestershire, then stir in dry ingredients until dissolved. Strain and use.
Why it works: Simple ingredient list, hard to screw up, and the flavors are complementary to almost any quality meat. This is what I recommend for first-timers.
Injection Technique: How to Do It Right
Having the right recipe is only half the battle. Proper technique ensures even distribution without damaging the meat.
Step-by-Step Injection Process
Step 1: Prepare Your Solution
Make your injection solution and strain it through a fine-mesh strainer to remove any particles that could clog the needle. If using a butter-based injection, keep it warm enough to remain liquid throughout the process.
Step 2: Plan Your Injection Points
Don't just randomly stab your meat. Create a mental grid:
- For brisket: Inject in a grid pattern every 1.5-2 inches across the flat and point. Focus more injection volume in the thicker point section.
- For pork shoulder: Create a grid pattern with injection points every 2 inches. Pay special attention to the thickest parts of the muscle.
- For turkey: Inject each breast in 3-4 locations, each thigh in 2-3 locations, and each drumstick in 1-2 locations. Inject into the meat, not the cavity.
Step 3: Insert Needle Properly
Insert the needle deep into the meat, nearly to the opposite side. The goal is to place the needle tip in the center of the muscle, not near the surface. Angle the needle to avoid hitting bone (which dulls the tip and prevents proper injection).
Step 4: Inject While Withdrawing
This is the key technique: press the plunger slowly while pulling the needle back out. This distributes the liquid along the length of the needle path rather than creating a single pocket of liquid at the tip. You should see the meat swell slightly along the injection path.
Step 5: Inject the Right Amount
As a general rule, inject 1-2 ounces of solution per pound of meat. For a 12-pound brisket, that's 12-24 ounces total distributed across all injection points. Don't inject so much that liquid pools on the surface or leaks excessively from the puncture holes.
Step 6: Massage and Redistribute
After injecting, massage the meat gently to help distribute the liquid more evenly. You may see some liquid leak from puncture holes—this is normal. Pat the surface dry before applying your rub.

Common Injection Mistakes (and How to Avoid Them)
Mistake #1: Injecting Too Close to the Surface
Shallow injections just under the surface will leak out during cooking. Insert the needle deep, aiming for the center of the thickest part of the meat.
Mistake #2: Injecting While Inserting
If you press the plunger while the needle is going in, you create a single pocket of liquid at the tip. Always inject while withdrawing the needle to distribute along the entire path.
Mistake #3: Using Cold Butter Injections
Butter-based injections solidify when cold, clogging your needle immediately. Keep the solution warm (not hot) and work quickly. If it starts to solidify, warm it gently.
Mistake #4: Over-Injecting
More is not better. Over-injection creates mushy texture and excessive leaking. Stick to 1-2 ounces per pound maximum. If liquid is pooling on the surface or streaming out of puncture holes, you've injected too much.
Mistake #5: Injecting Immediately Before Cooking
Injection needs time to distribute and equilibrate. Inject at least 2-4 hours before cooking, ideally 12-24 hours. This allows the liquid to spread through muscle fibers via osmosis and gives salt time to modify protein structure.
Mistake #6: Not Straining the Solution
Garlic bits, herb pieces, and undissolved spices will clog your needle instantly. Always strain your injection solution through a fine-mesh strainer before loading the injector.
Mistake #7: Hitting Bone
Running your needle into bone damages the needle tip and prevents injection. Learn the anatomy of your cuts and angle the needle to avoid bones. For turkey, this means injecting into the breast meat without hitting the keel bone.
Timing: When to Inject for Best Results
Timing profoundly affects how injection impacts your final product.
The Sweet Spot: 12-24 Hours Before Cooking
This is ideal for most applications. Injecting the night before gives the solution time to:
- Distribute evenly through osmosis and diffusion
- Allow salt to penetrate and modify muscle proteins (similar to dry-brining)
- Equilibrate temperature (you want meat at room temp before cooking)
- Reabsorb any liquid that initially leaked from puncture holes
After injecting, place the meat in a large zip-top bag or vacuum-seal it (gently—don't suck out all the injected liquid), and refrigerate. Remove from refrigeration 1-2 hours before cooking to allow it to come to room temperature.
Minimum: 2-4 Hours Before Cooking
If you're short on time, inject at least 2-4 hours before cooking. This gives enough time for basic distribution, though not as thorough as the longer window. This is my approach for same-day cooks when I didn't plan ahead.
Maximum: 48 Hours Before Cooking
Don't inject more than 48 hours in advance. Extended exposure to liquid (especially acidic components) can start to break down muscle texture excessively, creating a mushy result. Some competition teams inject up to 36 hours early for maximum penetration, but beyond 48 hours, you risk negative texture changes.
Special Case: Turkey for Thanksgiving
For holiday turkeys, inject 24 hours before roasting. This gives time for flavor distribution without the rushed stress of Thanksgiving morning. Keep the bird refrigerated and loosely covered. Pat dry and apply any surface seasoning 1 hour before it goes in the oven or smoker.
Protein-Specific Injection Techniques
Brisket Injection
Brisket presents unique challenges due to its size, dual-muscle structure (point and flat), and varying thickness.
Injection approach:
- Use a beef broth-based injection (Recipe 2 above works perfectly)
- Inject more heavily in the point (thicker, fattier section) than the flat
- Create a grid pattern with injection points every 1.5-2 inches
- Focus on the center of the muscle mass—avoid injecting near the fat cap or bottom surface
- Total volume: 12-24 ounces for a 12-15 pound packer brisket
- Timing: Inject 12-24 hours before cooking
Why it matters: Brisket can take 12-18 hours to smoke. Injection ensures the interior stays moist and flavorful even after such extended cooking. It also helps overcome the "stall" (evaporative cooling plateau around 150-170°F internal temp) by providing additional moisture.
Pork Shoulder (Pork Butt) Injection
Pork shoulder is forgiving and responds beautifully to injection, especially butter-based solutions.
Injection approach:
- Use a butter-based injection (Recipe 1 or 3)
- Inject in a grid pattern every 2 inches
- The bone in a bone-in shoulder creates a natural barrier—inject around it, not into it
- Total volume: 8-20 ounces for an 8-10 pound shoulder
- Timing: Inject 12-24 hours before cooking
Why it matters: Pork shoulder has abundant intramuscular fat that melts during cooking, naturally basting the interior. Injection amplifies this effect and adds complementary flavors. The result is pulled pork that's juicy and flavorful throughout, not just on the bark-covered exterior.
Turkey Injection
Turkey is the protein that benefits most dramatically from injection. Lean breast meat desperately needs the moisture and flavor boost.
Injection approach:
- Use a butter-based or Creole injection (Recipe 1 or 3)
- Focus primarily on breast meat (thickest, driest part of the bird)
- Inject each breast 3-4 times in different locations
- Inject each thigh and drumstick 2-3 times
- Inject into the meat, not the body cavity
- Total volume: 12-16 ounces for a 12-14 pound turkey
- Timing: Inject 24 hours before roasting
Why it matters: Turkey breast is notoriously easy to overcook into dry, stringy disappointment. Injection provides insurance, keeping the breast moist even if your oven temp runs a bit high or you cook 10 minutes longer than ideal. The flavor improvement is equally dramatic—injected turkey tastes seasoned throughout, not just on the skin.
Whole Chicken Injection
While chicken cooks faster than turkey, injection still provides significant benefit, especially for smoked or slow-roasted birds.
Injection approach:
- Use a simple broth or butter injection (Recipe 1 or 5)
- Inject each breast 2-3 times, each thigh 1-2 times
- Total volume: 4-6 ounces for a 4-5 pound chicken
- Timing: Inject 4-12 hours before cooking
Why it matters: Chicken cooks relatively quickly, but injection still adds insurance against dryness and adds interior flavor that rubs can't provide. Especially valuable if you're smoking chicken at low temperatures where surface-to-interior flavor transfer is minimal.
Combining Injection with Other Techniques
Injection is powerful, but it works best as part of a comprehensive approach.
Injection + Dry Rub
This is the standard competition approach:
- Inject the meat 12-24 hours before cooking
- Refrigerate in a sealed bag
- Remove from fridge 1-2 hours before cooking
- Pat surface dry (injection may have leaked slightly)
- Apply dry rub generously to all surfaces
- Cook as normal
This gives you interior flavor (injection) and exterior flavor/texture (bark from the rub). The combination is greater than the sum of its parts.
Injection + Brine (Use Caution)
You can combine injection with brining, but be careful about salt content. Both techniques add salt, and over-salting is a real risk.
If brining and injecting:
- Use a low-salt or salt-free injection solution
- Reduce brining time by 30-50%
- Taste-test before cooking if possible (cook a small piece to check seasoning)
Honestly, I rarely combine these techniques. Injection alone provides the moisture and seasoning benefits that brining offers, with more control and less mess.
Injection + Mop Sauce
During long smokes, some pitmasters apply mop sauce (thin liquid applied with a brush or actual mop) every hour or two. If you've injected, you can skip mopping or use a very light hand—the interior is already moist and flavorful.
If you do mop, use a sauce that complements your injection flavor profile. Injected with beef broth? Mop with thinned Worcestershire and beef broth. Injected with butter and Creole seasoning? Mop with melted butter and hot sauce.
Frequently Asked Questions
Can I inject meat right before cooking, or do I need to wait?
While you can inject immediately before cooking, you'll get significantly better results if you inject 12-24 hours in advance. This allows the solution to distribute evenly through the muscle tissue via osmosis, and gives salt time to modify protein structure for improved moisture retention. Minimum wait time is 2-4 hours; optimal is 12-24 hours; maximum is 48 hours.
Is injection cheating in barbecue competitions?
Not at all. Injection is completely legal in sanctioned competitions (KCBS, IBCA, etc.) and is used by virtually every winning team. What's prohibited in some circuits is certain additives like phosphates or artificial flavorings. Check your specific competition rules, but basic injection with broth, butter, and seasonings is universally accepted. The only "cheating" is not using every legal advantage available.
Can I reuse leftover injection solution?
No. Once your needle has been in raw meat, the injection solution is contaminated with bacteria. Discard any unused solution that's been in contact with raw meat. If you have leftover solution that hasn't touched meat, you can refrigerate it for 2-3 days or freeze it for later use. I usually make just enough for the cook to avoid waste.
Do I still need to brine if I'm injecting?
Generally, no. Injection accomplishes the same goals as brining—adding moisture and seasoning to the interior—with more precision and less time. Brining a turkey for 12 hours and then injecting it risks over-salting and excessive moisture. Choose one method or the other. I prefer injection because it's faster, less messy, and provides more control over flavor profile.
What's the best injection solution for competition barbecue?
For pork, most competition teams use a butter-based injection with apple juice, Worcestershire, and brown sugar (similar to Recipe 1). For brisket, beef broth with Worcestershire, beef base, and savory seasonings dominates (Recipe 2). Some teams add food-grade phosphates for extra moisture retention, though this is controversial. The key is complementing the meat's natural flavor rather than overwhelming it—judges want to taste quality meat, not just your injection.
Conclusion: Injection as a Game-Changer
Injection isn't a gimmick or a shortcut—it's a fundamental technique that delivers results impossible to achieve any other way. Surface marinades can't reach the interior. Dry rubs create bark but don't add internal moisture. Brining works but takes longer and is less precise. Injection does what nothing else can: delivers flavor and moisture exactly where you want it, when you want it there.
The learning curve is gentle. Start with the simple broth injection (Recipe 5) on a pork shoulder. Follow the basic technique: inject deep, withdraw while pressing the plunger, use 1-2 ounces per pound, and give it 12-24 hours to work. You'll taste the difference immediately—juicier meat with flavor that goes all the way through.
As you gain confidence, experiment with butter-based injections, competition formulas, and protein-specific approaches. Learn the anatomy of your cuts so you can inject efficiently without hitting bone. Dial in your timing so the injection has maximum impact.
Then, the next time someone compliments your perfectly smoked brisket or impossibly juicy turkey, you can smile knowing that while they're tasting the smoke and the bark, the real secret is what you put inside the meat twelve hours before it hit the pit.
Now go inject something. Your pitmaster reputation depends on it.
— Hank Delgado
Frequently Asked Questions
What is the best injection for pork shoulder?
A butter-based injection with apple juice works best for pork shoulder. Combine 1 cup melted butter, 1/2 cup apple juice, 1/4 cup Worcestershire sauce, 2 tablespoons brown sugar, and seasonings (salt, garlic powder, pepper). The butter adds richness and moisture retention, while apple juice provides sweetness that complements pork. Inject 12-24 hours before cooking, using approximately 8-12 ounces total for an 8-10 pound shoulder.
How long before cooking should I inject meat?
The optimal timing is 12-24 hours before cooking. This allows the injection solution to distribute evenly through muscle tissue and gives salt time to modify proteins for better moisture retention. Minimum timing is 2-4 hours if you're short on time. Maximum is 48 hours—beyond that, you risk mushy texture from excessive protein breakdown. Never inject more than 48 hours in advance.
How much injection solution should I use per pound of meat?
Use 1-2 ounces of injection solution per pound of meat as a general guideline. For a 12-pound brisket, that's 12-24 ounces total distributed across multiple injection points. Don't over-inject—if liquid is pooling on the surface or streaming from puncture holes, you've used too much. The goal is even distribution throughout the interior, not flooding the meat.
Can I inject a turkey instead of brining it?
Yes, and many pitmasters prefer injection over brining for turkey. Injection delivers moisture and flavor directly into the breast meat (the driest part) with more precision and less time than brining. Use a butter-based injection 24 hours before roasting, focusing on the breast meat with 3-4 injection points per side. This provides similar moisture benefits to brining without the 12-24 hour brine time or the challenge of finding space for a large container.
Do I inject meat with the needle going in or coming out?
Always inject while withdrawing the needle, not while inserting it. Insert the needle deep into the meat (nearly to the opposite side), then slowly press the plunger while pulling the needle back out. This distributes liquid along the entire needle path rather than creating a single pocket at the tip. You should see the meat swell slightly along the injection path—that's proper distribution.
More Charcuterie Guides
What Is Pink Curing Salt? Sodium Nitrite Explained for Home Charcuterie
Pink curing salt is the most essential — and most misunderstood — ingredient in meat curing. This guide explains what it is, why it's pink, how sodium nitrite prevents botulism, proper usage rates, and whether you can cure meat without it.
10 min readHow Long Does Charcuterie Last? Storage Guide for Cured Meats & Cheese
Understanding proper charcuterie storage ensures you enjoy it at peak quality while avoiding food safety risks.
10 min read