How to Make Terrine at Home: A Complete Guide to French Country Pâté
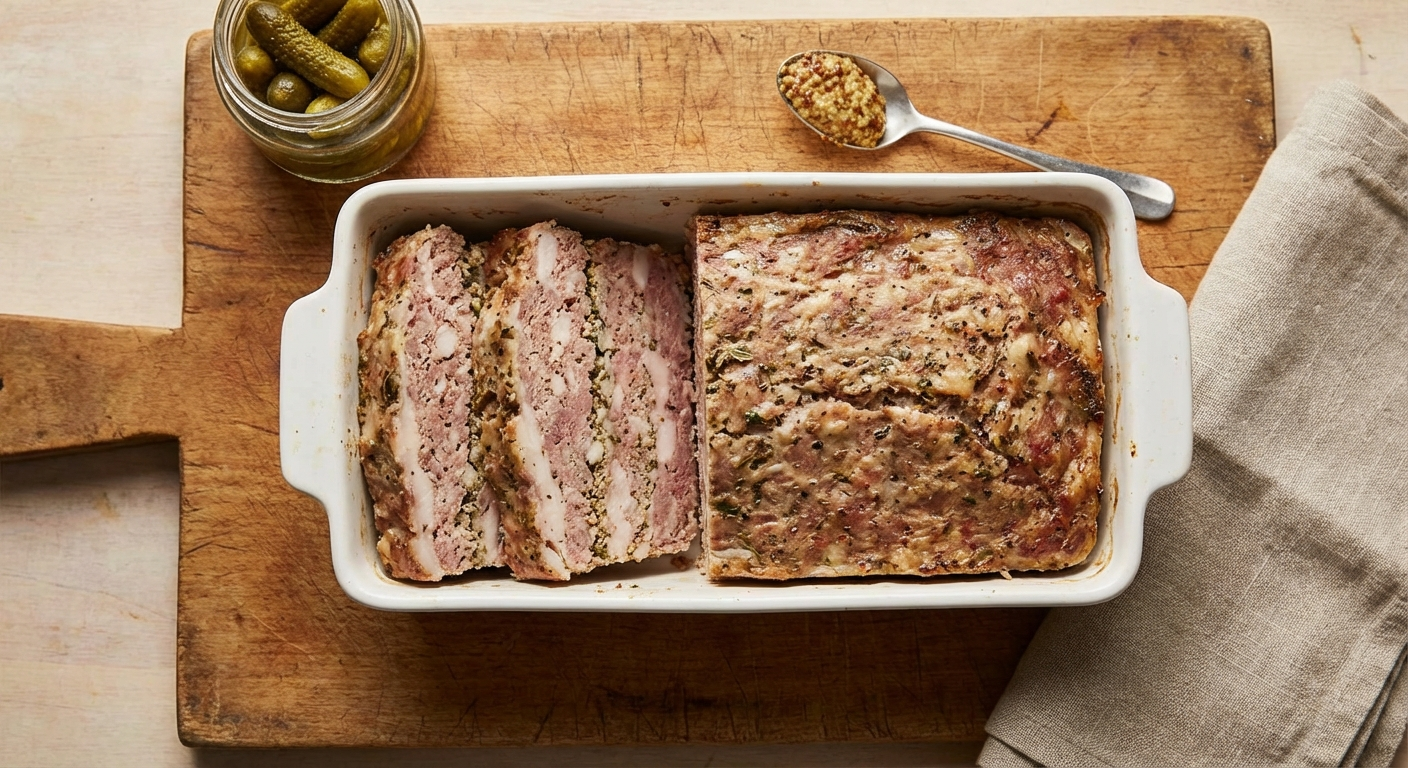
If you’ve ever walked into a French bistro and seen that thick slab of rustic meat loaf served with cornichons and crusty bread, you’ve met the terrine. It’s one of the oldest preparations in the charcuterie canon — a coarsely ground mixture of meats, fat, aromatics, and seasonings baked low and slow in a ceramic or cast iron mold until the flavors meld into something far greater than the sum of their parts.
Unlike pâté, which is typically smooth and liver-forward, a terrine de campagne (country terrine) celebrates texture. You want coarse chunks of meat visible in every slice. You want the fat to create pockets of richness. You want herbs and spices to perfume the whole thing. And you want it served cold, with nothing more than good mustard and pickles.
Making a terrine at home requires no special equipment beyond a loaf pan and an oven. The technique is forgiving, the ingredients are affordable, and the results will make you look like a classically trained French chef. Let me walk you through it.
What Is a Terrine?
The word “terrine” refers to both the cooking vessel (a deep, straight-sided ceramic or cast iron mold) and the food cooked inside it. In charcuterie, a terrine is a forcemeat — a mixture of ground or chopped meats — that’s seasoned, packed into the mold, and baked in a water bath until set.
There are many styles of terrine, but the most accessible for home cooks is the terrine de campagne (country terrine). It’s rustic by design — coarsely ground pork, pork fat, liver for depth, herbs, a splash of brandy, and usually a lining of bacon or caul fat. This is peasant food elevated to art.
Key characteristics that separate terrine from other charcuterie:
- Cooked, not cured: Unlike bresaola or prosciutto, terrines are baked. They don’t require curing salt or a curing chamber.
- Coarse texture: The grind should be chunky — you want to see distinct pieces of meat in each slice.
- Served cold: Terrines are always chilled before serving. The flavors develop and the fats set, creating a sliceable structure.
- Better with age: A terrine tastes best 2–3 days after baking. The flavors meld and mellow beautifully.
Essential Equipment
You don’t need a dedicated terrine mold to make excellent terrine. Here’s what works:
- A standard 9x5 loaf pan: Metal, ceramic, or glass all work. If you want to get traditional, a Le Creuset or Staub terrine mold is beautiful but absolutely optional.
- A meat grinder or food processor: A stand mixer grinder attachment is ideal. A food processor works but pulse carefully — you want coarse texture, not paste.
- A roasting pan for the water bath: The terrine bakes in a bain-marie (water bath) for even, gentle heat.
- An instant-read thermometer: The terrine is done at 155°F internal temperature.
- Weights for pressing: After baking, the terrine is pressed to compact the texture. Bricks wrapped in foil, canned goods, or a second loaf pan filled with dried beans all work.
Ingredients: The Classic Country Terrine
This recipe makes one 9x5 loaf — about 2.5 pounds, serving 10–12 as an appetizer.
The Meat
- 1 lb pork shoulder, cut into 1-inch cubes (this provides the meaty backbone)
- 8 oz pork belly or fatback, cut into 1-inch cubes (essential — without enough fat, the terrine will be dry and crumbly)
- 8 oz chicken livers, cleaned and trimmed (adds depth, richness, and that unmistakable terrine flavor)
- 4 oz ham or smoked bacon, diced small (provides salt and smokiness throughout)
The Seasonings
- 2 teaspoons kosher salt (about 1.5–2% of total meat weight)
- 1 teaspoon freshly ground black pepper
- ½ teaspoon ground allspice
- ¼ teaspoon ground nutmeg
- ¼ teaspoon ground cloves
- 2 tablespoons brandy or Cognac
- 2 cloves garlic, minced
- 2 shallots, finely diced
- 2 tablespoons fresh thyme leaves
- 1 tablespoon fresh parsley, chopped
- 1 bay leaf
- 1 large egg
The Lining
- 8–10 slices of bacon (to line the mold — creates a beautiful exterior and helps keep the terrine moist)
Step-by-Step: Making the Terrine
Step 1: Prepare the Meats (Day Before)
Cut the pork shoulder, pork belly, and chicken livers into rough 1-inch cubes. Keep everything cold — partially frozen meat grinds better and stays safe. Toss the cubed meats with the salt, pepper, allspice, nutmeg, cloves, garlic, shallots, and brandy. Cover and refrigerate overnight.
This overnight marination serves two purposes: it distributes the seasoning evenly through the meat, and the salt begins to extract proteins (myosin) from the muscle fibers, which acts as a natural binder during cooking.
Step 2: Grind the Forcemeat
Set up your grinder with a coarse plate (3/8-inch or 10mm). If using a food processor, work in small batches and pulse 6–8 times — you want irregular chunks, not a smooth paste.
Grind about two-thirds of the meat mixture through the coarse plate. Leave the remaining third either hand-chopped into ¼-inch pieces or grind through a larger plate. This combination of textures is what gives country terrine its characteristic rustic bite.
Transfer everything to a large bowl. Add the egg and mix with your hands until the mixture is cohesive but still visibly chunky. Don’t overmix — you’re not making sausage.
Step 3: Test the Seasoning
This step is crucial and often skipped. Take a small spoonful of the mixture, flatten it into a patty, and cook it in a small skillet over medium heat. Taste it. Is it seasoned enough? Remember that cold food tastes less salty than hot food, so the test patty should taste slightly over-seasoned when warm.
Adjust salt, pepper, or spices as needed. Once you bake the full terrine, you can’t fix the seasoning. This 2-minute test saves the entire batch.
Step 4: Line the Mold
Preheat your oven to 325°F.
Lay the bacon slices across the bottom and up the sides of your loaf pan, overlapping slightly. Let the ends hang over the edges — you’ll fold them over the top after filling. The bacon creates a beautiful wrap that protects the terrine during baking and looks stunning when sliced.
Step 5: Fill and Pack
Spoon the forcemeat into the bacon-lined mold. Press it down firmly with the back of a spoon or your hands, eliminating any air pockets. Air gaps become voids in the finished terrine and look sloppy when sliced.
Press the bay leaf into the top center. Fold the overhanging bacon strips over the top to enclose the filling completely. If you have extra bacon, lay it across the top for a finished look.
Cover tightly with aluminum foil. If you have a terrine mold with a lid, use it instead.
Step 6: Bake in a Water Bath
Place the terrine in a larger roasting pan. Fill the roasting pan with hot water until it reaches halfway up the sides of the terrine mold. This bain-marie ensures gentle, even cooking — without it, the edges overcook while the center stays raw.
Bake at 325°F for approximately 1 hour and 15 minutes to 1 hour and 30 minutes. The terrine is done when the internal temperature reaches 155°F. The juices should run clear, not pink.
Don’t overbake. A terrine that hits 165°F+ will be dry and crumbly. Pull it at 155°F and let carryover cooking handle the rest.
Step 7: Press and Cool
Remove the terrine from the water bath. Remove the foil. Place a piece of cardboard or a small cutting board cut to fit inside the pan directly on top of the terrine. Weight it down with 2–3 pounds of weight (canned goods, bricks wrapped in foil, etc.).
Pressing accomplishes two things: it compacts the texture so slices hold together, and it forces out excess fat and juices, concentrating the flavor. Let the weighted terrine cool to room temperature on the counter (about 2 hours), then transfer to the refrigerator, weights still in place, and chill overnight.
Serving Your Terrine
A terrine is best served 2–3 days after baking. The flavors meld and develop in remarkable ways — day-one terrine tastes good; day-three terrine tastes extraordinary.
To serve, remove the weights, run a thin knife around the edges, and unmold onto a cutting board. Slice into ½-inch thick pieces with a sharp knife.
Classic Accompaniments
- Cornichons: The classic pairing. Their sharp, vinegary crunch cuts through the richness perfectly.
- Whole grain mustard: Dijon works too, but whole grain is traditional and the texture complements the coarse terrine.
- Crusty baguette or country bread: Toasted or plain. The bread is the vehicle.
- Dressed greens: A simple frisée or arugula salad with vinaigrette provides freshness.
- Pickled onions: Quick-pickled red onions add color and acidity.
A terrine makes a spectacular addition to any charcuterie board, offering a distinctly different texture from sliced cured meats. Pair it with some of the best cheeses for charcuterie for a proper French-inspired spread.
Variations and Riffs
Game Terrine
Replace half the pork shoulder with duck leg meat, venison, or rabbit. Game terrines have a more complex, wild flavor. Add a few juniper berries and extra thyme to complement the gamey notes.
Terrine with Pistachios
Fold in ½ cup of shelled, unsalted pistachios before packing the mold. They add gorgeous color contrast — green jewels against the pink forcemeat — and a pleasant crunch in every bite.
Herbed Terrine
Double the fresh herbs and add tarragon or chervil. This lighter-flavored variation works beautifully in spring and summer with a glass of rosé.
Terrine en Croûte
For the ambitious cook: wrap the forcemeat in puff pastry or pâte brisée before baking. The crust adds buttery crunch and makes for a showstopping presentation. This is a more advanced technique — you need to partially bake the pastry case first, fill it, then finish baking — but the results are extraordinary.
Storage and Shelf Life
A properly made terrine keeps beautifully:
- Refrigerator: 7–10 days, wrapped tightly in plastic wrap or in an airtight container. The flavors actually improve for the first 3–4 days.
- Freezer: Up to 3 months. Slice before freezing for easy portioning. Thaw overnight in the refrigerator.
- Sealed with fat: Traditionally, terrines were sealed with a layer of melted lard or clarified butter poured over the top. This creates an airtight seal and extends refrigerator life to 2–3 weeks.
Troubleshooting
Terrine is Dry and Crumbly
Cause: Not enough fat in the mixture, or it was overbaked. A country terrine needs at least 25–30% fat by weight. Lean pork shoulder alone isn’t enough — you need the pork belly or fatback.
Fix: Next time, increase the fat ratio and pull from the oven at exactly 155°F internal.
Terrine Falls Apart When Sliced
Cause: The forcemeat wasn’t mixed enough to develop binding proteins, or it wasn’t pressed after baking.
Fix: Make sure to mix until the forcemeat is cohesive (the egg helps here), and always press with weights during cooling.
Bland Flavor
Cause: Under-seasoned, or you skipped the overnight marination.
Fix: Always do the pan-fry test before filling the mold. And don’t skip the brandy — it adds a background warmth that makes everything else sing.
Large Air Pockets in the Slice
Cause: Not packed tightly enough into the mold.
Fix: Press firmly in layers, tapping the mold against the counter between additions to settle the mixture.
Why Every Home Charcutier Should Make Terrine
If you’re getting into charcuterie — if you’ve already made pancetta, bresaola, or salami — terrine is the project that rounds out your skill set. Cured meats teach you about salt, time, and patience. Terrine teaches you about forcemeat, binding, fat ratios, and thermal precision. Together, they give you a complete understanding of the charcutier’s craft.
Plus, there’s nothing quite like placing a thick slice of homemade terrine on the table, flanked by cornichons and good bread, and watching someone’s eyes light up at the first bite. That moment — when something you made with your own hands elevates someone’s meal — is what this is all about. For premium cuts of pork to start your terrine, check out The Meatery’s pork collection.
Frequently Asked Questions
What is the difference between terrine and pâté?
A terrine is coarsely ground and baked in a mold (the terrine dish), resulting in a chunky, rustic texture. Pâté is typically finely ground or puréed for a smooth, spreadable consistency. Both are forcemeats, but the texture and presentation are distinctly different. Pâté en croûte — pâté baked in pastry — blurs the line further.
Do I need a special mold to make terrine?
No. A standard 9x5 inch loaf pan works perfectly. Traditional ceramic or cast iron terrine molds are beautiful but optional. The key is having straight sides so the terrine unmolds cleanly and slices evenly.
How long does terrine last in the fridge?
A properly made terrine lasts 7-10 days refrigerated, tightly wrapped. The flavor actually improves for the first 2-3 days as the seasonings meld. For longer storage, seal with melted lard or clarified butter on top (extends to 2-3 weeks) or freeze sliced portions for up to 3 months.
Why is my terrine dry?
The most common cause is insufficient fat. A country terrine needs at least 25-30% fat by weight — that means including pork belly or fatback, not just lean pork shoulder. Overbaking (above 155°F internal) also dries it out. Always use a thermometer and pull at exactly 155°F.
Can I make terrine without liver?
Yes, though the flavor will be different. Liver adds depth and richness that's characteristic of classic terrine de campagne. If you omit it, increase the pork shoulder by the same amount and consider adding extra aromatics (another shallot, more herbs) to compensate for the lost complexity.
More Charcuterie Guides
What Is Pink Curing Salt? Sodium Nitrite Explained for Home Charcuterie
Pink curing salt is the most essential — and most misunderstood — ingredient in meat curing. This guide explains what it is, why it's pink, how sodium nitrite prevents botulism, proper usage rates, and whether you can cure meat without it.
10 min readHow Long Does Charcuterie Last? Storage Guide for Cured Meats & Cheese
Understanding proper charcuterie storage ensures you enjoy it at peak quality while avoiding food safety risks.
10 min read