How to Make Rillettes at Home: French Potted Meat Done Right
Rillettes are one of the most rewarding things you can make in a home kitchen, and somehow they remain one of the least known outside of France. While pâté gets all the attention on charcuterie boards and terrine shows up on restaurant menus, rillettes quietly deliver more flavor per bite than either of them — with a fraction of the effort.
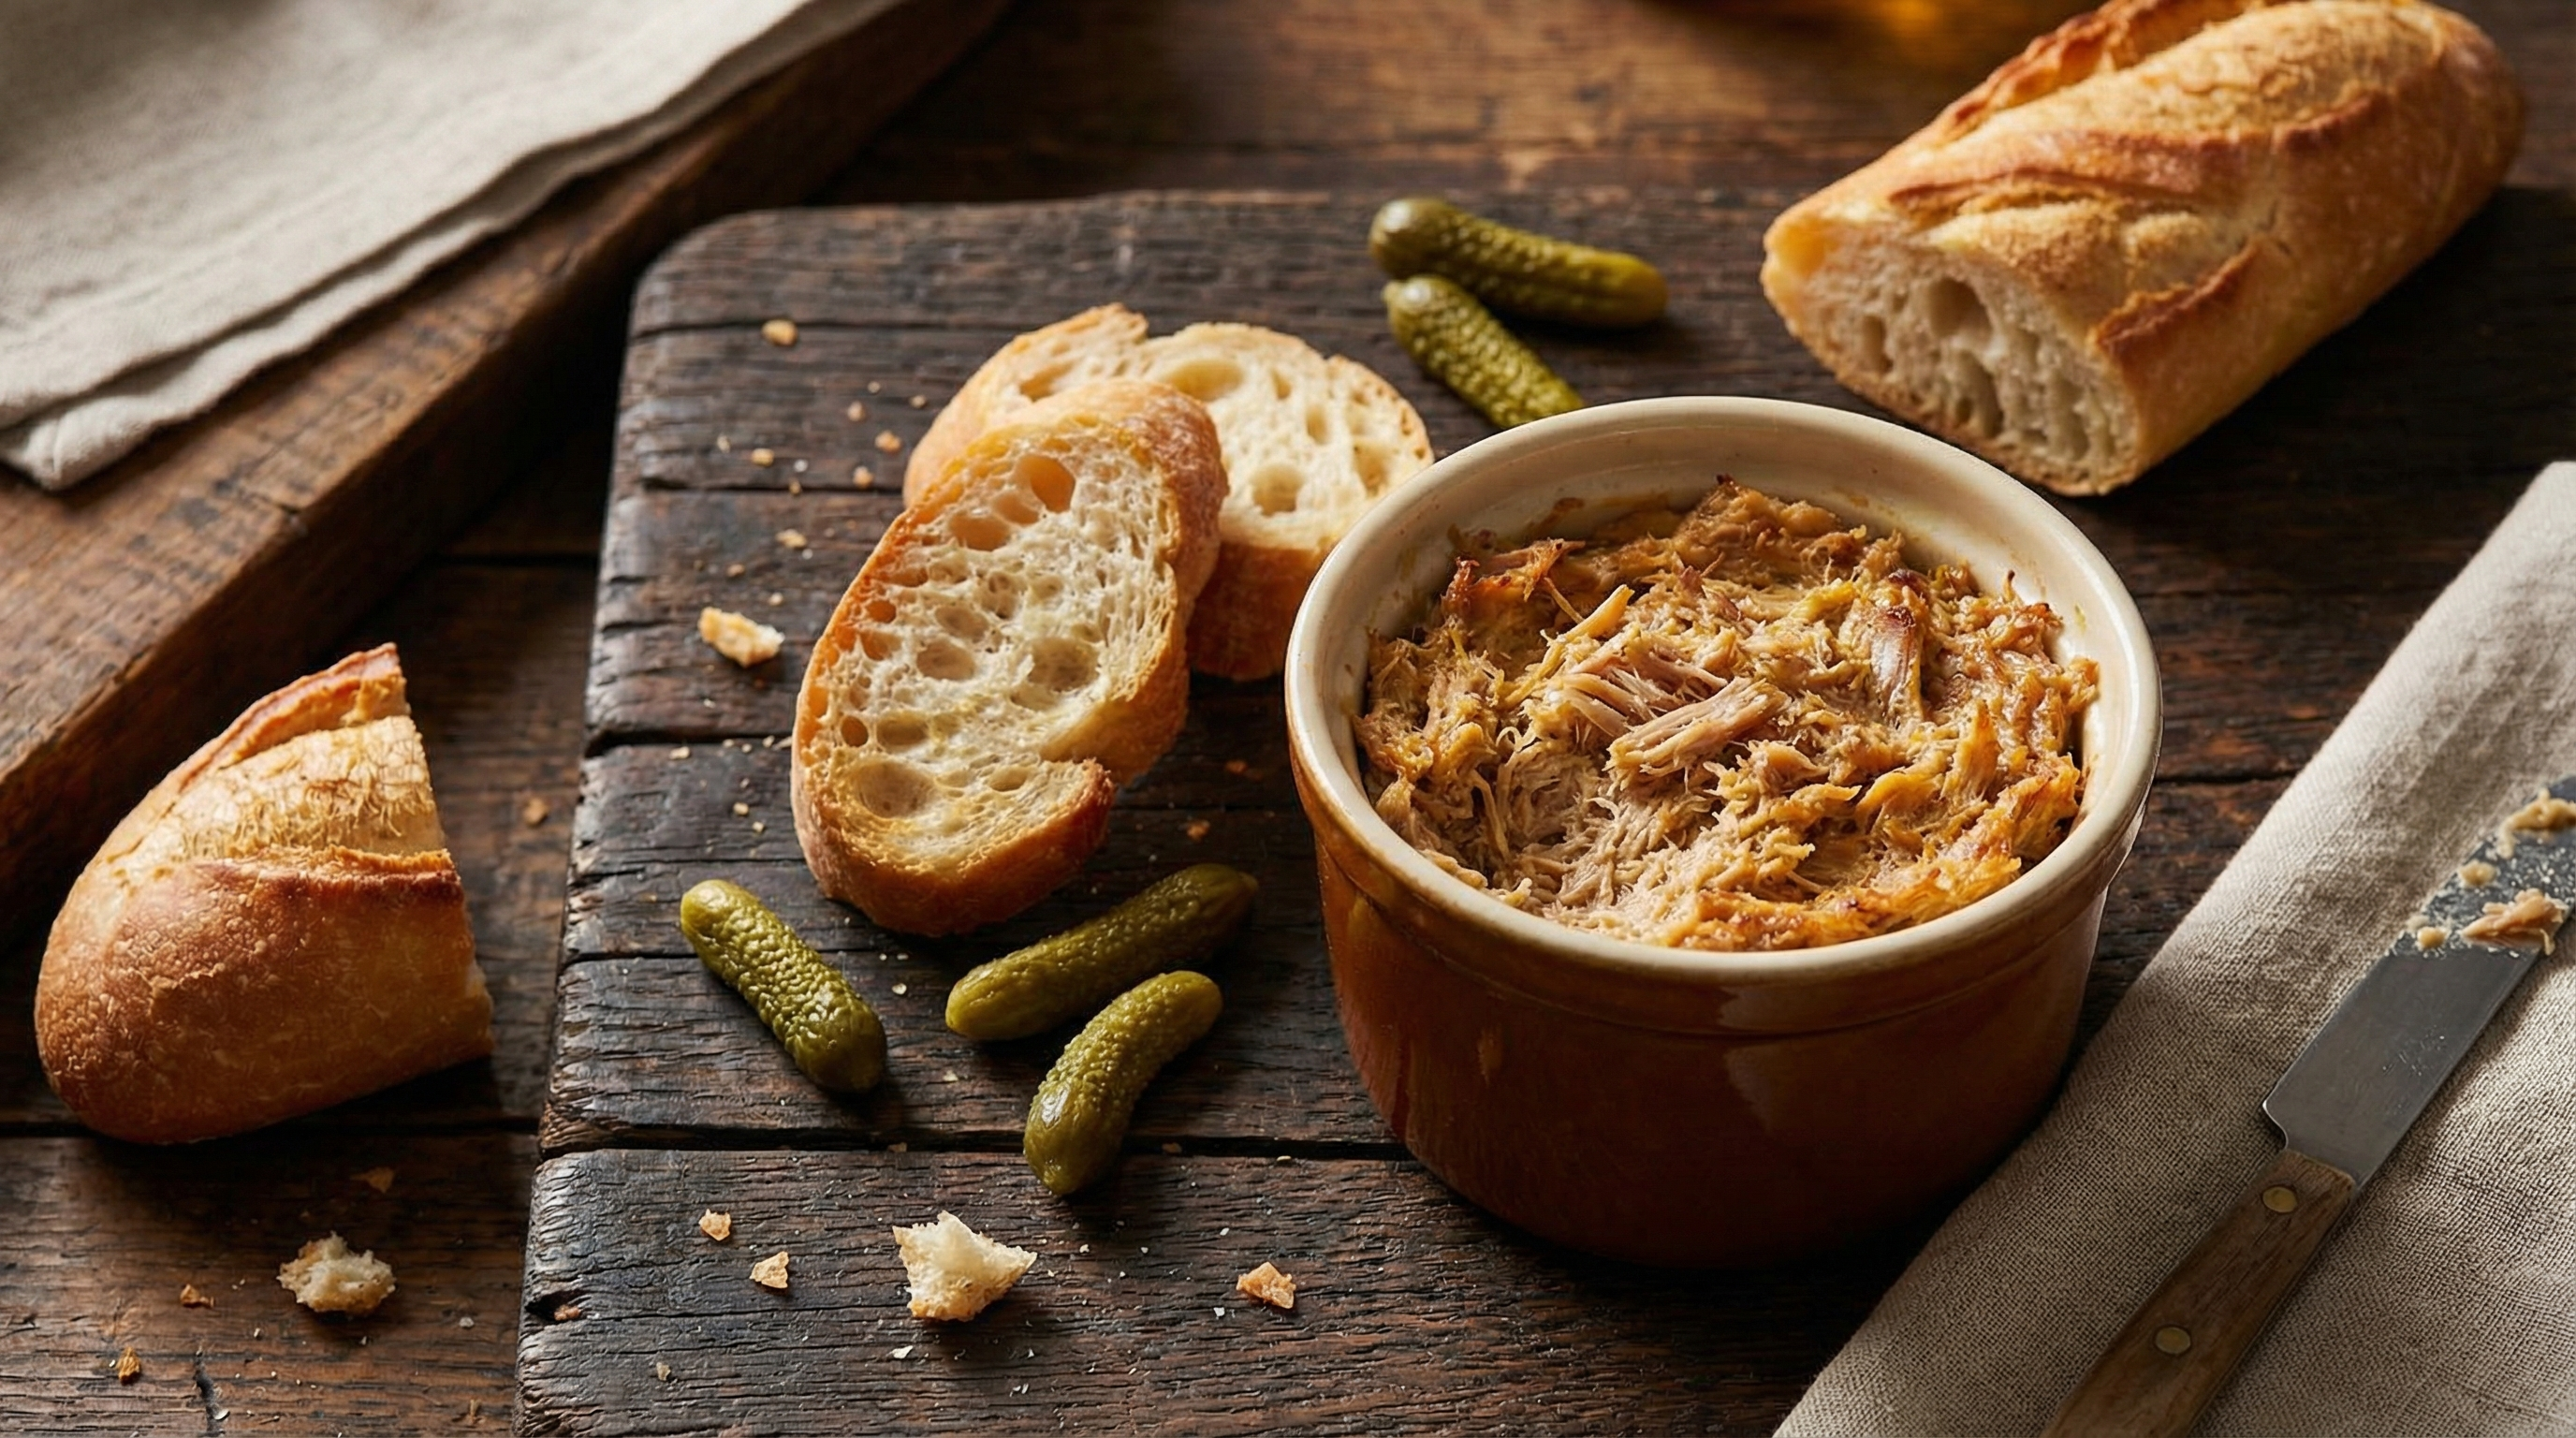
At their simplest, rillettes are pork slowly cooked in its own fat until the meat falls apart, then shredded and packed into jars or crocks where the fat rises to the surface and seals the meat beneath. The result is a rough-textured, deeply savory spread that melts on warm bread and keeps for weeks in the refrigerator. Think of it as the French cousin of pulled pork, except the fat is the feature, not something you drain off.
Rillettes originated in Tours, in the Loire Valley, where they’ve been made since at least the 15th century. Every charcuterie shop in central France keeps a crock behind the counter. Making them at home takes about 4 to 6 hours of mostly unattended cooking, and the technique is forgiving enough that your first batch will almost certainly be excellent.
What Are Rillettes?
The word “rillettes” comes from the Old French “rille,” meaning a slice or strip of pork. Unlike pâté, which is ground to a smooth paste and baked in a mold, or confit, where whole pieces of meat are submerged in fat, rillettes occupy their own category. The meat is cooked slowly until it can be pulled apart with a fork, then mixed back into the rendered fat to create a coarse, spreadable texture.
Traditional rillettes from Tours (rillettes de Tours) are the benchmark. They’re made exclusively with pork belly and shoulder, cooked for 4 to 6 hours, and seasoned with nothing more than salt, pepper, and sometimes a hint of nutmeg or thyme. The texture should be visibly shredded — you want to see distinct fibers of meat throughout the fat, not a homogeneous paste.
The tradition has expanded well beyond pork. Duck rillettes are almost as common in France, and you’ll also find versions made with rabbit, goose, salmon, and even sardines. But pork rillettes remain the foundation, and they’re what we’re making here.
What makes rillettes special on a charcuterie board is their textural contrast. While salami, prosciutto, and coppa are all sliced firm meats, rillettes are a spread. They give your guests something to interact with — scooping, spreading, building their own bites. A crock of homemade rillettes instantly elevates a board from a simple meat-and-cheese arrangement to something that feels genuinely curated.
Choosing Your Pork
Great rillettes require two things from your pork: fat and connective tissue. Fat provides the medium the meat cooks in and the silky richness of the final product. Connective tissue breaks down during the long cook into gelatin, which gives rillettes their luscious, slightly sticky body that pâté can’t match.
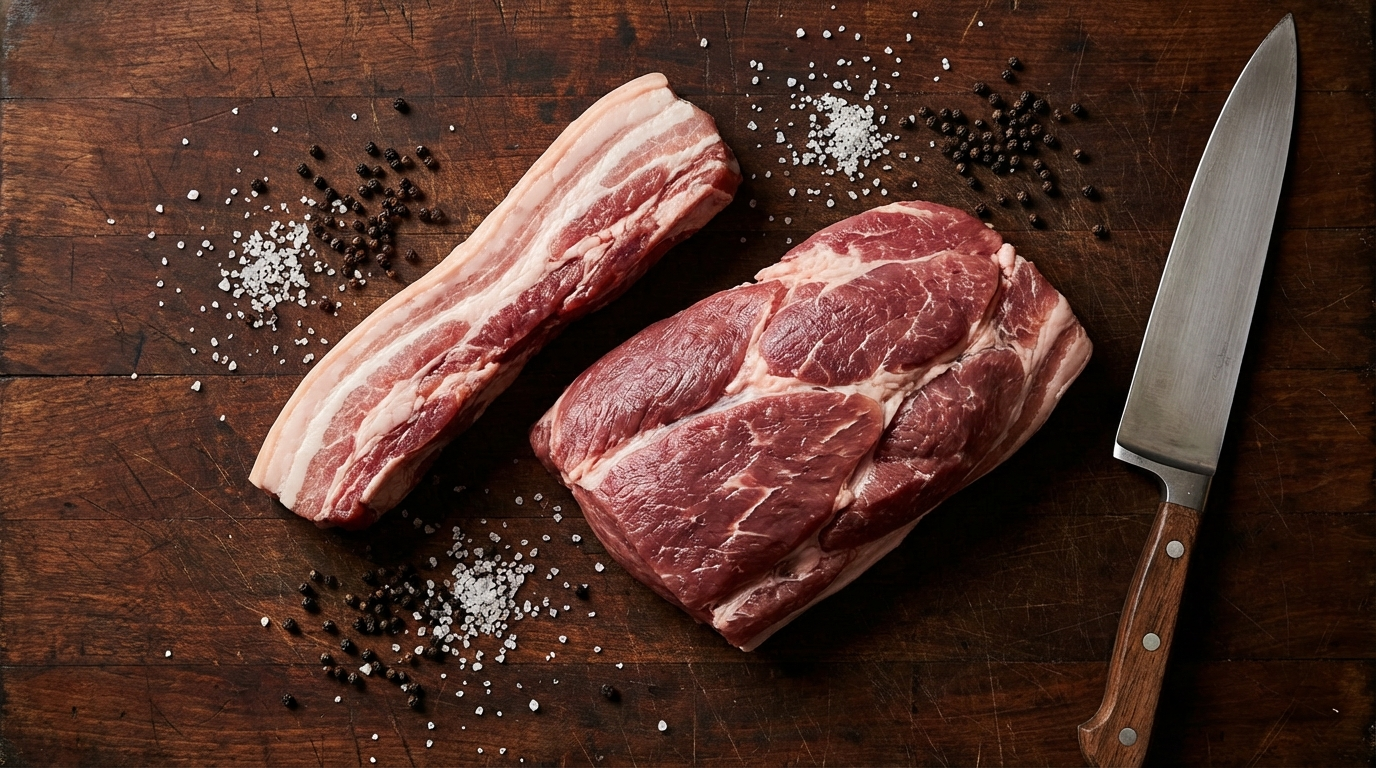
Pork belly is your primary fat source. Skin-on belly works best because the skin renders into gelatin during cooking, adding body to the final product. Plan on using about 40% belly by weight in your total mix.
Pork shoulder (Boston butt) provides the meat and connective tissue. The intramuscular fat and collagen in shoulder are what create those beautiful shredded fibers held together by rendered fat. Use about 60% shoulder.
A classic ratio for 5 pounds of rillettes:
- 3 pounds pork shoulder (bone-in is fine; the bone adds flavor)
- 2 pounds pork belly (skin-on preferred)
You can adjust this ratio to taste. More belly produces richer, fattier rillettes. More shoulder gives a meatier, more textured result. Neither direction is wrong — it’s a matter of preference.
Quality matters here. Heritage breed pork from a local farm produces noticeably better rillettes than commodity pork. Breeds like Berkshire, Duroc, and Mangalitsa develop more intramuscular fat and deeper pork flavor. Since rillettes are essentially a pure expression of pork, the quality of your starting material shows up directly in the final product with nowhere to hide.
Avoid pork that’s been “enhanced” with a salt solution — the label will say “contains up to X% solution.” This injected brine throws off your salt ratios and produces rillettes with a processed, watery quality instead of the clean pork flavor you want.
Additional Ingredients
One of the beautiful things about rillettes is the short ingredient list. Traditional rillettes de Tours use:
- Salt: 1.5% to 2% of total meat weight (about 1.5 tablespoons of kosher salt per pound). Season before cooking, not after.
- Black pepper: Freshly ground, about 1 teaspoon per pound of meat.
- Fresh thyme: 4 to 5 sprigs for a 5-pound batch. Remove before shredding.
- Bay leaves: 2 to 3 leaves. Remove before shredding.
- White wine: 1 cup of dry white wine (Muscadet, Sauvignon Blanc, or Chenin Blanc from the Loire are traditional). This deglazes the pot and adds subtle acidity that balances the richness.
- Water: About 1 cup to start, adding more as needed to keep the meat from sticking during the initial cooking phase.
Optional additions that work well without straying too far from tradition:
- Nutmeg: A tiny grating — maybe an eighth of a teaspoon. Classic in many French charcuterie preparations.
- Quatre épices: A traditional French spice blend of white pepper, nutmeg, ginger, and cloves. Use sparingly — a quarter teaspoon for the whole batch.
- Garlic: Not traditional in rillettes de Tours, but one or two smashed cloves work beautifully if you want a slightly more rustic result.
What to avoid: liquid smoke, Worcestershire sauce, brown sugar, or barbecue seasoning. These turn rillettes into a different product entirely. The whole point is pure, clean pork flavor enriched by its own fat. Let the meat speak.
The Slow Cook
This is where the magic happens. The entire technique is essentially a long, low braise in fat. You’re rendering the fat out of the belly and the connective tissue out of the shoulder simultaneously, until the meat practically dissolves.
Step 1: Cut the meat. Cut the pork belly and shoulder into roughly 2-inch cubes. Don’t trim any fat — it all goes in. If using bone-in shoulder, leave the bone in; it adds gelatin and flavor. Remove it after cooking.
Step 2: Season. Toss the cubed meat with your salt and pepper. Let it sit at room temperature for 30 minutes to an hour while the salt begins to penetrate. This seasoning step is critical — if you try to salt after cooking, the seasoning sits on the surface instead of permeating the meat.
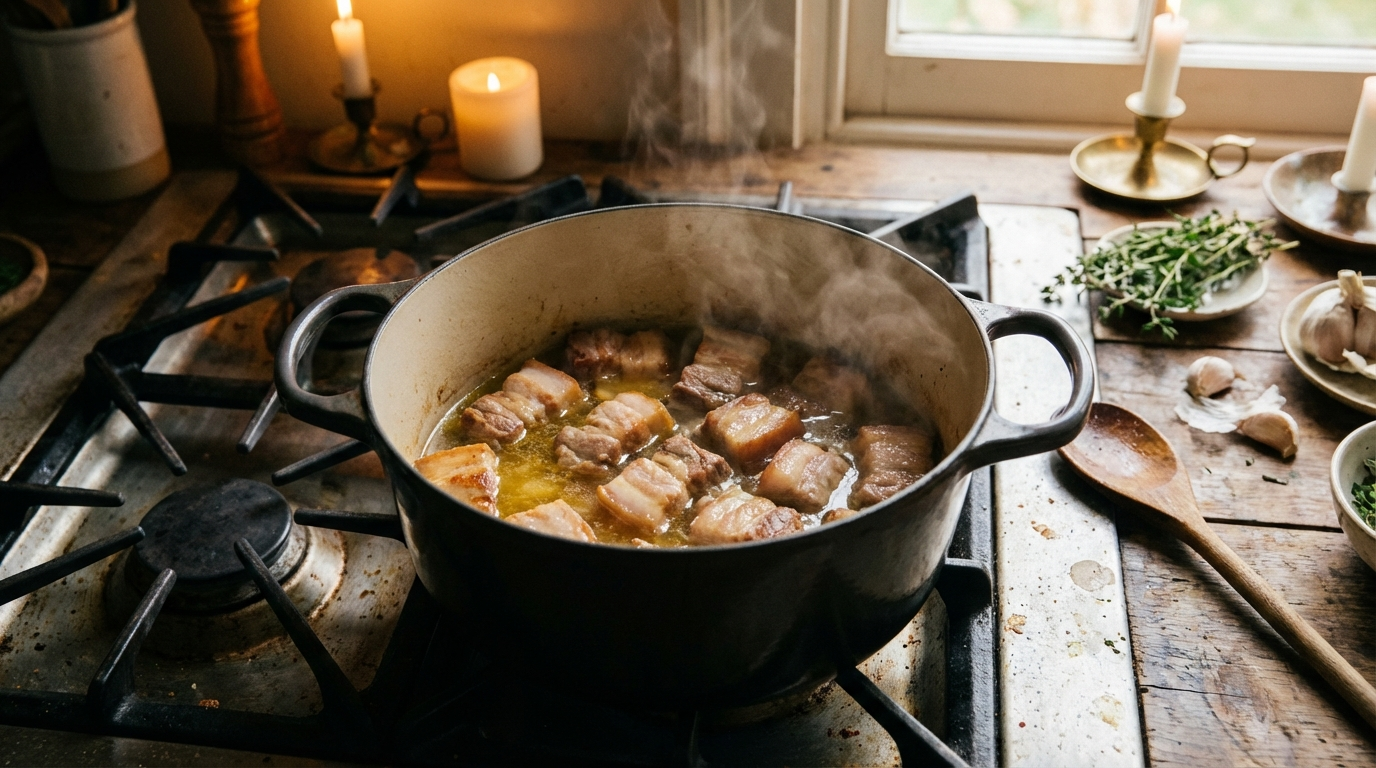
Step 3: Start the cook. Place all the meat in a heavy Dutch oven or enameled cast iron pot. Add the white wine, water, thyme, and bay leaves. The liquid should come about a third of the way up the meat — not submerging it. As the belly fat renders, the meat will be cooking in a combination of its own fat and the cooking liquid.
Step 4: Bring to a bare simmer. Set your burner to the lowest possible setting, or place the pot in a 250°F oven. You want the faintest bubbling — a bubble breaking the surface every few seconds, not a rolling boil. Higher heat renders fat too quickly and can fry the meat instead of gently braising it, producing a greasy rather than silky result.
Step 5: Cook for 4 to 6 hours. Stir every 45 minutes to an hour, scraping the bottom to prevent sticking. As the hours pass, you’ll notice the meat getting progressively softer. By hour 3, pieces will start breaking apart when you stir. By hour 4 to 5, the meat should fall apart at the touch of a spoon.
The rillettes are done when:
- Every piece of meat shreds easily with a fork
- The pork belly has fully rendered its fat, leaving soft, melting strips of meat
- The cooking liquid has mostly evaporated or been absorbed, and the meat is sitting in clear rendered fat
- The bottom of the pot has developed a golden fond (this gets stirred in for flavor)
Oven method: Many cooks prefer the oven because it provides even heat from all sides. Set it to 250°F, cover the pot tightly, and check every hour. The oven method is more forgiving — you’re less likely to scorch the bottom, and the temperature stays more consistent than a stovetop burner.
Shredding and Seasoning
Once the meat is fall-apart tender, remove the pot from heat. Fish out and discard the thyme stems, bay leaves, and any bones. Now comes the most satisfying part of the entire process.
Use two forks. Pull the meat apart in the pot, working through every piece until you have a mass of coarse, shredded fibers swimming in rendered fat. The traditional texture of rillettes is not smooth — you want to see individual strands of meat. Do not use a food processor. Mechanical processing turns rillettes into a pâté-like paste and destroys the textural character that makes them special.
Some pieces of belly fat won’t shred — they’ll be soft, melting pieces of rendered fat. Stir these in. They add pockets of richness throughout the rillettes.
Taste and adjust seasoning now. The rillettes should taste fully seasoned while warm. They’ll taste slightly less salty when cold (fat mutes salt perception), so if they taste perfectly seasoned warm, add a tiny pinch more salt. Adjust pepper. Add nutmeg if using. A small splash of Cognac or Armagnac stirred in at this point is a traditional finishing touch that adds subtle depth.
Mix the shredded meat and fat together thoroughly. The ratio should be visibly meaty with plenty of rendered fat coating and suspending the fibers. If your rillettes look dry (not enough visible fat), your belly-to-shoulder ratio was probably too lean. You can fix this by melting additional lard and folding it in.
Potting and Storage
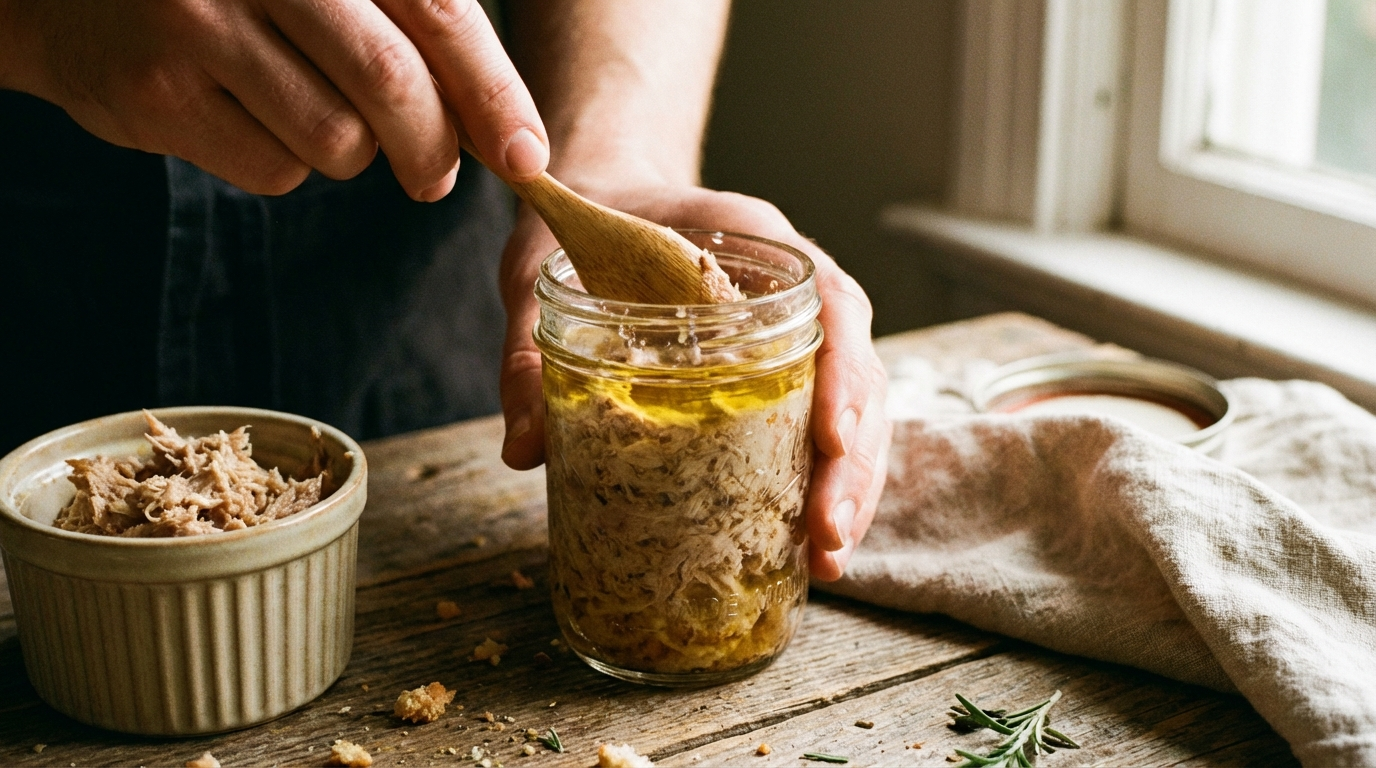
While the rillettes are still warm and fluid, pack them into clean glass jars, ceramic crocks, or ramekins. Press down firmly with the back of a spoon to eliminate air pockets. Air is the enemy of preservation — any trapped pockets can harbor bacteria and cause the rillettes to spoil prematurely.
Fill each container to within half an inch of the rim. As the rillettes cool, the fat will rise to the surface and form a natural seal. If the fat layer doesn’t fully cover the meat surface, melt additional lard and pour a thin layer (about a quarter inch) over the top. This fat cap is what allows rillettes to keep for weeks — it creates an anaerobic barrier that prevents oxidation and bacterial growth.
Storage times:
- Refrigerator, sealed with fat cap: 3 to 4 weeks
- Refrigerator, fat cap broken: 5 to 7 days
- Freezer: Up to 3 months (thaw in refrigerator overnight)
Let the rillettes cool to room temperature before refrigerating. Cover tightly with plastic wrap, then a lid. The flavors develop and improve over the first 2 to 3 days as the seasoning melds with the fat and meat. Day 3 rillettes are noticeably better than day 1.
Serving Rillettes
Always serve rillettes at room temperature or slightly cool — never ice cold straight from the fridge. Cold fat is firm and mutes flavor. Pull the jar out 30 to 45 minutes before serving. The rillettes should be soft enough to spread easily with a butter knife but still hold their shape on a piece of bread.
Classic accompaniments:
- Bread: Crusty baguette, sliced and lightly toasted, is the traditional vehicle. Pain de campagne (country bread) also works beautifully. The bread should have enough structure to support a generous spread without collapsing.
- Cornichons: These tiny, tart French pickles are the essential counterpoint to the richness of rillettes. Their acidity cuts through the fat and resets your palate between bites.
- Whole-grain mustard: A small dish of Dijon or Meaux mustard alongside the rillettes. The sharpness complements the pork’s sweetness.
- Radishes: Fresh, peppery radishes with a bit of flaky salt. A classic French combination with potted meats.
- White wine: A chilled Vouvray, Muscadet, or Chenin Blanc from the Loire Valley mirrors the wine that went into the rillettes and has enough acidity to cut through the fat.
On a charcuterie board, place the rillettes in their crock or transfer to a small bowl. Provide a dedicated spreading knife. Position them near the bread and cornichons so guests intuitively make the connection. Rillettes pair especially well with harder cured meats like salami and saucisson sec — the contrast between the soft spread and the firm sliced meats gives the board textural variety.
Variations Worth Trying
Once you’ve mastered the classic pork version, the technique adapts to other proteins with minimal changes.
Duck rillettes: Use duck legs (confit or raw) in place of the pork shoulder, and duck fat in place of the belly. Cook at the same low temperature for 3 to 4 hours. Duck rillettes are richer and more intensely flavored than pork — a little goes a long way. They’re traditional in the Sarthe region of France.
Rabbit rillettes: A whole rabbit, cut into pieces, slow-cooked with additional pork back fat (rabbit is too lean on its own). The result is delicate, slightly gamey, and refined. Add a splash of white wine and fresh tarragon.
Smoked rillettes: Use smoked pork belly or add a light cold smoke to the finished product. This variation is popular in Brittany and adds a subtle smokiness that works exceptionally well with dark bread and sharp mustard.
Rillettes with added fat back: If you want even richer rillettes, replace some of the shoulder with pork back fat. The finished product will be more luscious but with less textured meat. This style is closer to rillons (larger pieces of pork belly cooked in fat) rather than traditional rillettes.
Common Mistakes and How to Fix Them
Cooking too hot: The most common error. If you see vigorous bubbling at any point, your heat is too high. High heat renders fat too quickly, leaving the meat dry and stringy rather than silky and meltingly tender. If the bottom of your pot is browning aggressively, add a splash of water and reduce heat immediately.
Under-seasoning: Rillettes need enough salt to taste well-seasoned through the fat. If your rillettes taste bland when cold, they were under-salted. Fat dampens salt perception by about 15-20%, so season a bit more assertively than you think necessary while the mixture is warm.
Too smooth a texture: If you shredded too aggressively or (worse) used a food processor, the rillettes will have a pâté-like consistency. You can partially fix this by folding in some hand-shredded cooked pork, but prevention is better — always shred by hand with two forks, and stop when you can still see distinct fibers.
Not enough fat: If your rillettes are dry and crumbly instead of spreadable, the pork belly proportion was too low or the belly didn’t have enough fat. Fix it by melting lard and folding it into the shredded meat until the texture is smooth and spreadable. Next time, use fattier belly or increase the belly-to-shoulder ratio.
Spoilage at the surface: If mold or off-smells develop within the first week, the fat cap wasn’t thick enough or air was trapped underneath it. Always press out air pockets when potting, and ensure a complete, unbroken fat layer covers the surface. If only the very top layer has turned, scrape it off; the rillettes underneath the fat cap are usually fine.
Frequently Asked Questions
How long do homemade rillettes last?
Properly sealed with a fat cap in the refrigerator, rillettes keep 3 to 4 weeks. Once the fat cap is broken, consume within 5 to 7 days. They also freeze well for up to 3 months.
What is the difference between rillettes and pâté?
Pâté is ground to a smooth paste and baked in a mold. Rillettes are slow-cooked until fall-apart tender, then shredded by hand and mixed with rendered fat. Rillettes have a coarser, more rustic texture and a purer pork flavor since no eggs, cream, or liver are typically added.
Can I make rillettes without pork belly?
You can, but you will need to add another fat source. Substitute the belly with an equal weight of pork back fat cut into cubes, or add rendered lard to the pot. Without adequate fat, the rillettes will be dry and crumbly rather than spreadable.
Do rillettes need curing salt?
No. Unlike salami or bresaola, rillettes are fully cooked (not raw-cured), so curing salt (sodium nitrite) is not necessary. The combination of thorough cooking, salt, and the anaerobic fat seal provides the preservation.
What bread is best for serving rillettes?
A crusty baguette, sliced and lightly toasted, is the classic French choice. Pain de campagne (country bread) and sourdough also work well. Avoid soft sandwich bread — you need structure to support the spread without collapsing.
More Charcuterie Guides
What Is Pink Curing Salt? Sodium Nitrite Explained for Home Charcuterie
Pink curing salt is the most essential — and most misunderstood — ingredient in meat curing. This guide explains what it is, why it's pink, how sodium nitrite prevents botulism, proper usage rates, and whether you can cure meat without it.
10 min readHow Long Does Charcuterie Last? Storage Guide for Cured Meats & Cheese
Understanding proper charcuterie storage ensures you enjoy it at peak quality while avoiding food safety risks.
10 min read