How to Make Corned Beef at Home: The Complete Brining & Cooking Guide
Here’s the thing about corned beef: the stuff you buy vacuum-sealed at the grocery store is serviceable. It gets the job done on St. Patrick’s Day. But it’s also oversalted, mushy in places, and tastes like every other package on the shelf. Making corned beef at home fixes all of that — and it’s far simpler than most people realize.
“Corning” beef is just brining it. You’re submerging a brisket in a salt-and-spice solution for 5 to 7 days, then cooking it low and slow until it’s tender enough to shred with a fork. The process is virtually hands-off — the brine does the work while you go about your life. The reward is corned beef with balanced seasoning, better texture, and a depth of flavor that no shrink-wrapped package can match.
This guide covers every step: choosing the right brisket, building your brine from scratch, the curing process, and three cooking methods so you can pick what works best for your setup.
What Is Corned Beef, Exactly?
The name has nothing to do with corn the vegetable. “Corns” were large grains of salt — the coarse rock salt that was used to preserve meat before refrigeration existed. Corned beef is salt-cured beef, specifically beef brisket that’s been cured in a seasoned brine. It sits squarely in the charcuterie tradition of preserving meat through salt — the same fundamental technique behind bresaola, pancetta, and countless other cured meats.
The difference is that corned beef is wet-cured (brined) rather than dry-cured, and it’s cooked before eating rather than air-dried. If you’re familiar with the concepts in our dry cure vs. wet brine guide, you already understand the mechanics at play here.
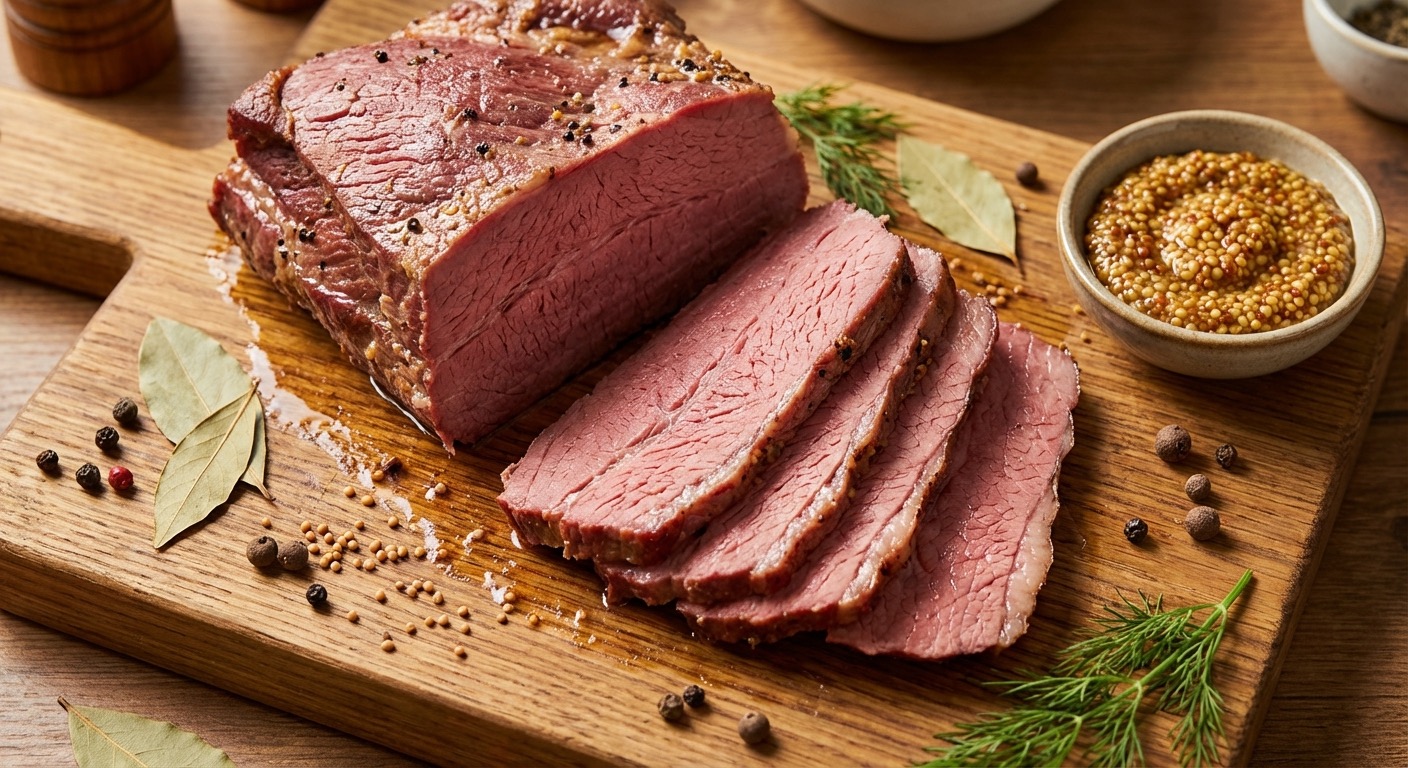
Modern corned beef also uses pink curing salt (sodium nitrite) to maintain that characteristic rosy-pink color and add a distinctive cured flavor. Without it, your corned beef will look gray after cooking — still perfectly safe and tasty, just not what most people expect visually.
Choosing Your Brisket
Brisket is the traditional cut for corned beef, and there’s a reason for that. The brisket’s generous connective tissue breaks down during the long cook, turning tough muscle fibers into silky, fork-tender meat. But not all briskets are created equal, and the cut you choose matters significantly.
Flat vs. Point
A whole brisket (called a “packer”) has two muscles: the flat and the point.
- The flat: Leaner, more uniform in thickness, slices beautifully. This is what most commercial corned beef is made from, and it’s the cut I recommend for beginners. A typical flat weighs 4–7 pounds.
- The point: Fattier, more marbled, more irregular in shape. Makes incredibly flavorful corned beef but doesn’t slice as cleanly. Better for shredding or hash.
- Whole packer: Both muscles together, 12–18 pounds. Only go this route if you’re feeding a crowd or want to make a massive batch.
For your first batch, grab a brisket flat in the 4–6 pound range. It’ll cure evenly, cook predictably, and slice into those perfect rectangular pieces you’re picturing.
What to Look For
- Even thickness: A flat that tapers dramatically from one end to the other will cure unevenly. Look for consistent thickness across the length.
- Good fat cap: A quarter-inch of fat on one side is ideal. It bastes the meat during cooking. Too thick and it won’t render fully; too thin and the meat dries out.
- Deep red color: Fresh beef should be deep cherry-red. Avoid anything brown or gray.
- Flexibility: Pick it up. A quality brisket will bend and flex. A stiff, rigid one suggests it’s been sitting too long or was previously frozen.
Quality sourcing matters here. Premium beef from suppliers like The Meatery will give you noticeably better results — more marbling, cleaner flavor, and better texture in the finished product.
Building Your Brine
The brine is where the magic happens. It’s a solution of water, salt, sugar, curing salt, and aromatic spices that penetrates the meat over several days, transforming raw brisket into corned beef.
The Base Formula
For a 4–6 pound brisket flat:
- 1 gallon cold water
- 1 cup kosher salt (Morton’s — if using Diamond Crystal, use 1½ cups due to flake size difference)
- ½ cup dark brown sugar
- 1 tablespoon pink curing salt #1 (6.25% sodium nitrite — this is Prague Powder #1, not Himalayan pink salt)
If you need a refresher on curing salts — what they are, why they matter, and how to use them safely — check our complete curing salts guide.
The Pickling Spice Blend
You can buy pre-mixed pickling spice, but making your own takes five minutes and tastes dramatically better. Toast these whole spices lightly in a dry skillet until fragrant:
- 2 tablespoons black peppercorns
- 2 tablespoons mustard seeds (yellow or brown)
- 2 tablespoons coriander seeds
- 1 tablespoon red pepper flakes
- 6 whole cloves
- 6 allspice berries
- 2 cinnamon sticks, broken into pieces
- 6 bay leaves, crumbled
- 1 tablespoon dried ginger (or a 2-inch piece of fresh, sliced)
- 1 teaspoon juniper berries (optional but excellent)
Lightly crush the toasted spices with the bottom of a heavy pan or a mortar and pestle. You want to crack them open, not grind them to powder. The goal is releasing aromatics while keeping enough structure that the spices infuse slowly over the curing period.
Making the Brine
- Dissolve the salts and sugar: Bring half the water (2 quarts) to a boil. Add the kosher salt, brown sugar, and pink curing salt. Stir until completely dissolved. This is your hot base.
- Add the spices: Stir in the crushed pickling spice blend and any aromatics (garlic, bay leaves). Let the hot brine steep for 5 minutes.
- Cool completely: Add the remaining half gallon of cold water to bring the temperature down. Then refrigerate until the brine hits 40°F or below. Never submerge meat in warm brine — it creates a food safety hazard and cooks the outer surface.
- Optional additions: 4 cloves of smashed garlic, 1 teaspoon whole caraway seeds, 1 small dried chile. These won’t overpower the classic flavor but add subtle complexity.
The Curing Process
This is the easy part. Patience does the work for you.
Setup
- Trim the brisket: Leave the fat cap intact (it protects the meat during cooking). Remove any large silverskin or hard fat deposits from the lean side.
- Choose your vessel: A food-safe container large enough to submerge the brisket completely. Options: large Cambro container, food-grade bucket, heavy-duty zip-top bag inside a baking dish (for spillage insurance), or a non-reactive pot (stainless steel or enameled).
- Submerge: Place the brisket in the vessel, pour the cold brine over it. The meat must be fully submerged. If it floats, place a plate or zip-top bag filled with water on top to keep it under.
- Refrigerate: Cover and place in the refrigerator.
Cure Time
The cure time depends on the thickness of your brisket:
- 5 days: Minimum for a thinner flat (1–1.5 inches thick). The cure will penetrate to the center but the flavor will be mild.
- 7 days: The sweet spot for most brisket flats. Deep, balanced flavor throughout.
- 10 days: Maximum. Thicker cuts or whole packers benefit from the extra time. Beyond 10 days, the texture starts to suffer — it gets overly firm and salty.
Flip the brisket once daily. This ensures even curing, especially if part of the meat is pressing against the container bottom where brine circulation is limited.
You’ll notice the brine getting darker and the meat getting firmer as the days pass. This is normal — the salt is drawing out moisture while the nitrite is working its way in, setting that characteristic pink color.
Cooking Method 1: Stovetop Braise (Classic)
This is the traditional method and produces the most classic result — tender, sliceable corned beef with a robust brothy flavor.
Steps
- Remove and rinse: Take the brisket out of the brine, discard the brine, and rinse the meat thoroughly under cold running water. This removes excess surface salt. Some people soak the meat in fresh cold water for 30 minutes to an hour to reduce saltiness further — worth doing if you used a longer cure.
- Fresh spices: Make a fresh batch of pickling spices (about half the amount you used for the brine). Don’t reuse the brine spices — they’ve given everything they’ve got.
- Into the pot: Place the brisket in a large Dutch oven or stockpot. Add the fresh spices, 1 quartered onion, 3 smashed garlic cloves. Add enough cold water to cover the meat by 1 inch.
- Bring to a boil, then reduce: Bring to a rolling boil over high heat. Skim any foam that rises. Reduce to a bare simmer — you want lazy bubbles, not a vigorous boil. Boiling makes the meat tough and stringy.
- Cook low and slow: Simmer for 2.5 to 3.5 hours (roughly 50 minutes per pound). The meat is done when a fork slides in with almost no resistance.
- Add vegetables (optional): If making the classic corned beef and cabbage, add chunked potatoes and carrots 45 minutes before the meat is done. Add cabbage wedges 15–20 minutes before done. They cook in the corned beef broth and absorb all that flavor.
- Rest: Remove the brisket and let it rest for 15–20 minutes before slicing. This is critical — cut too soon and the juices pour out, leaving you with dry meat.
Slicing
Always slice against the grain. Find the direction of the muscle fibers (they run lengthwise on a flat) and slice perpendicular to them, about ¼-inch thick. Slicing with the grain gives you stringy, chewy pieces. Against the grain gives you tender, melt-in-your-mouth slices.
Cooking Method 2: Oven Braise (Hands-Off)
Same principle as the stovetop, but the oven’s even heat means you don’t need to babysit the simmer.
- Preheat oven to 300°F.
- Rinse the brisket, place in a roasting pan or Dutch oven with fresh spices and aromatics.
- Add water or beef stock to come two-thirds up the side of the meat. No need to fully submerge.
- Cover tightly with a lid or foil.
- Braise for 3 to 4 hours, or until fork-tender.
- Rest and slice against the grain.
The oven method produces slightly more concentrated flavor because less liquid is used. The top of the meat, exposed above the liquid line, develops a light crust that adds textural contrast.
Cooking Method 3: Slow Cooker (Set It and Forget It)
The most hands-off approach. Results are excellent, though the texture is slightly softer than the stovetop or oven methods.
- Rinse the brisket and place it fat-side up in the slow cooker.
- Add fresh pickling spices, quartered onion, smashed garlic.
- Add enough water or stock to come halfway up the meat.
- Cook on low for 8–10 hours or high for 5–6 hours.
- If adding vegetables, add root vegetables 3 hours before done (on low) and cabbage 1.5 hours before done.
- Rest 15 minutes before slicing against the grain.
Turning Corned Beef into Pastrami
Here’s a secret that will change your life: pastrami is just corned beef that’s been coated in a spice rub and smoked. If you’ve made it this far, you’re one step away from homemade pastrami.
- After curing: Remove the brisket from the brine, rinse thoroughly, and pat dry.
- Apply the rub: Coat generously with coarsely ground black pepper and ground coriander (roughly 2:1 ratio). Some people add garlic powder, paprika, or mustard powder.
- Smoke: Smoke at 225–250°F using hardwood (oak, hickory, or cherry work beautifully) until internal temperature reaches 165°F, about 5–7 hours depending on size. If you’re into smoking, check our smoking wood guide for wood pairing recommendations.
- Steam to finish: Wrap in foil or butcher paper and continue cooking (oven at 275°F or back in the smoker) until internal temp hits 203°F and a probe slides in like butter.
- Rest and slice thin: Let it rest for at least 30 minutes, then slice thin against the grain. Stack it high on rye bread with spicy mustard.
This is the same fundamental process used in New York’s legendary delis. The quality of your homemade version — where you control the brisket quality, the spice blend, and the smoke — can absolutely rival or exceed what you get at a deli counter.
Storage and Leftovers
Uncooked (In Brine)
The brisket will keep in its brine in the refrigerator for up to 2 weeks. This makes it easy to start the cure well in advance and cook when you’re ready.
Cooked
- Refrigerator: Sliced or whole, stored in cooking liquid, up to 5 days.
- Freezer: Wrap tightly in plastic and foil. Keeps well for 2–3 months. Thaw overnight in the refrigerator. Freezing the cooking liquid separately gives you an incredible base for soups.
Leftover Ideas
- Corned beef hash: Diced corned beef, crispy potatoes, onions, fried egg on top. The ultimate breakfast.
- Reuben sandwiches: Sliced corned beef, Swiss cheese, sauerkraut, Russian dressing, grilled on rye. Non-negotiable.
- Corned beef fried rice: Diced corned beef stir-fried with day-old rice, eggs, scallions, and a splash of soy sauce.
- Soup: Simmer leftover corned beef with cabbage, potatoes, and carrots in the reserved cooking liquid for a hearty one-pot meal.
Common Mistakes and How to Avoid Them
- Using table salt instead of kosher salt: Table salt is much finer and denser. If you substitute 1:1, your corned beef will be inedibly salty. Stick with kosher salt and the measurements above.
- Not cooling the brine: Warm brine partially cooks the surface and creates a bacterial playground. Cool completely before submerging the meat.
- Skipping the curing salt: Your corned beef will taste fine without it, but it’ll look gray and lack that distinctive “cured” flavor. Prague Powder #1 is easy to find online.
- Boiling instead of simmering: A rolling boil tightens the muscle fibers and makes the meat tough and stringy. Keep it at a gentle simmer — barely bubbling.
- Not resting before slicing: 15–20 minutes minimum. The fibers need time to relax and reabsorb juices.
- Slicing with the grain: This is the single most common mistake. Find the grain, then slice across it. The difference is night and day.
- Under-curing: If you only brine for 2–3 days, the center of the brisket will taste like plain boiled beef. Five days minimum; seven is better.
Frequently Asked Questions
Frequently Asked Questions
How long does it take to make corned beef at home?
The active hands-on time is about 30 minutes total — making the brine and setting up the cure. The brisket then cures in the refrigerator for 5-7 days (no effort required, just flip it daily). Cooking takes 2.5-4 hours depending on your method. Plan for about a week from start to finish.
Can I make corned beef without pink curing salt?
Yes. The meat will be safe to eat and will taste good, but it will turn gray when cooked instead of the classic pink color, and it will lack the distinctive "cured" flavor that makes corned beef taste different from regular braised brisket. Prague Powder #1 (sodium nitrite) is the standard curing salt for this application.
What cut of beef is best for corned beef?
Brisket flat is the traditional and recommended cut. It has enough connective tissue to become tender during cooking, slices cleanly, and cures evenly due to its uniform thickness. The brisket point works too but is fattier and better for shredding than slicing. Beef round can be used as a leaner alternative but won't be as tender.
Why is my corned beef tough?
The most common cause is cooking at too high a temperature. Corned beef needs to simmer gently — aggressive boiling tightens the muscle fibers and makes the meat tough and stringy. Other causes include not cooking long enough (the connective tissue needs time to break down) and slicing with the grain instead of against it.
Can I reuse the brine for another batch?
No. The brine has absorbed blood, proteins, and bacteria from the first brisket. Its salt concentration has also changed as moisture was exchanged with the meat. Always make fresh brine for each batch.
Is homemade corned beef healthier than store-bought?
It can be. You control exactly how much salt goes in, you can reduce the sugar, and you skip the preservatives and additives that commercial producers often use. You also control the quality of the beef itself. That said, corned beef is inherently a salt-cured product — it's not a low-sodium food no matter how you make it.
More Charcuterie Guides
What Is Pink Curing Salt? Sodium Nitrite Explained for Home Charcuterie
Pink curing salt is the most essential — and most misunderstood — ingredient in meat curing. This guide explains what it is, why it's pink, how sodium nitrite prevents botulism, proper usage rates, and whether you can cure meat without it.
10 min readHow Long Does Charcuterie Last? Storage Guide for Cured Meats & Cheese
Understanding proper charcuterie storage ensures you enjoy it at peak quality while avoiding food safety risks.
10 min read