How to Make Beef Bresaola: The Complete Italian Curing Guide
In the mountain valleys of Lombardy, Italian families have been making bresaola for centuries. Long before refrigeration, before vacuum sealers, before anyone understood the science of water activity and pH levels, they knew how to transform a simple cut of beef into something extraordinary. Lean beef, salt, aromatics, cold Alpine air, and time — that's all it takes.
I've been curing meats for over 25 years, and bresaola holds a special place in my heart. Unlike fattier cured meats like coppa or lonza, bresaola is lean — almost austere. When sliced paper-thin, it has a delicate, slightly sweet flavor with hints of juniper and warm spices. Draped over arugula with shaved Parmigiano and a drizzle of good olive oil, there's nothing better.
Making bresaola at home is absolutely achievable if you understand the process and respect the safety requirements. This isn't a weekend project — you're looking at 2-3 weeks of curing and 4-8 weeks of drying. But every day that passes, something magical is happening inside that chamber. Let me walk you through it.
Understanding Bresaola: What Makes It Special
Bresaola (pronounced breh-ZAH-oh-lah) is a whole-muscle cured beef product from the Valtellina valley in northern Italy. Unlike salami, which is ground and fermented, bresaola is a whole piece of beef that's cured with salt and spices, then air-dried until it loses about 30-40% of its original weight.
The result is deeply ruby-red, incredibly lean, and remarkably tender despite having no fat marbling. The curing process denatures the proteins in a way that creates tenderness without cooking. Think of it as beef's answer to prosciutto — though bresaola is actually leaner and more delicate in flavor.
Traditional bresaola has Protected Geographical Indication (PGI) status in Europe, meaning authentic Bresaola della Valtellina must be made in that specific region. But the technique translates beautifully to home production, and what you make in your own curing chamber can rival anything imported from Italy.
Selecting the Right Cut
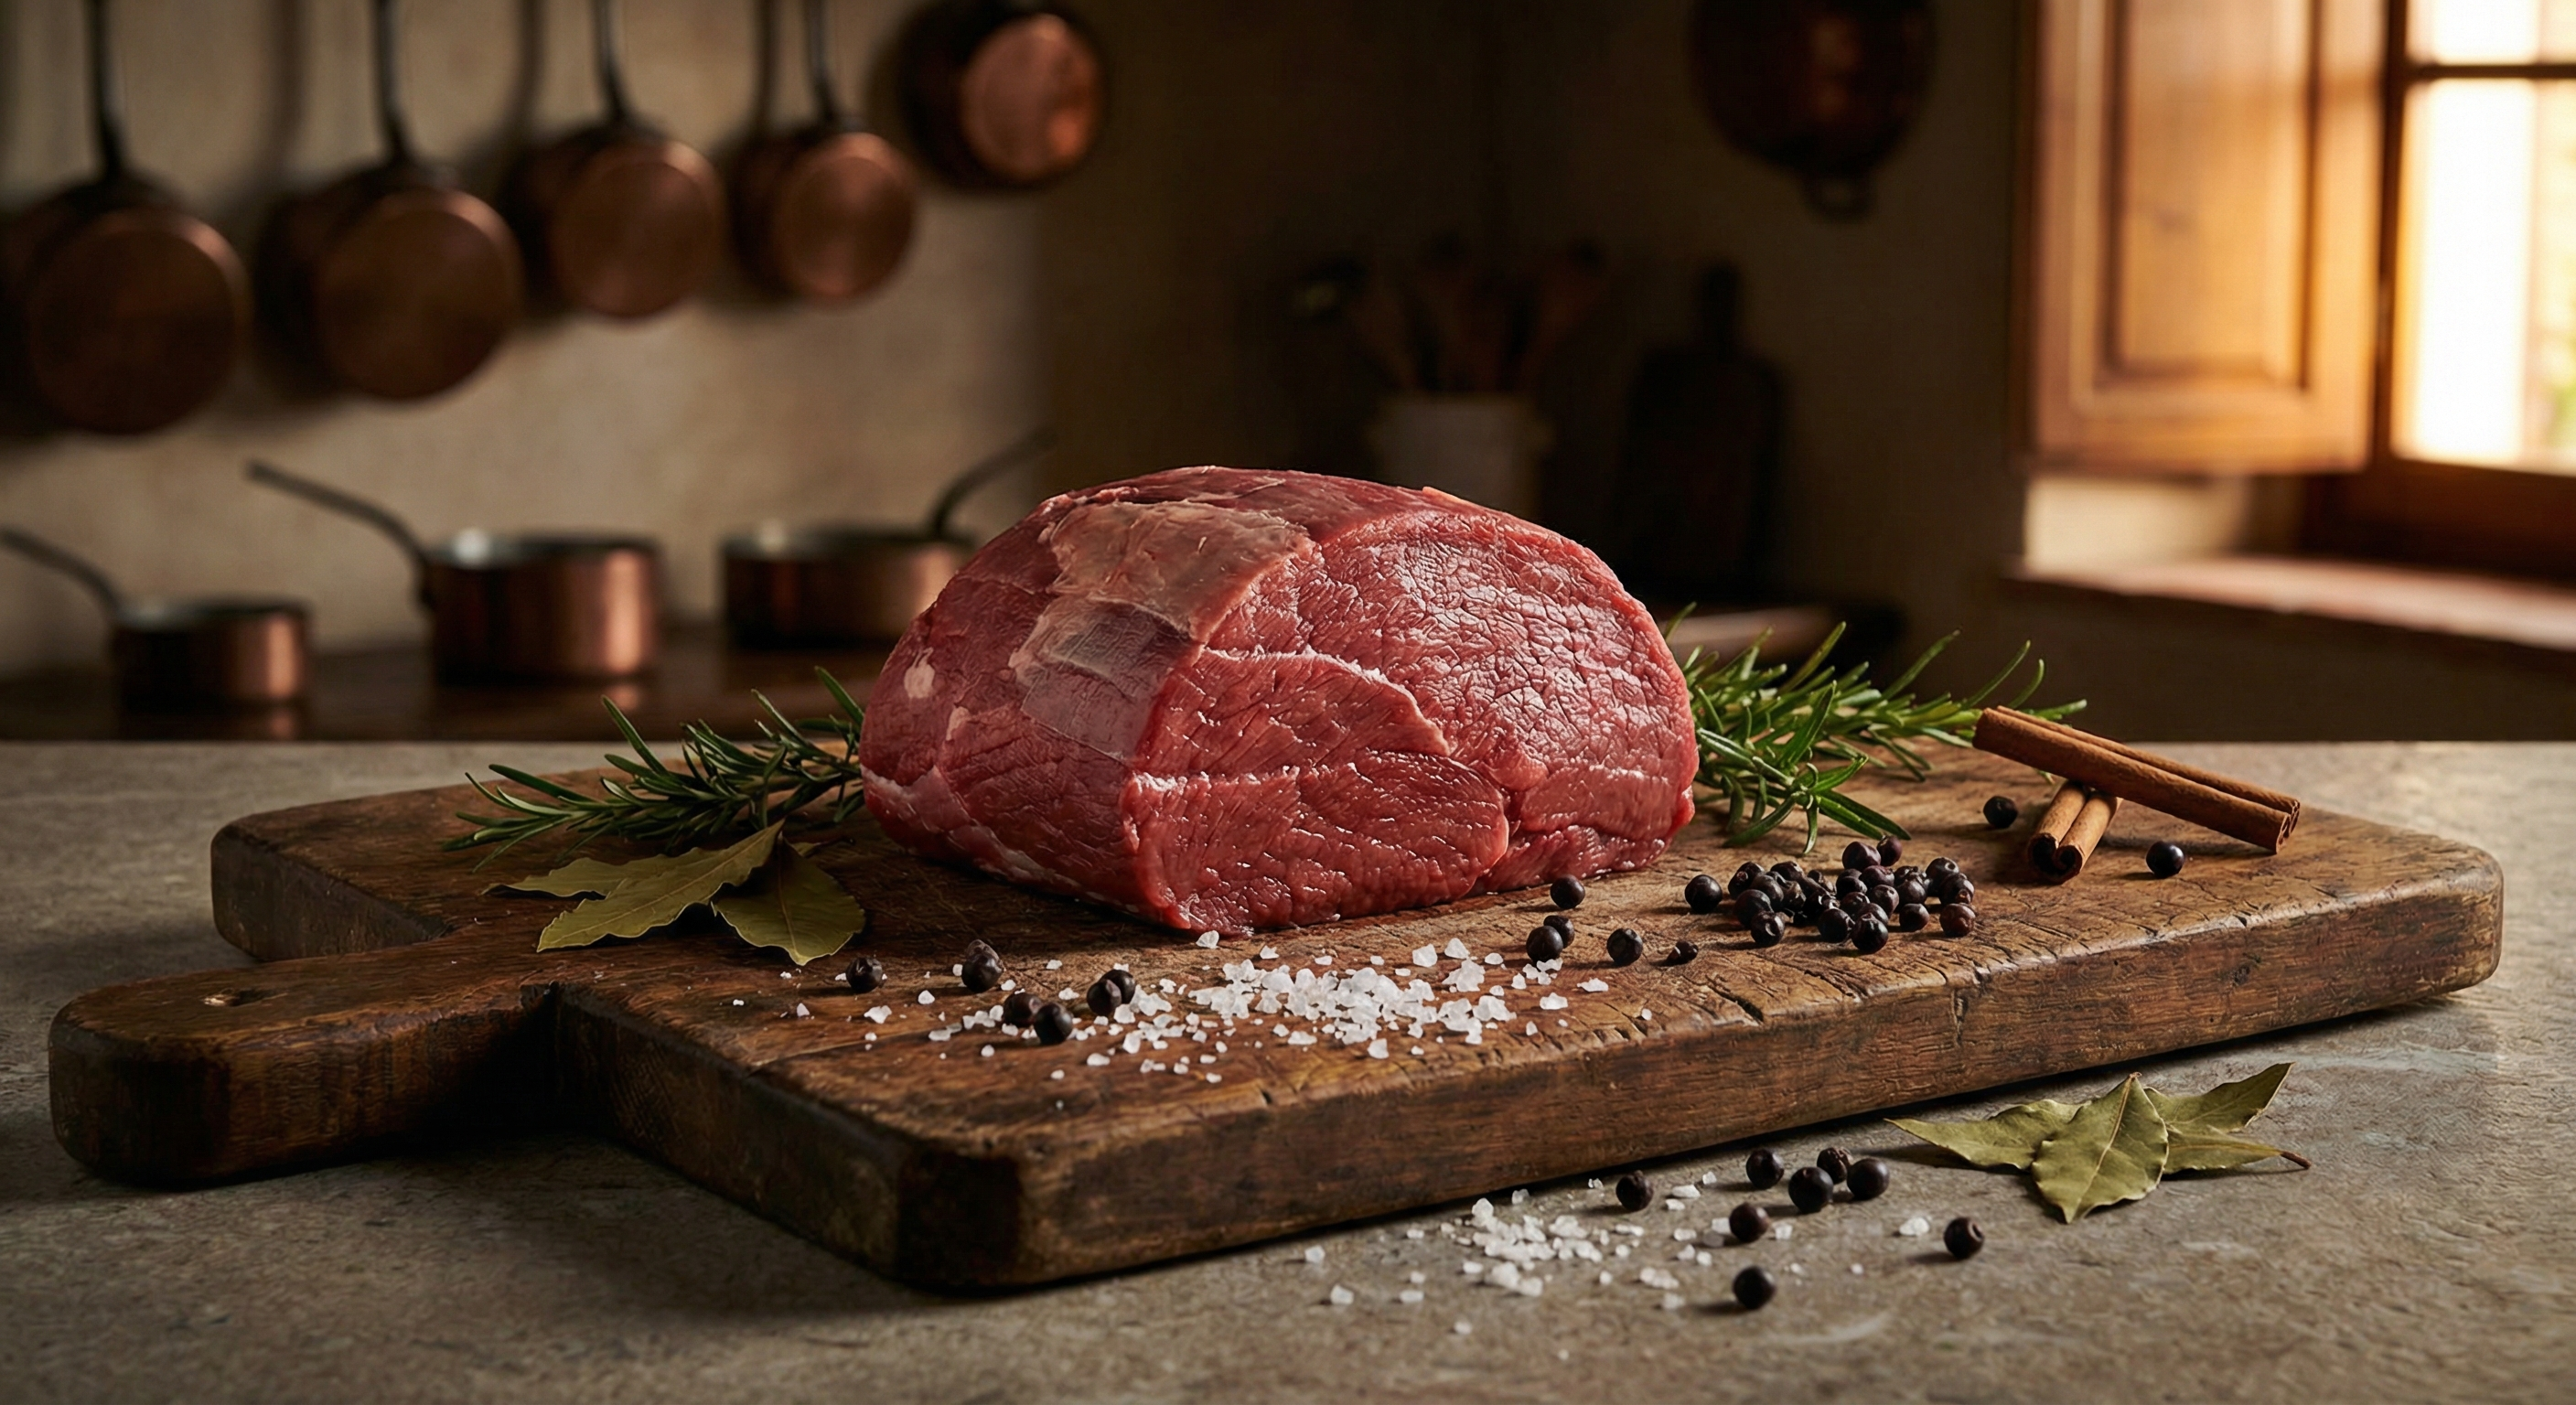
Choosing the correct cut is critical. Bresaola is traditionally made from the eye of round — a cylindrical, uniformly shaped muscle from the rear leg of the beef. This cut is ideal because:
- Uniform shape: The cylindrical form ensures even curing and drying
- Very lean: Minimal fat means faster, more predictable drying
- Single muscle: No seams or connective tissue that could trap moisture
- Good size: Typically 3-5 pounds, perfect for home curing
Top round also works well and is sometimes preferred for larger batches. It's slightly less uniform but has excellent flavor and texture when cured. You can find quality beef eye of round or top round at The Meatery's Angus beef collection.
Avoid cuts with significant fat pockets or multiple muscles joined together. Fat doesn't cure properly in the same timeframe as lean muscle, and seams between muscles can harbor bacteria. You want a single, clean, torpedo-shaped piece of beef.
Quality Matters
Since bresaola is served raw (cured, but not cooked), quality is paramount. Look for:
- Bright, cherry-red color with no gray or brown spots
- Fresh smell — no off odors
- USDA Choice or higher for best texture
- Well-trimmed with no silver skin or surface fat
The Cure: Ingredients and Ratios
The cure is where bresaola's flavor profile is built. A traditional cure uses salt as the primary preservative, with curing salt (sodium nitrite) for safety and color, plus aromatics for that distinctive Italian character.
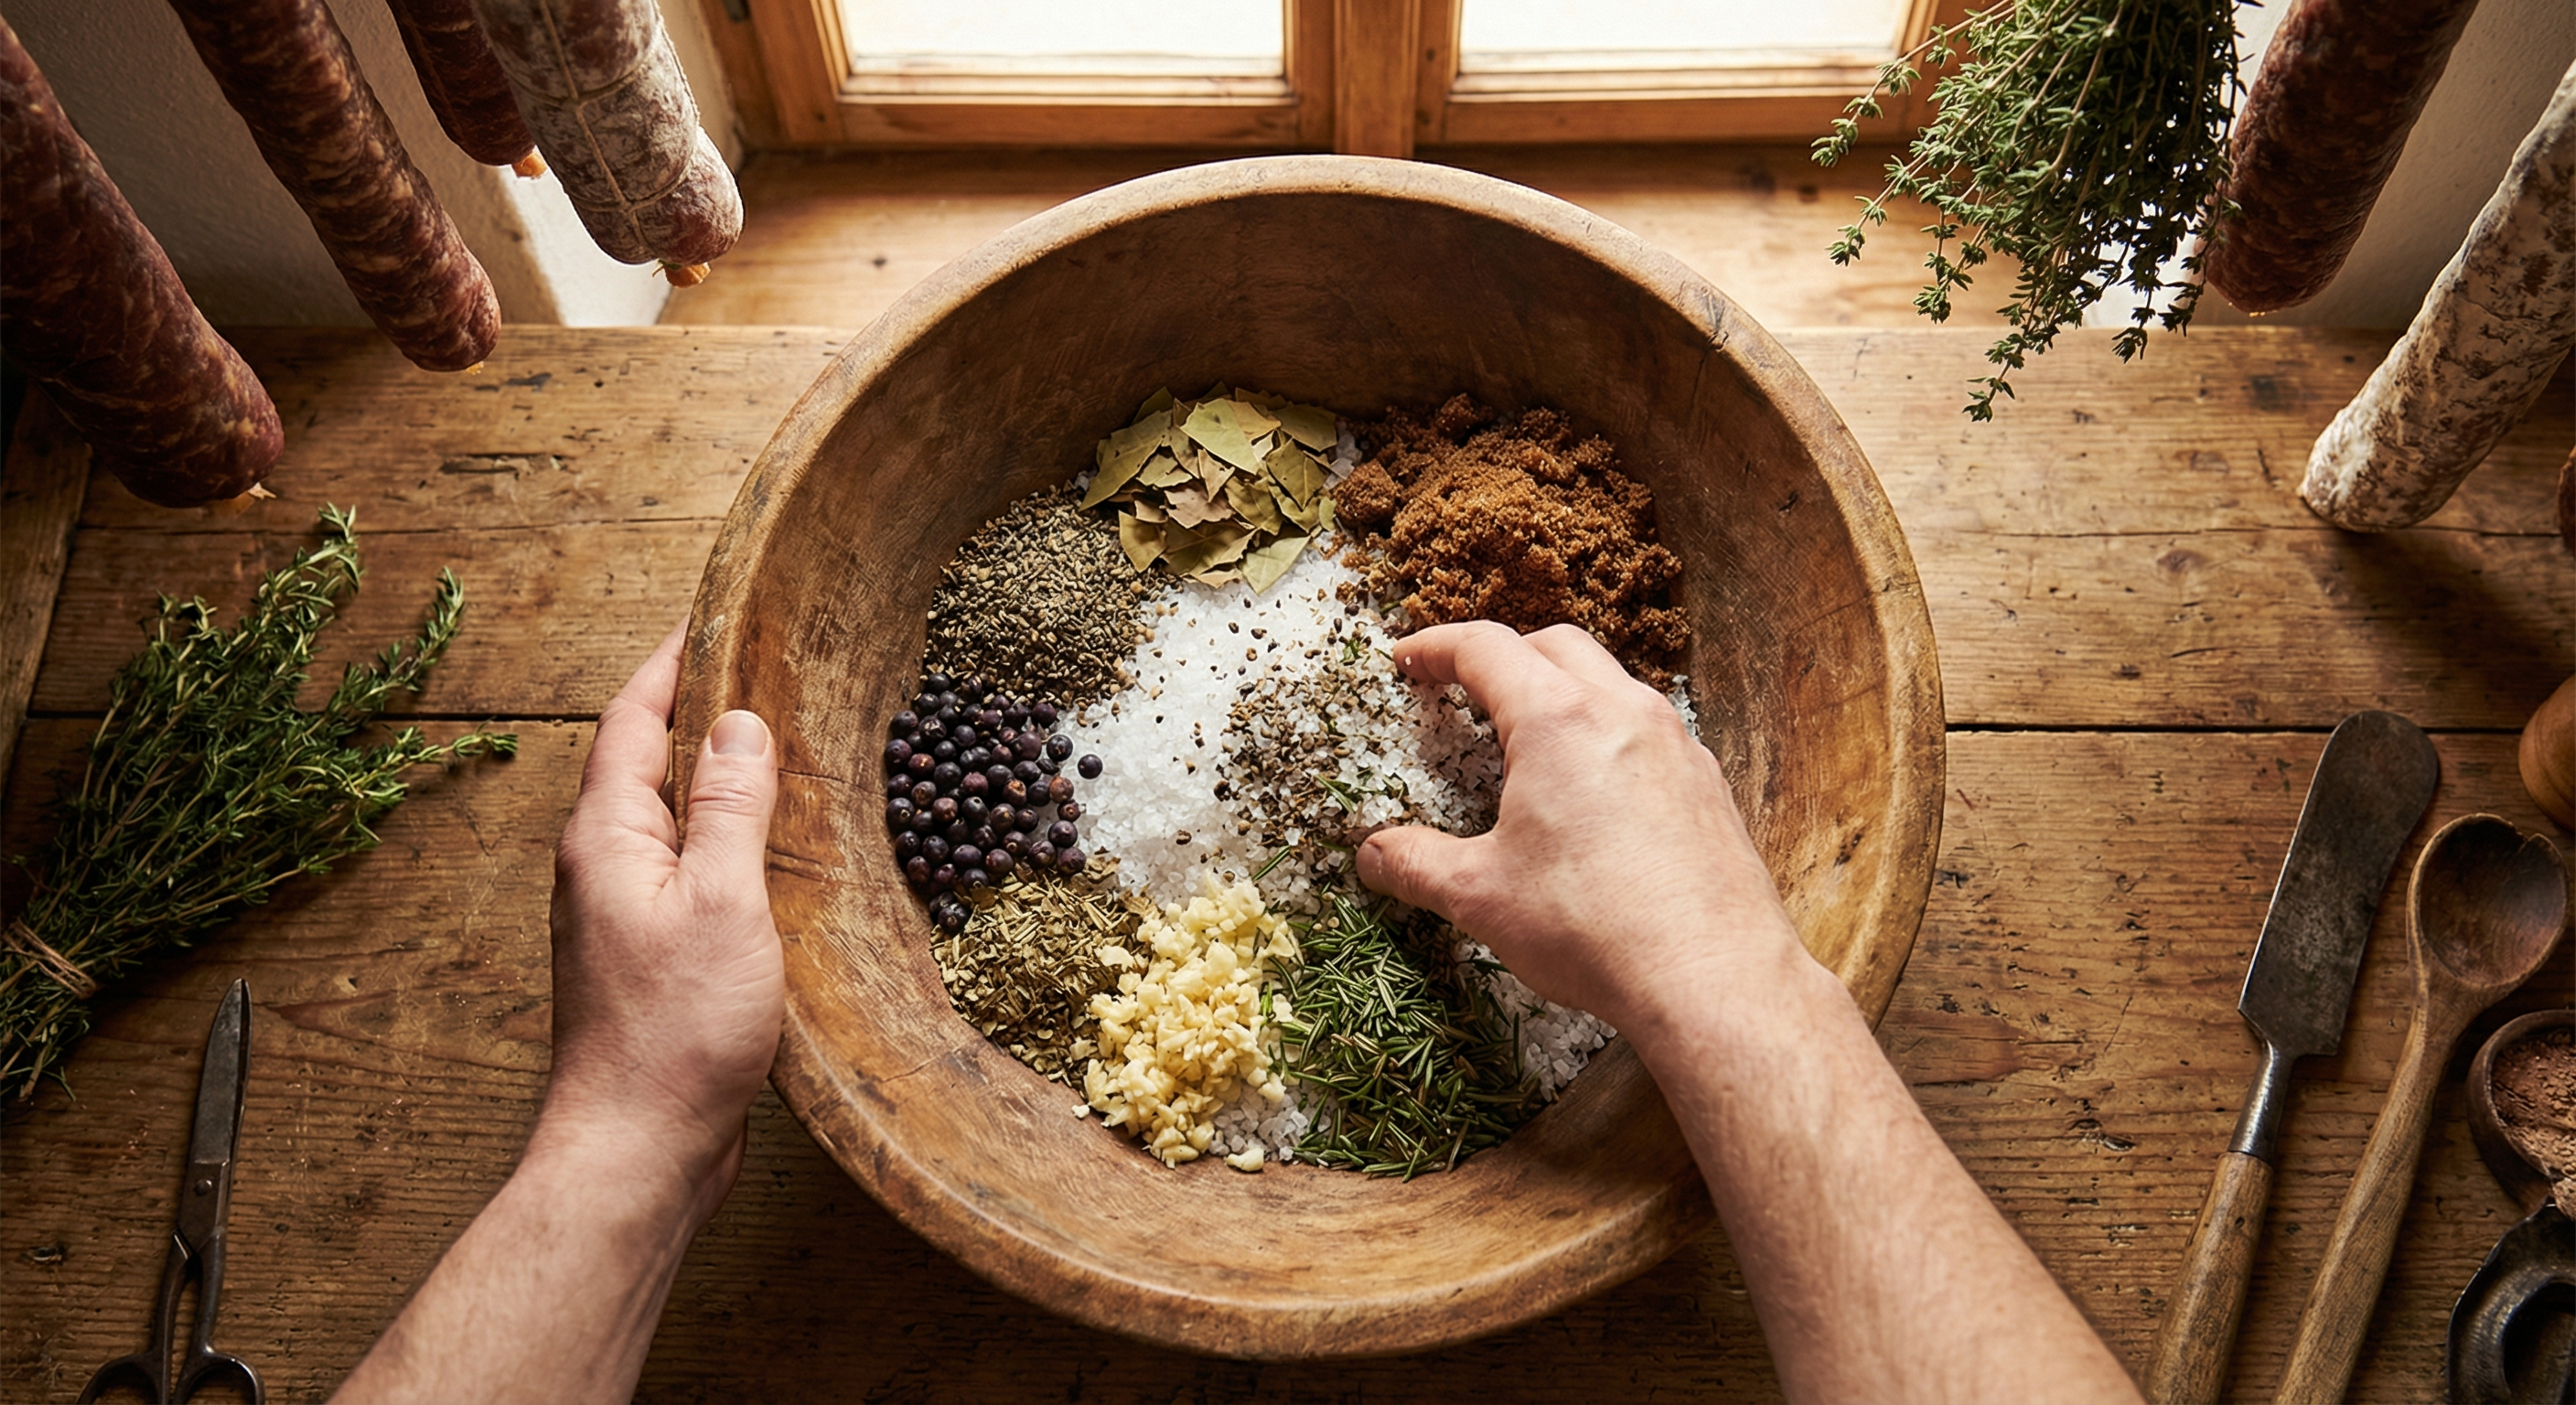
Essential Cure Formula (Per 5 lbs / 2.3 kg of Beef)
- Kosher salt: 100g (about 6 tablespoons)
- Curing salt #2 (Prague Powder #2): 12g (about 2 teaspoons)
- Brown sugar: 30g (2 tablespoons)
- Coarsely ground black pepper: 15g (about 3 tablespoons)
- Juniper berries, crushed: 10g (about 1.5 tablespoons)
- Dried bay leaves, crumbled: 4-5 leaves
- Fresh rosemary, minced: 1 tablespoon
- Fresh thyme, minced: 1 tablespoon
- Garlic, minced: 4 cloves
- Ground cinnamon: 1/2 teaspoon
- Ground cloves: 1/4 teaspoon
- Ground nutmeg: 1/4 teaspoon
- Red wine (dry): 1/2 cup
Why Curing Salt #2?
This is non-negotiable for safety. Curing salt #2 contains both sodium nitrite and sodium nitrate. The nitrite provides immediate antimicrobial protection, while the nitrate slowly converts to nitrite over the long drying period, providing ongoing protection. For a product that takes 6-10 weeks to complete, you need both.
Never substitute regular salt or omit the curing salt. Without nitrites/nitrates, you cannot safely make bresaola at home. These compounds prevent the growth of Clostridium botulinum and other dangerous pathogens.
The Curing Process: Step by Step
Day 1: Prepare and Apply the Cure
- Trim the beef: Remove any external fat, silver skin, and connective tissue. The surface should be clean, lean meat only. Weigh the trimmed beef and record this — you'll need it later to track weight loss.
- Mix the cure: Combine all dry ingredients in a bowl. Add the wine to make a thick paste. The wine helps the cure adhere and adds subtle flavor complexity.
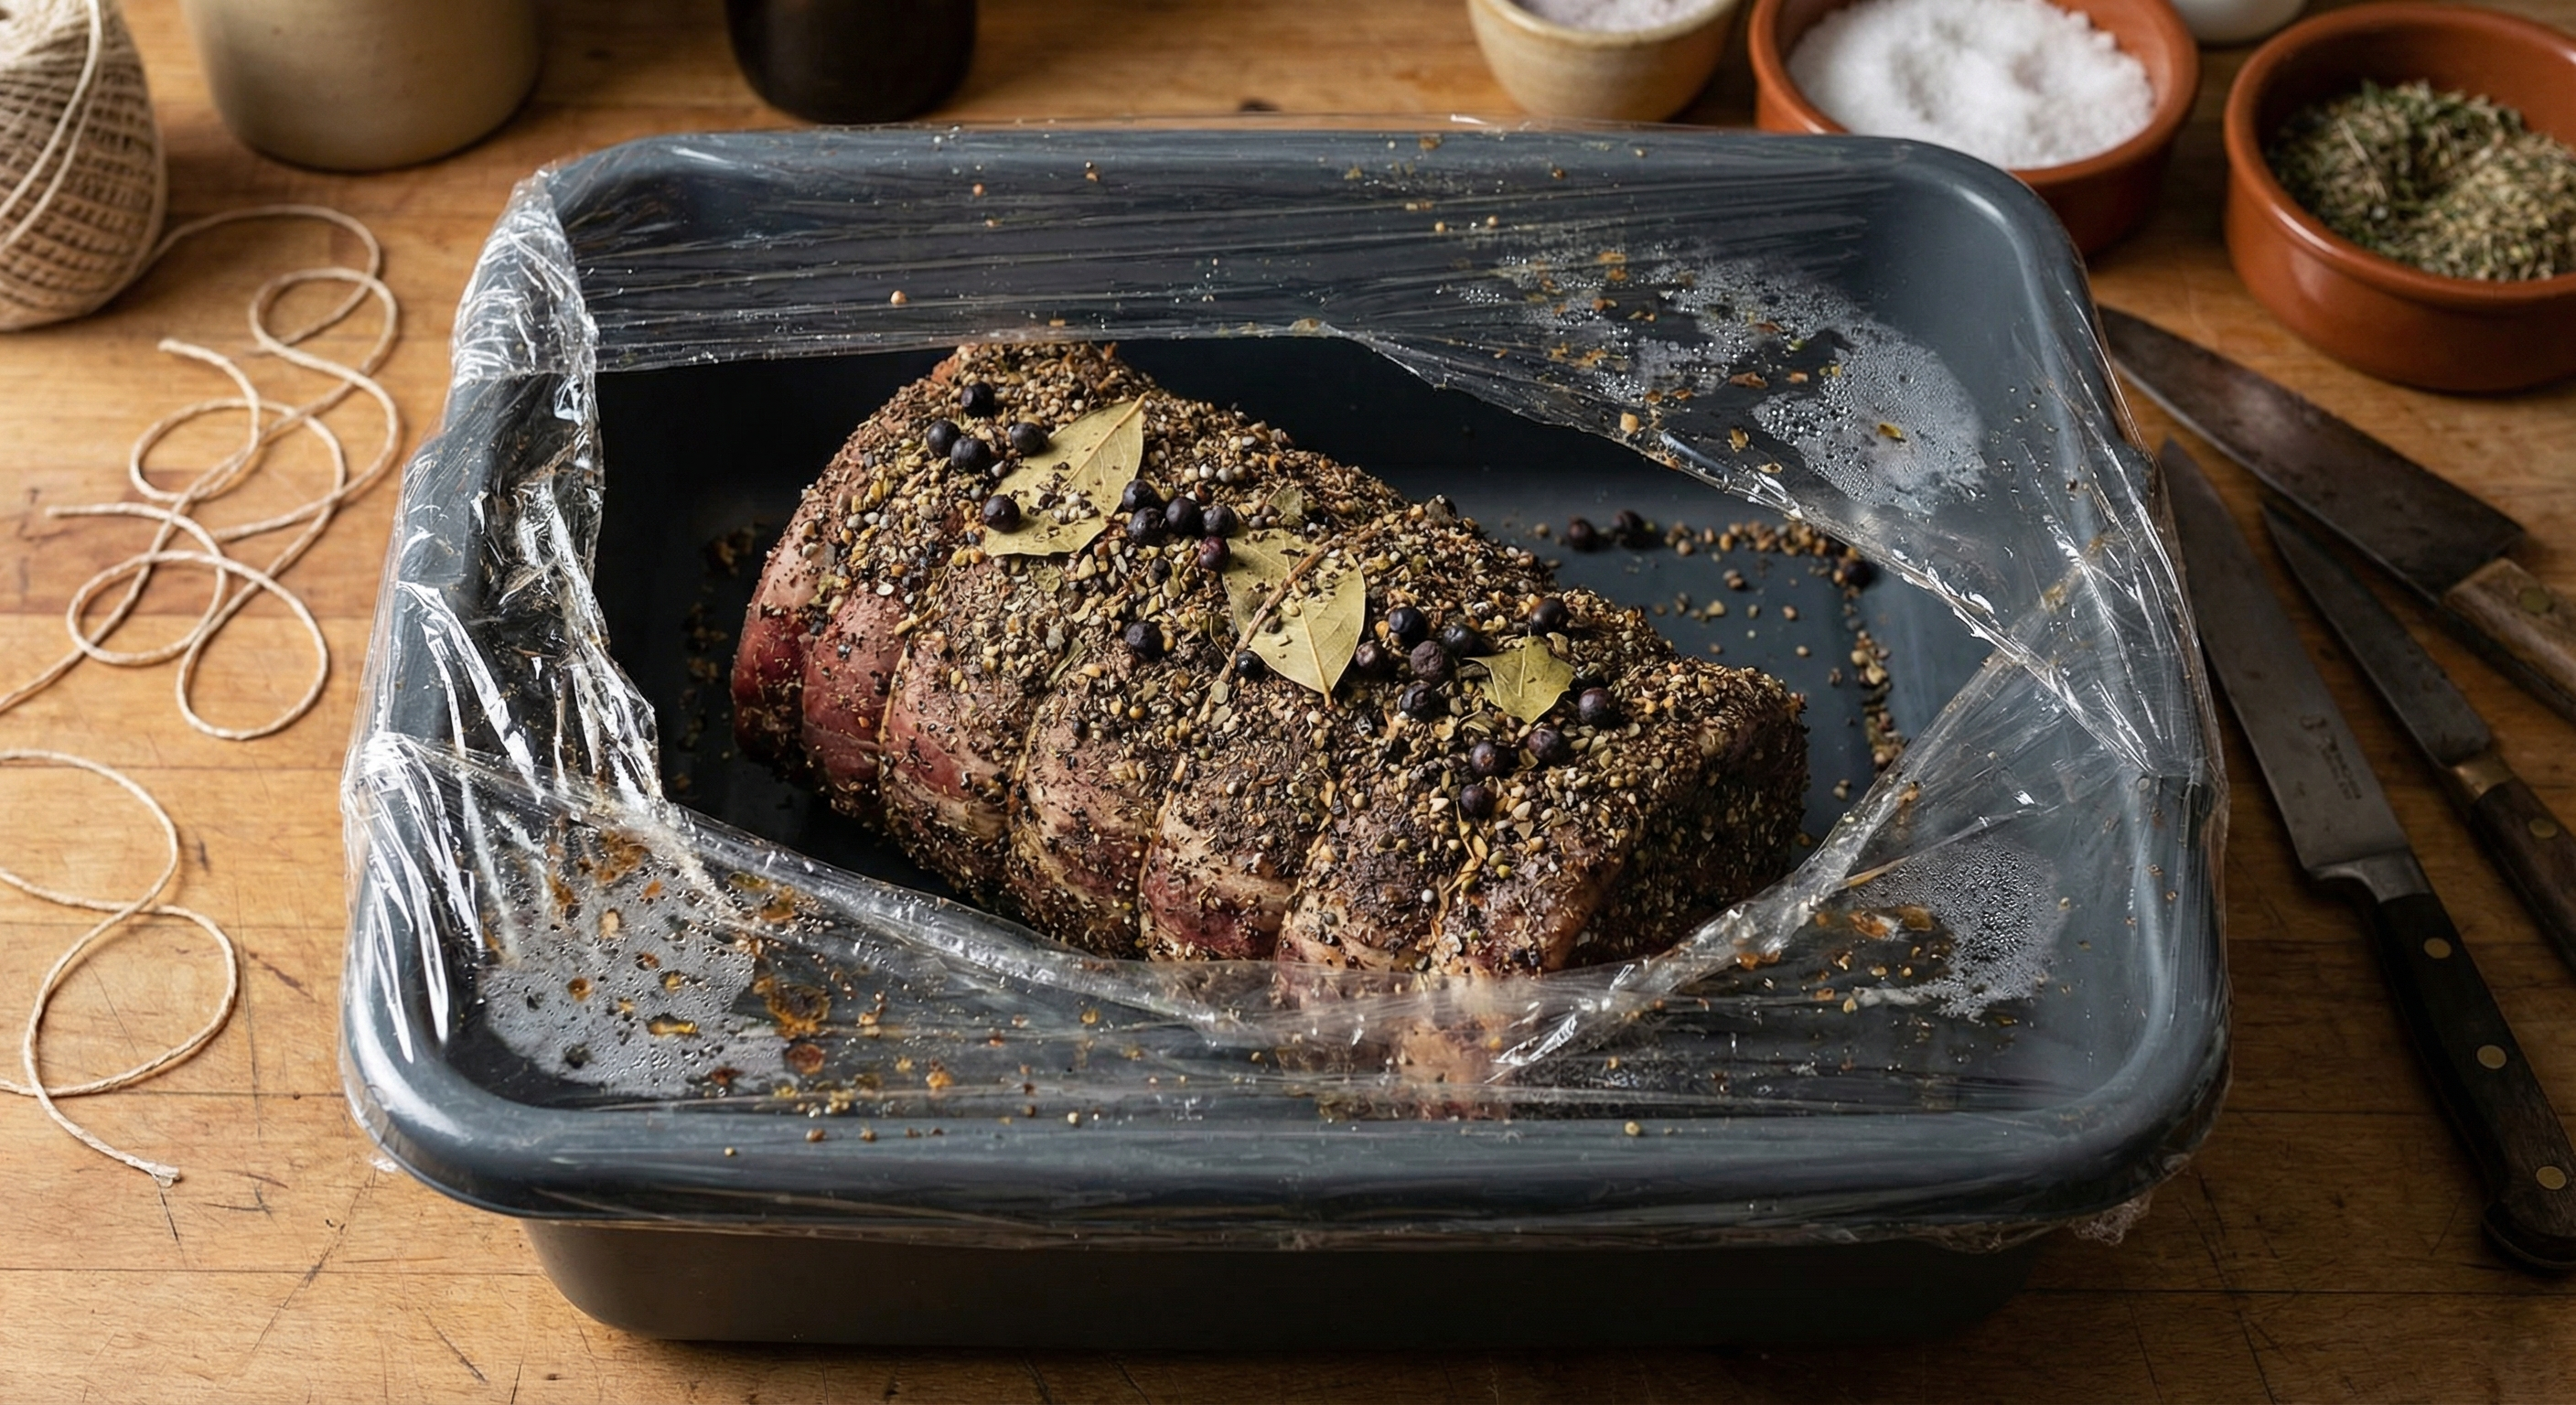
- Apply the cure: Wearing gloves, rub the cure mixture thoroughly over every surface of the beef. Get into every crevice. The cure should form a thick coating.
- Bag and refrigerate: Place the cured beef in a vacuum bag or a large zip-lock bag, pressing out as much air as possible. Place in the refrigerator at 36-40°F (2-4°C).
Days 2-14: The Cure Phase
The beef stays in the refrigerator for 2-3 weeks, depending on thickness. During this time:
- Flip daily: Turn the bag over once a day to redistribute the cure and any liquid that accumulates.
- Massage gently: Every few days, give the beef a gentle massage through the bag to help the cure penetrate evenly.
- Monitor liquid: You'll see liquid drawn out of the meat — this is normal. The salt is doing its job, extracting moisture and concentrating flavor.
How long to cure? The rule of thumb is 2 days per inch of thickness at the thickest point, plus 2 days extra. A 3-inch thick eye of round needs about 8 days minimum, but 14 days is safer and develops better flavor. I typically cure for the full 2 weeks.
Rinse and Dry
After curing, remove the beef from the bag and rinse under cold running water to remove the surface cure. Pat completely dry with paper towels. The surface should feel tacky but not wet.
At this point, some recipes call for a second coating of just black pepper and aromatics (no salt). This is optional but traditional — it creates a beautiful crust on the finished product.
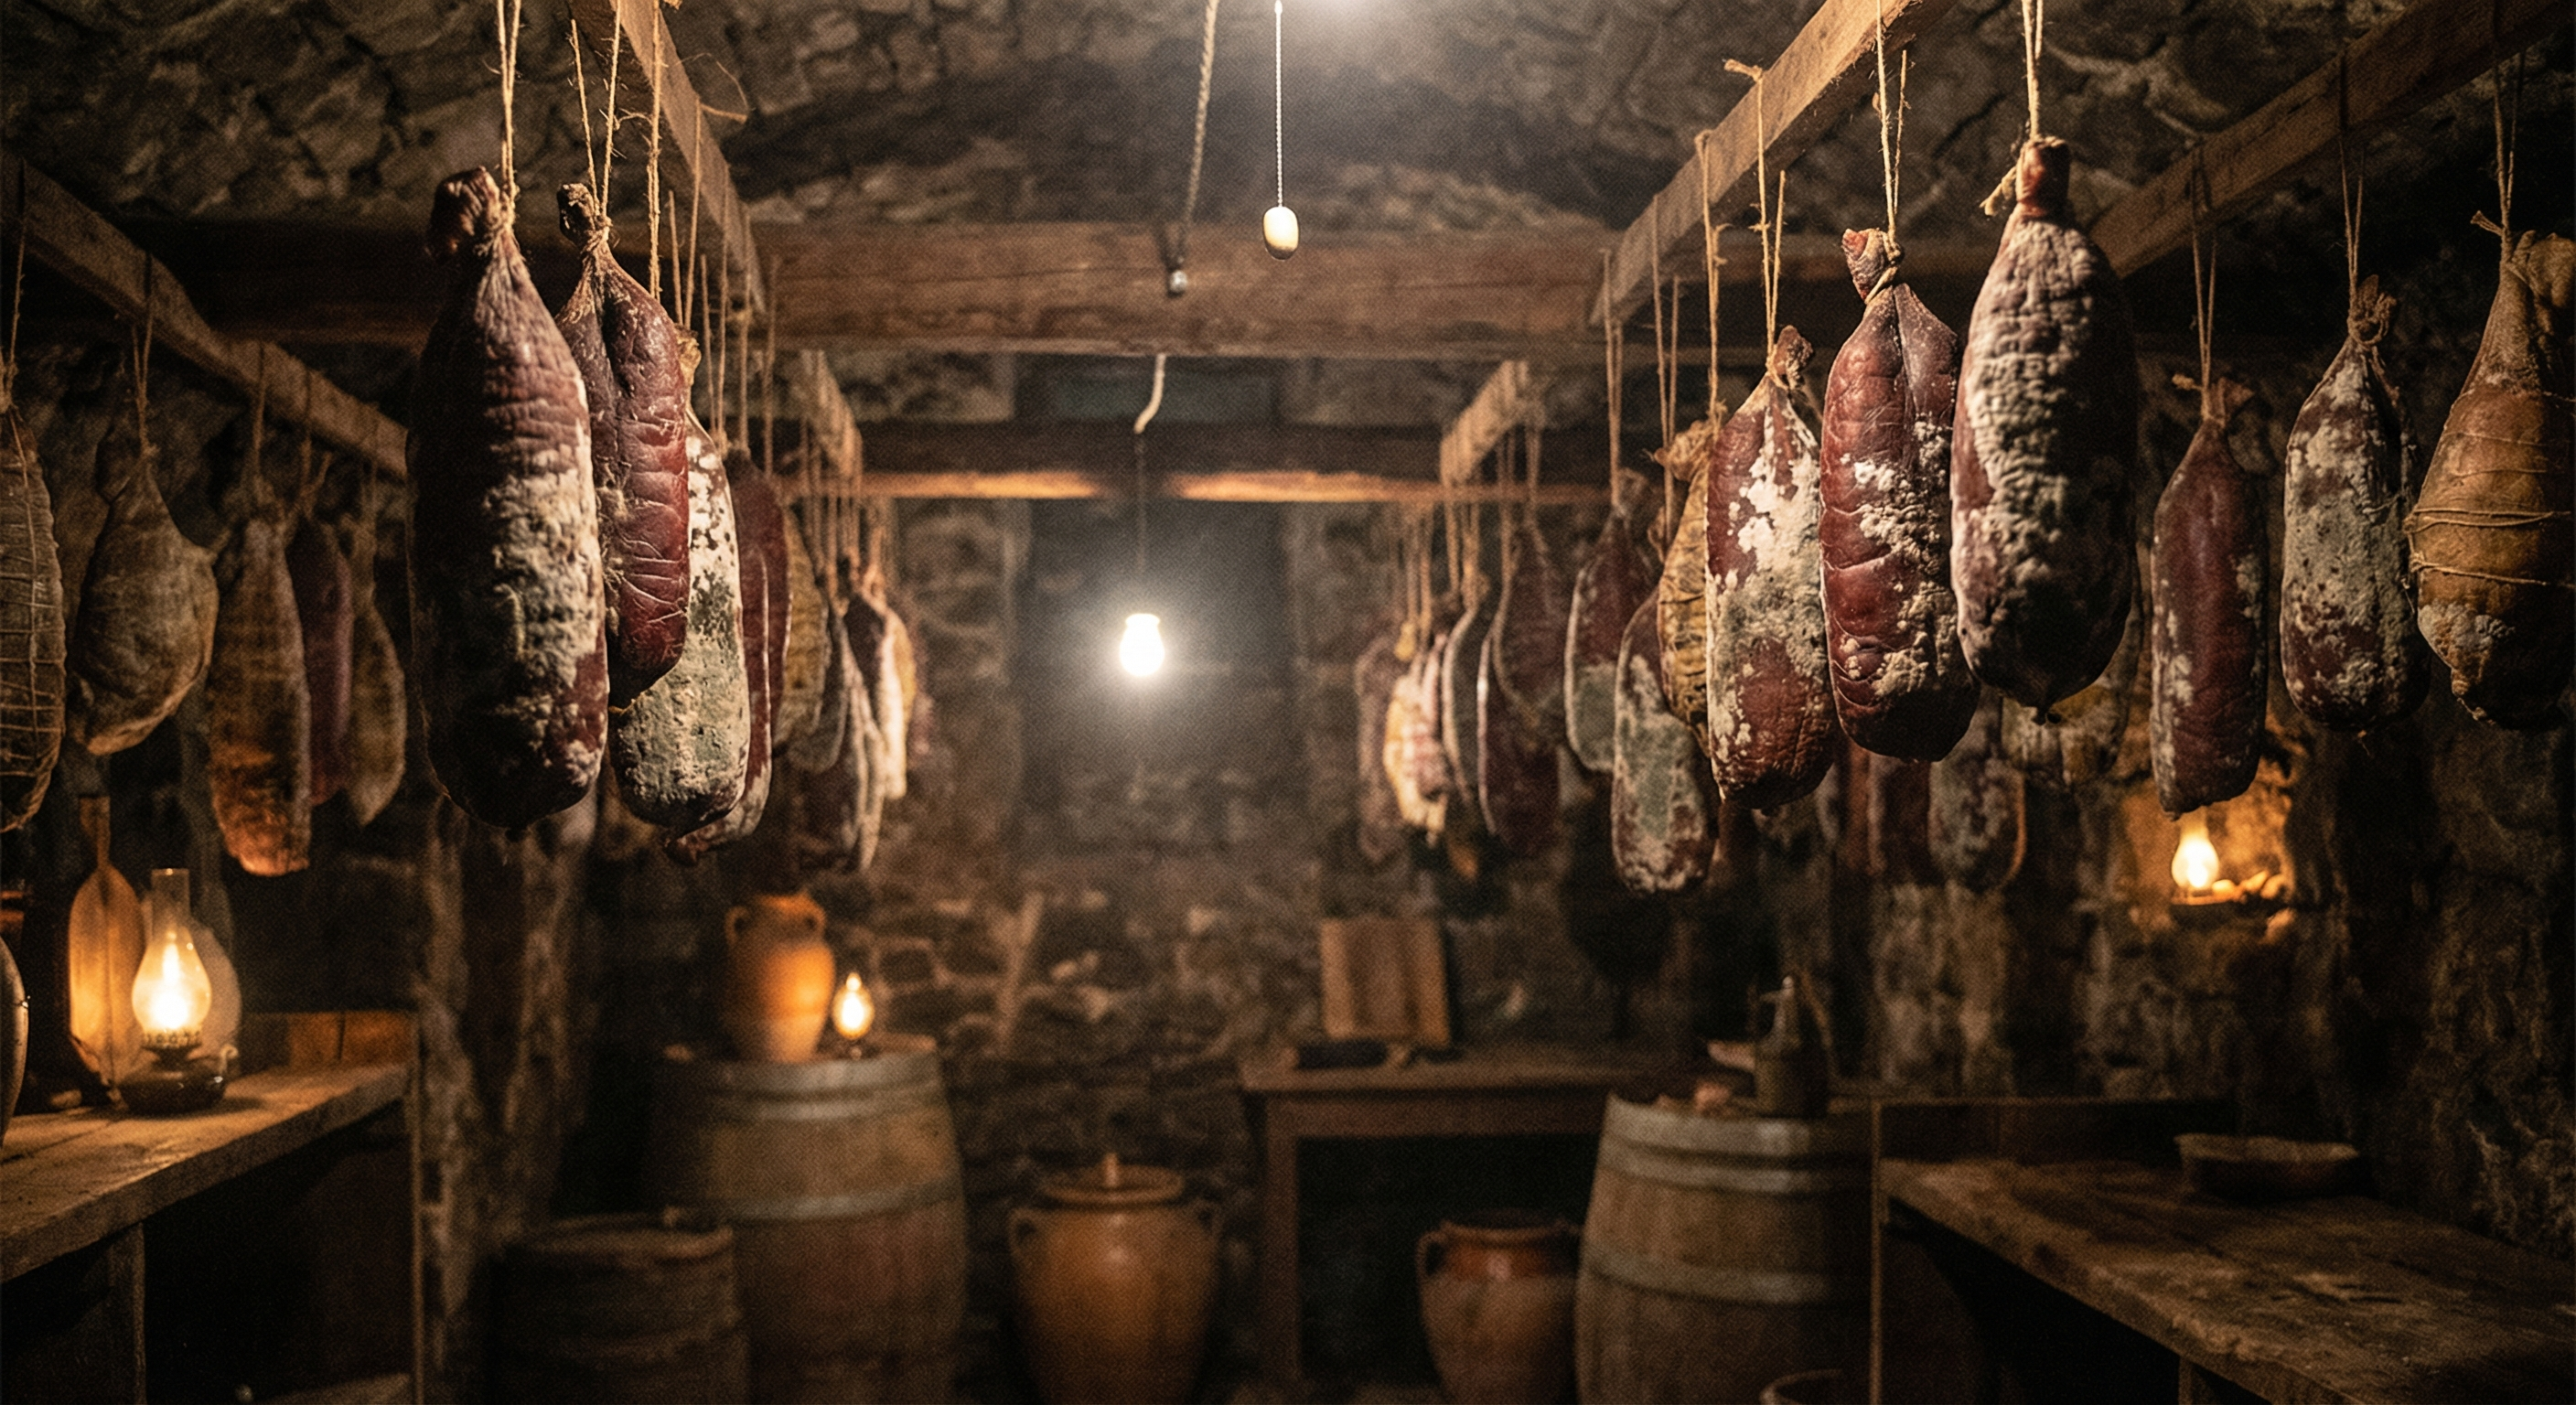
Drying: The Magic Happens
The drying phase is where bresaola transforms from cured beef into something transcendent. Proper drying requires controlled conditions that you can achieve with a dedicated curing chamber (a modified refrigerator works great).
Ideal Drying Conditions
- Temperature: 50-60°F (10-15°C)
- Humidity: 70-80% relative humidity
- Air circulation: Gentle, consistent airflow
- Light: Dark or very low light
Setting Up a Curing Chamber
A small dorm fridge or wine cooler modified with a humidity controller and small fan is the standard home setup. You'll need:
- Temperature controller (to override the fridge thermostat)
- Humidifier or tray of salt water to maintain humidity
- Hygrometer to monitor conditions
- Small fan for air circulation
Many home curers use an Inkbird temperature/humidity controller connected to a small ultrasonic humidifier. The setup runs about $100-150 total and pays for itself quickly if you make several cured meats per year.
Hanging and Monitoring
- Case the bresaola (optional): For best results, encase the beef in beef bung casing or collagen casing. This protects against case hardening and promotes even drying. Tie securely with butcher's twine.
- Hang with airflow: Hang the bresaola so air can circulate around all sides. Use an S-hook through the twine.
- Monitor weight: Weigh the bresaola weekly. You're looking for a 30-40% weight loss from the starting (post-cure) weight.
- Check for problems: Look for any off-colors (green, black) or off-smells. A white, powdery mold bloom is normal and even desirable — this is Penicillium and it's beneficial. Wipe it down with a vinegar-dampened cloth if it gets too thick.
Timeline
Drying takes 4-8 weeks depending on the size of your piece and the conditions in your chamber. Patience is essential — rushing the process by lowering humidity leads to case hardening, where the outside dries before the inside, trapping moisture and potentially creating safety issues.
A properly dried bresaola will feel firm throughout — no soft spots. When pressed, it should have some give but spring back. The color should be uniform dark ruby-red throughout when sliced.
Safety Guidelines: Non-Negotiables
Making cured meats at home is safe when you follow established practices. It becomes dangerous when you cut corners. Here are the rules I never break:
- Always use curing salt #2 in the correct ratio. For bresaola, that's approximately 0.25% of the meat weight.
- Maintain proper temperature throughout curing (below 40°F / 4°C) and drying (50-60°F / 10-15°C).
- Achieve target weight loss of 30-40%. This reduces water activity to levels that prevent bacterial growth.
- Keep detailed records — starting weight, cure time, drying start date, weekly weights. If something goes wrong, you need to trace where.
- When in doubt, throw it out. Off smells, unusual colors (green, gray, black), slimy texture — any of these means discard the entire piece. Bresaola is delicious, but it's not worth the risk.
Knowing When It's Done
Bresaola is ready when it has:
- Lost 30-40% of its starting weight
- A firm texture throughout — no soft spots when pressed
- A uniform dark ruby color when sliced
- A pleasant, aromatic smell with notes of spice and aged beef
- A dry but not cracked exterior
When you're confident it's ready, slice off a thin piece from one end to test. The texture should be tender but not mushy, and the flavor should be concentrated and complex — salty, sweet, with the aromatics coming through clearly.
Slicing and Serving
Bresaola must be sliced paper-thin — 1-2mm maximum. A sharp slicing knife works, but a meat slicer makes this dramatically easier. Freeze the bresaola for 30 minutes before slicing to firm it up for cleaner cuts.
Classic Serving Suggestions
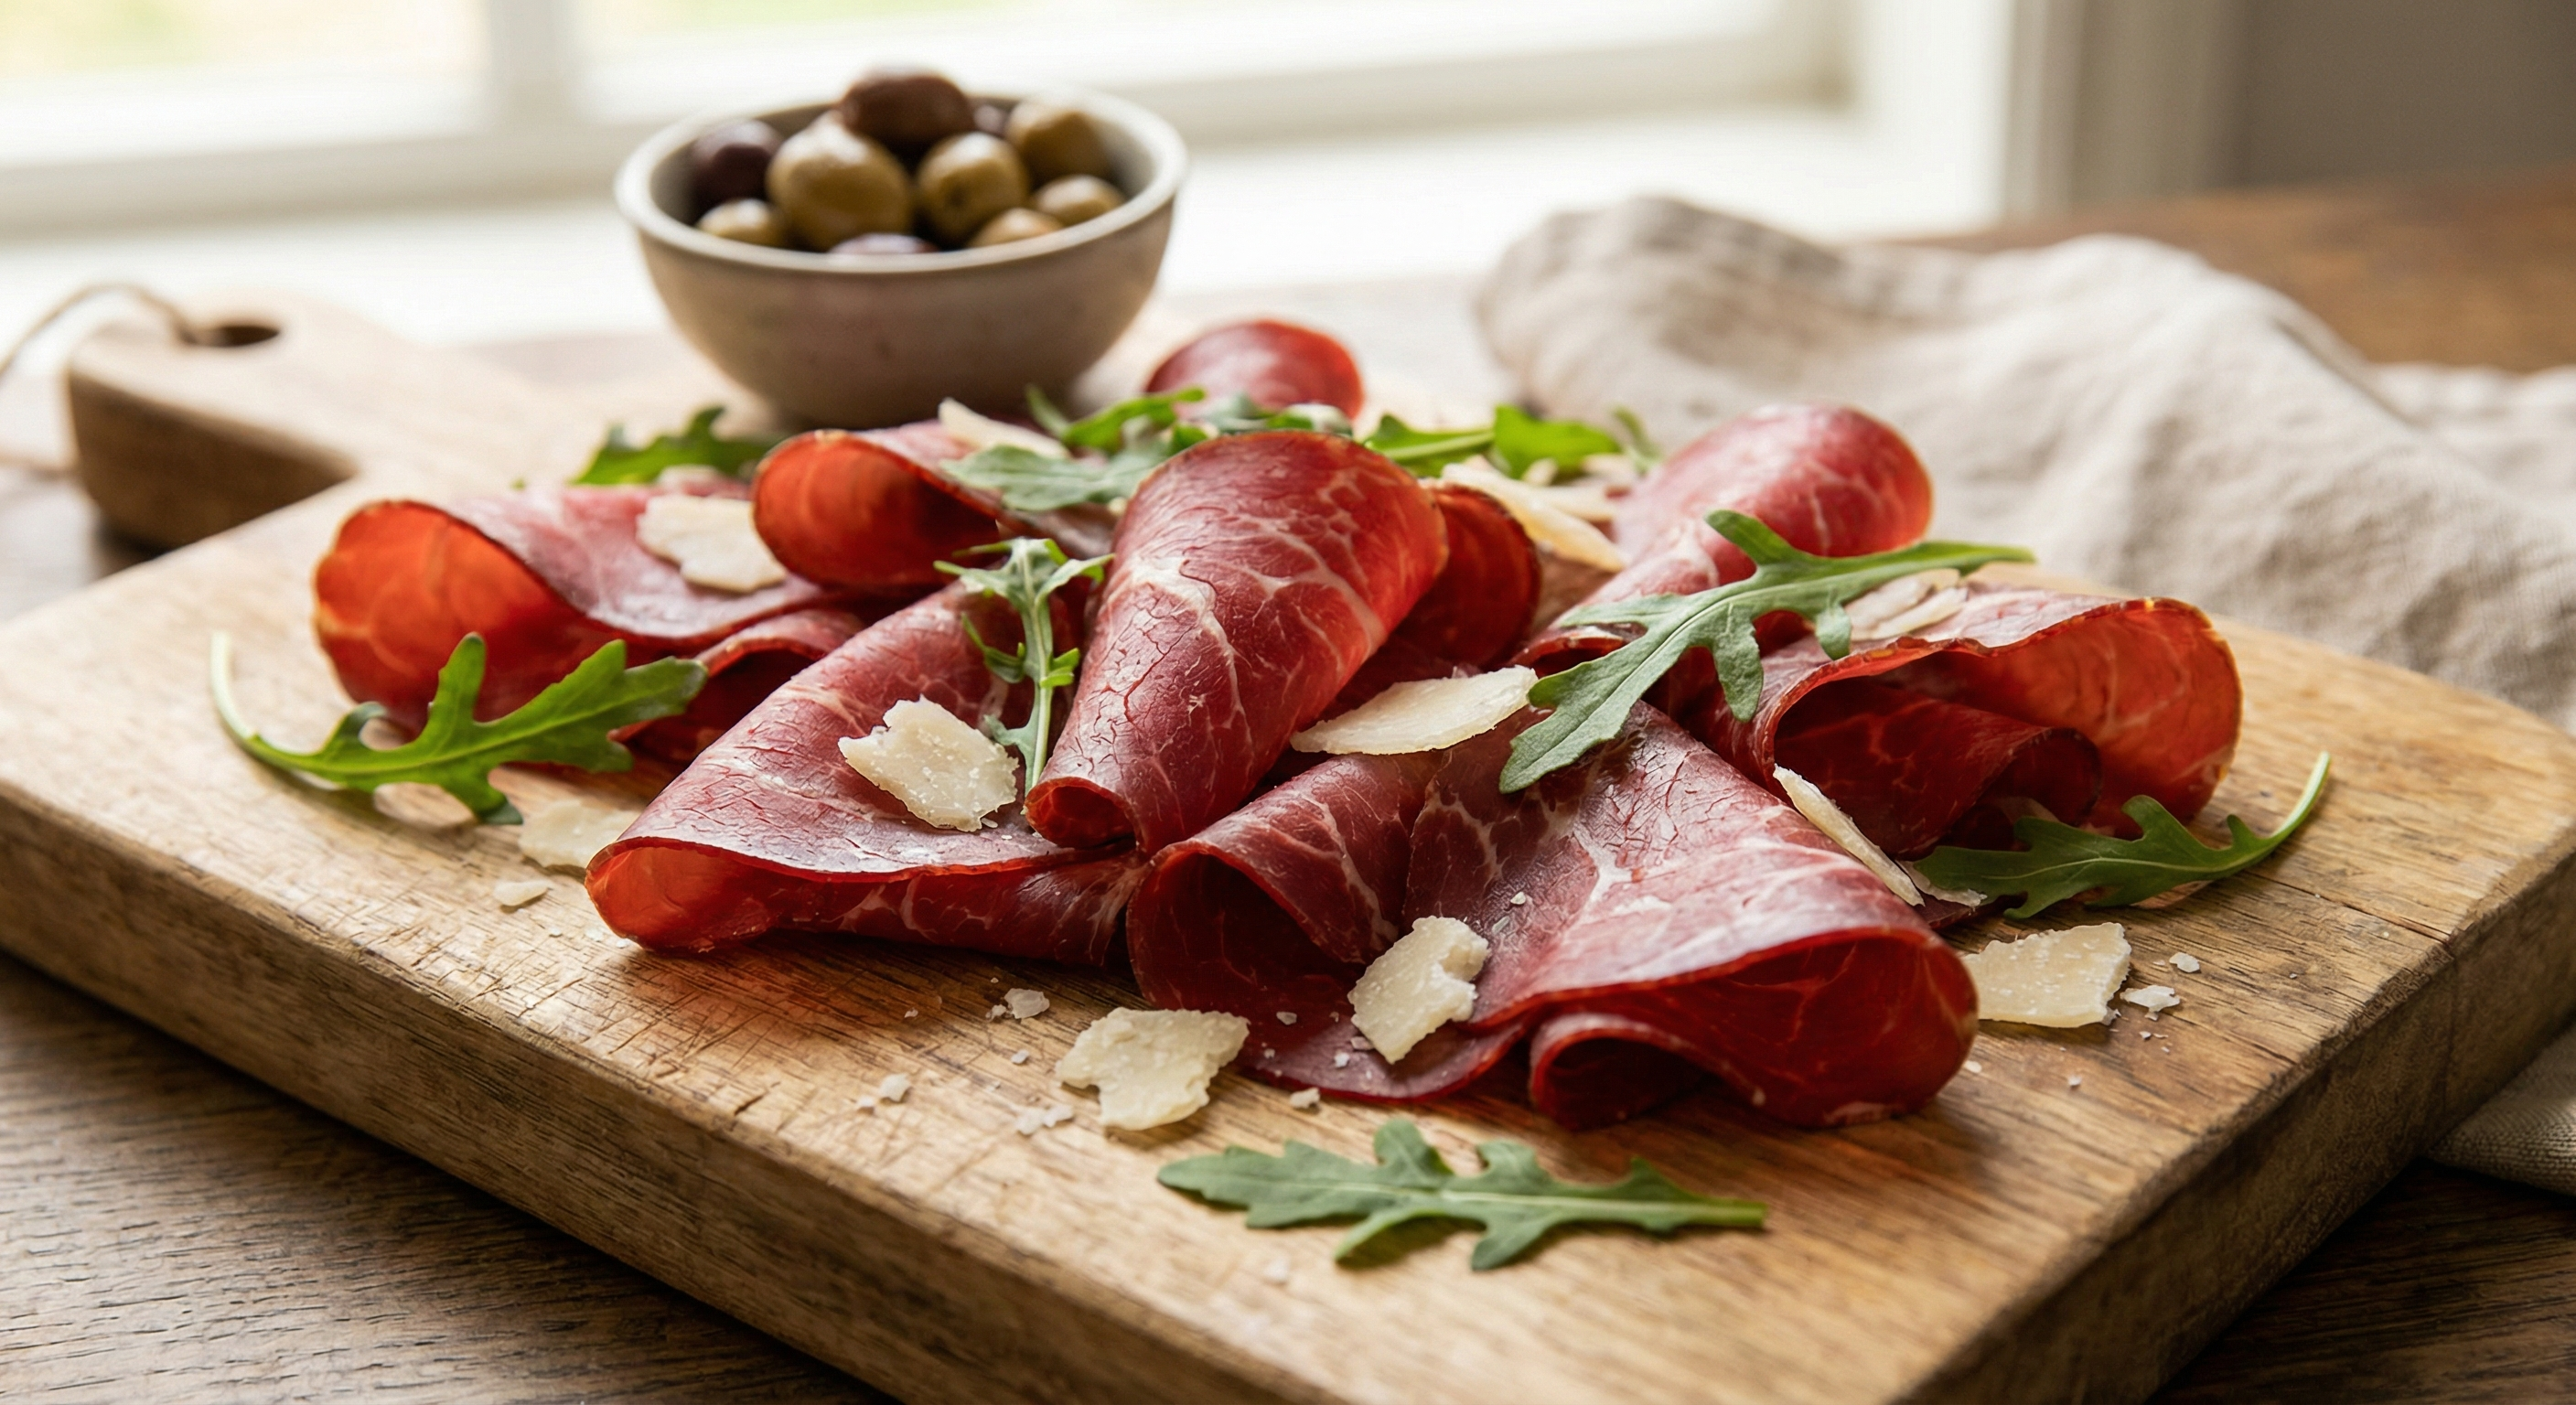
- Bresaola con rucola: Thin slices over arugula, shaved Parmigiano, olive oil, and lemon juice. The definitive preparation.
- Antipasto board: Include on your next charcuterie board alongside other cured meats and Italian cheeses.
- Carpaccio-style: Arrange slices on a plate, drizzle with balsamic reduction and olive oil, top with capers.
- With melon: Like prosciutto, bresaola pairs beautifully with sweet cantaloupe or honeydew.
Storage
Whole, uncut bresaola can be stored in the curing chamber for several months — the drying continues slowly, and the flavor concentrates further. Once cut, wrap tightly in plastic wrap and refrigerate for up to 3-4 weeks. You can also vacuum-seal portions and freeze for up to 6 months.
Bresaola will continue to dry in the refrigerator, becoming firmer and more intensely flavored over time. Some people prefer it younger and more tender; others like it aged longer and more concentrated. Make a few batches and discover your preference.
Troubleshooting Common Issues
Case Hardening
Problem: The outside is hard and dry, but the inside is still soft.
Cause: Humidity was too low, causing the exterior to dry too fast and form a barrier that prevents interior moisture from escaping.
Solution: Raise humidity to 75-80% and be patient. In future batches, start with higher humidity and gradually reduce it over the drying period.
Mold Problems
White/gray fuzzy mold: Usually Penicillium — beneficial. Wipe with vinegar if excessive.
Green, black, or red mold: Potentially dangerous. Discard the entire piece.
Sour or Off Smell
This indicates bacterial growth, likely from insufficient curing salt or temperature abuse. Do not consume — discard and review your process.
Final Thoughts
Making bresaola at home connects you to centuries of Italian tradition. Every time you hang a piece in your curing chamber, you're doing exactly what families in Valtellina have done for generations — transforming simple ingredients into something extraordinary through patience and craft.
Start with a good cut, respect the process, and give it time. Your first successful bresaola will be a revelation — and you'll never look at store-bought cured meats the same way again. Just like building a great charcuterie board, the care you put in shows in every bite.
Frequently Asked Questions
Is it safe to make bresaola at home?
Yes, when you follow proper procedures. The key safety elements are: using curing salt #2 (sodium nitrite/nitrate) at the correct ratio, maintaining proper temperatures throughout curing and drying, achieving 30-40% weight loss, and keeping detailed records. Never skip the curing salt — it prevents dangerous pathogens including botulism.
How long does it take to make bresaola?
Plan for 8-12 weeks total. The curing phase takes 2-3 weeks in the refrigerator, followed by 4-8 weeks of drying in a controlled environment (50-60°F, 70-80% humidity). Rushing the process leads to safety issues and inferior results.
What temperature and humidity for drying bresaola?
Ideal drying conditions are 50-60°F (10-15°C) with 70-80% relative humidity and gentle air circulation. Most home curers use a modified refrigerator with a temperature controller, humidifier, and small fan to maintain these conditions.
Can I use curing salt #1 instead of #2 for bresaola?
No. Bresaola requires curing salt #2 (Prague Powder #2), which contains both sodium nitrite and sodium nitrate. The nitrate slowly converts to nitrite over the long drying period, providing ongoing protection. Curing salt #1 only has nitrite and is meant for products that will be cooked or smoked, not air-dried for weeks.
How do I know when bresaola is done?
Bresaola is ready when it has lost 30-40% of its starting weight, feels firm throughout with no soft spots, has a uniform dark ruby color when sliced, and has a pleasant aromatic smell. Slice a thin piece from one end to test texture and flavor before serving.
More Charcuterie Guides
What Is Pink Curing Salt? Sodium Nitrite Explained for Home Charcuterie
Pink curing salt is the most essential — and most misunderstood — ingredient in meat curing. This guide explains what it is, why it's pink, how sodium nitrite prevents botulism, proper usage rates, and whether you can cure meat without it.
10 min readHow Long Does Charcuterie Last? Storage Guide for Cured Meats & Cheese
Understanding proper charcuterie storage ensures you enjoy it at peak quality while avoiding food safety risks.
10 min read