How to Make Bacon at Home: The Complete Curing & Smoking Guide
Here’s a truth that will ruin you forever: once you make bacon at home, you cannot go back to store-bought. I mean it. That plastic-wrapped stuff in the supermarket — the kind that’s injected with liquid smoke, pumped full of water, and shrinks to half its size in the pan — will taste like a faint echo of what real bacon is supposed to be.
Making bacon at home is one of the simplest curing projects there is. Simpler than salami, simpler than bresaola, simpler than most things in this handbook. You take a slab of pork belly, rub it with salt and sugar, wait a week, and smoke it. That’s the entire process. The details matter — they always do in charcuterie — but the fundamentals are straightforward enough that a complete beginner can nail it on the first try.
This guide covers everything: selecting pork belly, the two main curing methods (dry cure and wet brine), smoking techniques, slicing, storage, and flavor variations that will make your kitchen the most popular place in the neighborhood.
Understanding Bacon: What It Actually Is
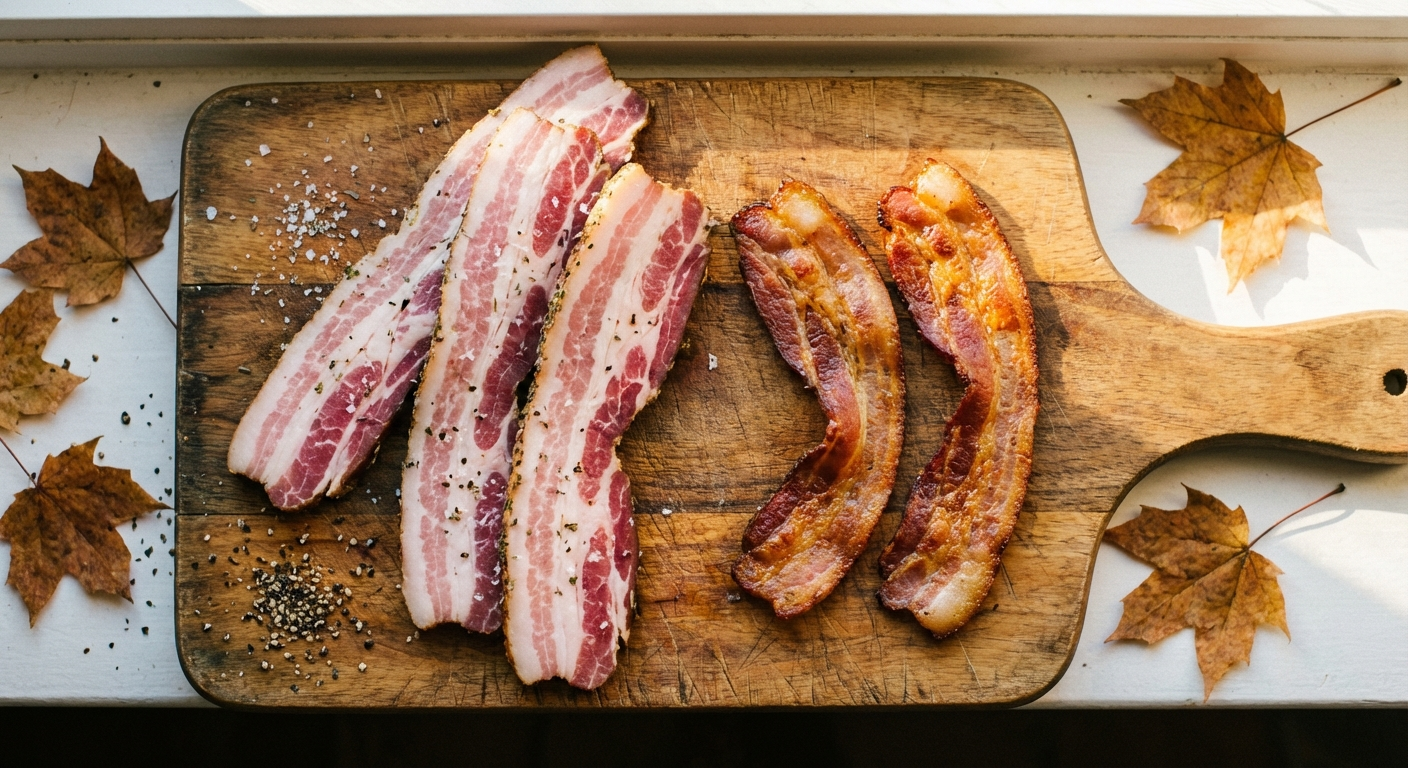
Bacon is cured pork belly. That’s it. The belly is a flat, rectangular cut from the underside of the pig, with alternating layers of meat and fat that create that iconic striped appearance when sliced. The cure — salt, sugar, and curing salt — preserves the meat, develops flavor, and creates that characteristic pink color. Smoking adds another layer of complexity.
What most Americans think of as “bacon” is specifically American-style streaky bacon — cured and smoked pork belly, sliced thin. But bacon takes many forms around the world:
- American streaky bacon: Cured and smoked pork belly. What we’re making here.
- Canadian bacon / back bacon: Cured pork loin. Leaner, more ham-like.
- Pancetta: Italian cured pork belly, not smoked. We have a full pancetta guide if you’re interested.
- Guanciale: Cured pork jowl — the king of Italian pasta meats. See our guanciale guide.
- Lardo: Cured pork back fat. Different animal entirely — check our lardo guide.
The common thread: salt-cured pork. The differences are in which cut, whether it’s smoked, and how it’s used. Today we’re focused on the classic — smoked pork belly bacon.
Selecting Your Pork Belly
The quality of your bacon starts with the quality of your pork belly. This is not the place to cut corners.
What to Look For
- Skin-off: Most recipes call for skin-off belly. If yours comes with skin on, you can remove it yourself with a sharp knife (save the skin for crackling or stock).
- Even thickness: Look for a slab that’s relatively uniform — at least 1.5 inches thick throughout. Thin spots will over-cure and taste too salty; thick spots might under-cure.
- Good meat-to-fat ratio: You want visible alternating layers of lean meat and fat. A belly that’s mostly fat with thin meat streaks will render away to almost nothing. Aim for roughly 50/50 meat to fat.
- Fresh, bright color: The meat should be pinkish-red, the fat white to slightly cream-colored. No gray spots, no off odors.
- Size: A 5-pound slab is ideal for a first batch — big enough to be worthwhile, small enough to handle easily. Most whole bellies are 10-12 pounds; ask your butcher to cut one in half.
Where to Buy
Your local butcher shop is the best source. They can cut a belly to your specifications, and the quality is typically superior to what you’ll find in a supermarket. Asian grocery stores are another excellent option — pork belly is a staple in many Asian cuisines, so they usually stock quality bellies at competitive prices.
For premium pork belly, The Meatery carries heritage and premium pork products that make exceptional bacon — the extra marbling and flavor from well-raised pork is noticeable in the finished product.
The Cure: Your Two Options
There are two approaches to curing bacon: dry cure and wet brine. Both produce excellent bacon. The choice comes down to personal preference and how hands-on you want to be.
Method 1: Dry Cure (My Preferred Method)
Dry curing is the traditional approach and the one I recommend for most people. You rub the cure mixture directly onto the pork belly, bag it, and refrigerate. The salt draws moisture out of the meat, concentrating flavor and creating a firmer texture. The result is bacon with more intense, concentrated pork flavor.
Basic Dry Cure Recipe (Per 5 lbs Pork Belly)
- Kosher salt: 50g (about 3 tablespoons)
- Curing salt #1 (Prague Powder #1): 10g (about 2 teaspoons)
- Brown sugar: 50g (about 3.5 tablespoons)
- Black pepper, coarsely ground: 15g (about 1 tablespoon)
That’s the base. It produces classic, straightforward bacon. We’ll talk about flavor variations later.
Why Curing Salt #1?
Curing salt #1 (also called Prague Powder #1 or pink salt) contains 6.25% sodium nitrite mixed with regular salt. The nitrite serves three critical functions:
- Safety: It inhibits Clostridium botulinum and other dangerous bacteria.
- Color: It reacts with myoglobin in the meat to create that familiar pink color. Without it, your bacon will turn gray when cooked — safe to eat (if properly handled) but visually unappealing.
- Flavor: It contributes to that distinctive “cured meat” flavor that we associate with bacon, ham, and hot dogs.
Note: Use curing salt #1 for bacon, not #2. Curing salt #2 is for dry-cured products that aren’t cooked (like bresaola or salami). Bacon is always cooked before eating, so #1 is correct. See our curing salts guide for the full breakdown.
Dry Cure Process
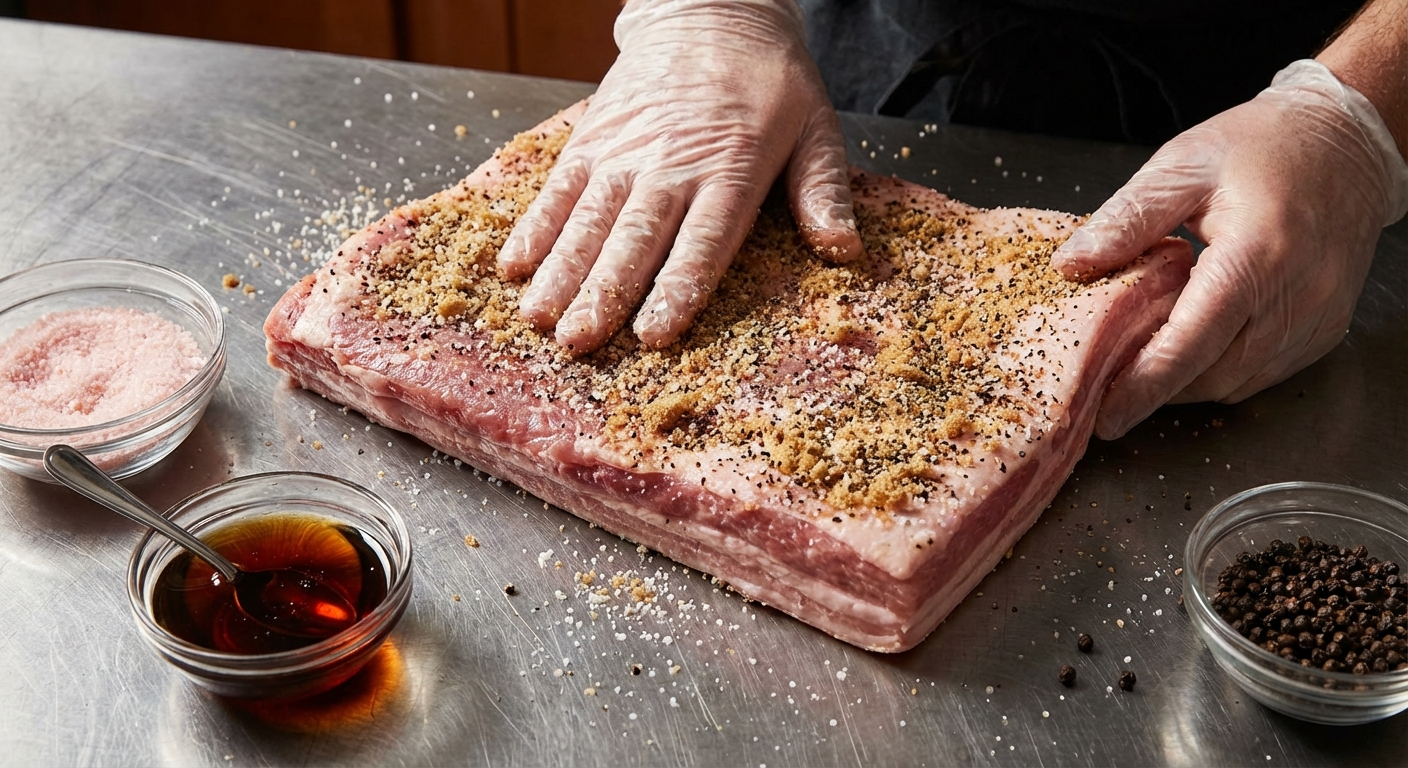
- Mix the cure: Combine all cure ingredients in a bowl. Mix thoroughly to distribute the curing salt evenly — this is important for consistent curing.
- Apply the cure: Place the pork belly on a sheet pan. Wearing gloves, rub the cure mixture over every surface — top, bottom, sides, ends. Use all of it. Press the cure into the meat.
- Bag it: Place the cured belly in a large zip-lock bag or vacuum bag. Squeeze out as much air as possible and seal.
- Refrigerate: Place the bag on a sheet pan (to catch any leaks) in the refrigerator at 36-40°F (2-4°C).
- Flip daily: Once a day, flip the bag over. You’ll notice liquid accumulating — this is moisture being drawn from the meat by the salt. Redistributing it ensures even curing.
- Cure for 7 days: A standard 1.5-2 inch thick belly needs 7 days. Thicker pieces may need up to 10 days. The belly is fully cured when it feels firm throughout — no soft, squishy spots when you press on it.
Method 2: Wet Brine (Equilibrium Method)
Wet brining submerges the pork belly in a seasoned salt-water solution. This method is more forgiving — it’s harder to over-cure because the salt concentration reaches equilibrium between the brine and the meat. The resulting bacon is slightly more moist and mildly flavored compared to dry-cured.
Basic Wet Brine Recipe (Per 5 lbs Pork Belly)
- Water: 1 gallon (cold)
- Kosher salt: 150g (about 1/2 cup)
- Curing salt #1: 10g (about 2 teaspoons)
- Brown sugar: 100g (about 1/2 cup)
- Maple syrup: 1/2 cup (optional, for maple bacon)
- Black peppercorns: 1 tablespoon
- Bay leaves: 3-4
- Garlic cloves, crushed: 4-5
Wet Brine Process
- Make the brine: Heat 1 quart of the water and dissolve the salt, curing salt, and sugar. Remove from heat and add the remaining cold water to cool the brine down quickly. Add remaining aromatics. The brine must be completely cold (below 40°F) before adding the pork.
- Submerge the belly: Place the pork belly in a non-reactive container (food-grade plastic, glass, or stainless steel). Pour the cold brine over it. The belly must be fully submerged — use a plate or zip-lock bag filled with brine on top as a weight if needed.
- Refrigerate for 7-10 days: Keep at 36-40°F. Flip the belly every 2-3 days.
After Curing: Rinse, Dry, and Form the Pellicle
Regardless of which curing method you used, the next steps are the same:
- Rinse: Remove the belly from the cure/brine and rinse thoroughly under cold running water. This removes excess surface salt.
- Fry test: Cut a small slice from one end and fry it in a pan. Taste it. If it’s too salty, soak the whole belly in cold water for 30-60 minutes and test again. If the salt level is right, proceed. This step saves you from ruining an entire batch.
- Dry thoroughly: Pat the belly completely dry with paper towels.
- Form the pellicle: Place the belly on a wire rack set over a sheet pan, uncovered, in the refrigerator for 12-24 hours. This forms a “pellicle” — a tacky, slightly sticky surface that helps smoke adhere to the meat. The pellicle is important. Don’t skip it.
Smoking Your Bacon
This is where homemade bacon goes from “really good” to “life-changing.” Smoking adds depth, complexity, and that intoxicating aroma that makes neighbors lean over the fence and ask what you’re cooking.
Cold Smoking vs. Hot Smoking
Traditional bacon is cold-smoked — exposed to smoke at temperatures below 100°F for several hours. This adds smoke flavor without cooking the meat. Cold-smoked bacon is then cooked later (in a pan, oven, etc.) before eating.
Hot smoking (at 200-225°F) also works and is simpler if you don’t have cold-smoking equipment. Hot-smoked bacon is partially cooked during the smoking process. It’s still best finished in a pan for crispness.
For the detailed comparison, check our cold smoking vs hot smoking guide.
Hot Smoking Method (Recommended for Beginners)
- Set up your smoker at 200°F. Any smoker works — offset, pellet, kamado, drum, or even a Weber kettle set up for indirect cooking.
- Choose your wood: Apple and cherry are the classics for bacon — mild, slightly sweet, and they complement pork beautifully. Hickory is traditional and stronger. Maple wood (if available) is incredible for maple-cured bacon. Refer to our smoking wood guide for more options.
- Smoke the belly: Place the pork belly on the grate, fat side up. Maintain 200°F with thin blue smoke.
- Monitor internal temperature: Smoke until the internal temperature of the thickest part reaches 150°F. This takes approximately 2-3 hours depending on thickness and your smoker.
- Remove and cool: Take the bacon out of the smoker and let it cool to room temperature on a wire rack (about 1 hour), then refrigerate uncovered for at least 4 hours, ideally overnight. This firms up the bacon for clean slicing.
Cold Smoking Method (Advanced)
- Set up a cold smoke generator — a tube smoker, maze smoker, or external smoke generator piped into an unheated chamber. The goal is smoke with minimal heat (under 90°F).
- Smoke for 4-8 hours: The longer you smoke, the more intense the flavor. I find 6 hours with apple wood to be the sweet spot for most palates.
- Temperature monitoring: Check that the chamber temperature stays below 90°F. If ambient temperature is warm, do this in the early morning or evening.
- Refrigerate: After smoking, refrigerate the bacon uncovered for 12-24 hours before slicing.
No Smoker? No Problem.
If you don’t have a smoker, you can still make excellent bacon. Skip the smoking step entirely — you’ll have what’s essentially fresh pancetta, which is fantastic in its own right. Or use a small amount of liquid smoke (1 teaspoon per 5 lbs of belly) mixed into the cure for a smoky flavor without the equipment.
Slicing
Slicing is where homemade bacon truly shines — you control the thickness. Store-bought bacon is typically sliced paper-thin to fit more slices in a package. Homemade bacon at 1/4-inch thickness is a completely different eating experience.
Tips for Clean Slicing
- Chill first: Semi-frozen bacon slices best. Put the slab in the freezer for 60-90 minutes before slicing — firm but not frozen solid.
- Use a sharp, long knife: A 10-12 inch slicing knife or carving knife works well. Keep it sharp — a dull knife tears instead of cutting.
- A meat slicer is ideal: If you make bacon regularly, a deli-style meat slicer ($100-200 for a home model) pays for itself quickly and produces perfectly uniform slices.
- Thickness: Standard is about 1/8 inch. Thick-cut is 1/4 inch. Steakhouse-style is 1/2 inch. Try different thicknesses and find what you like — that’s the beauty of making your own.
Storage
Properly cured and smoked bacon stores beautifully:
- Whole slab: Wrap tightly in plastic wrap and refrigerate for up to 2 weeks. Or vacuum-seal for up to 4 weeks.
- Sliced: Layer slices between parchment paper, stack in a zip-lock bag, and refrigerate for up to 10 days.
- Frozen: Vacuum-sealed bacon (whole or sliced) freezes beautifully for 6 months or more. Portion into amounts you’ll use in a week for easy thawing.
Pro tip: Freeze sliced bacon flat on a parchment-lined sheet pan, then transfer frozen slices to a bag. This way you can pull out individual slices without thawing the whole batch.
Flavor Variations
The basic cure is just the starting point. Once you’ve mastered the fundamentals, experiment with these popular variations:
Maple Bacon
Add 1/3 cup pure maple syrup to the cure. For the dry cure method, mix the syrup in with the dry ingredients to form a wet paste. The maple adds sweetness and creates incredible caramelization when the bacon is fried.
Peppered Bacon
After curing and rinsing, press coarsely cracked black pepper onto all surfaces before smoking. Use about 2 tablespoons per pound of belly. The pepper creates a spicy, crunchy crust.
Applewood-Smoked Honey Bacon
Replace the brown sugar in the cure with honey (same weight). Smoke with applewood. The result is delicate, floral, and slightly sweet — outstanding on a charcuterie board.
Coffee-Rubbed Bacon
Add 2 tablespoons of finely ground coffee to the cure. The coffee adds a bitter, roasted depth that pairs unexpectedly well with the sweetness of the pork fat. Smoke with cherry wood.
Spicy Bacon
Add 1 tablespoon of cayenne pepper or 2 tablespoons of crushed red pepper flakes to the cure. For a smokier heat, add 1-2 minced chipotle peppers (from a can of chipotles in adobo).
Juniper & Bay Bacon (European Style)
Add 1 tablespoon crushed juniper berries, 4 crumbled bay leaves, and 1 teaspoon dried thyme to the cure. This creates bacon with a more complex, aromatic flavor profile reminiscent of European curing traditions.
Troubleshooting Common Issues
Bacon Is Too Salty
Cause: Over-curing (too long) or too much salt in the formula.
Fix: Soak the cured belly in cold water for 1-2 hours, changing the water every 30 minutes. Always do the fry test before smoking.
Prevention: Stick to 7 days for standard-thickness bellies. Weigh your cure ingredients by gram on a kitchen scale — don’t rely on volume measurements for curing salt.
Bacon Is Too Smoky
Cause: Smoked too long or with too heavy a wood (like hickory or mesquite).
Fix: Refrigerate uncovered for a few days — the smoke flavor mellows over time.
Prevention: Use mild woods (apple, cherry) and start with shorter smoke times. You can always add more smoke; you can’t take it away.
Uneven Curing
Cause: Belly had significantly varying thickness, or the cure wasn’t applied evenly.
Prevention: Select bellies with even thickness. Apply cure thoroughly to all surfaces. Flip daily during curing to redistribute the liquid.
Bacon Doesn’t Crisp Well
Cause: Sliced too thick, or the belly had too much fat relative to meat.
Fix: Slice thinner. Start in a cold pan and cook over medium-low heat — this renders fat more effectively than starting in a hot pan.
Safety Notes
- Use curing salt #1: Don’t skip it, don’t substitute it. The sodium nitrite in curing salt #1 prevents botulism and other pathogens. Our curing salts guide has the full safety breakdown.
- Measure by weight: Always use a kitchen scale for curing salt. The margin between safe and unsafe is not large enough to eyeball.
- Keep cold: The belly must stay at 36-40°F throughout the entire curing process. No exceptions.
- Cook before eating: Unlike prosciutto or bresaola, bacon is not a ready-to-eat cured product. It must be cooked to at least 145°F internal temperature before consumption.
The Bottom Line
Making bacon at home is one of the most accessible entries into charcuterie. The ingredients are simple, the equipment is minimal, and the results are spectacular. Your first batch will be better than 95% of what you can buy in a store — and that’s not an exaggeration.
Start with the basic dry cure recipe above. Once you’ve got the process down, experiment with flavor variations, smoking woods, and different thicknesses. Before long, you’ll be curing bacon in 10-pound batches and wondering how you ever tolerated the supermarket stuff.
And once you’ve mastered bacon, you’re ready for the next level. Try our pancetta guide for Italian-style cured belly, or step up to homemade guanciale for the ultimate pasta meat. The world of home curing is deep, rewarding, and delicious.
Frequently Asked Questions
How long does it take to make bacon at home?
Plan for about 8-10 days total. The curing phase takes 7 days in the refrigerator. After that, you need 12-24 hours to form the pellicle, then 2-3 hours for hot smoking (or 4-8 hours for cold smoking). Add a few more hours for cooling and an overnight rest before slicing.
Can I make bacon without curing salt?
You can, but I don't recommend it. Curing salt #1 (sodium nitrite) prevents botulism, creates bacon's characteristic pink color, and contributes to its classic flavor. Without it, your bacon will be gray when cooked and lack that distinctive cured taste. If you insist on going nitrite-free, use celery powder as a natural nitrite source and follow a tested recipe.
Do I need a smoker to make bacon?
No. Without smoking, you'll make what's essentially fresh pancetta — still delicious. You can also use a small amount of liquid smoke (1 teaspoon per 5 lbs) mixed into the cure, or use a tube smoker in a regular grill for cold smoking. But if you have a smoker, use it — the flavor difference is significant.
How long does homemade bacon last?
Whole slab: 2-4 weeks refrigerated (vacuum-sealed lasts longer). Sliced: up to 10 days refrigerated. Frozen: 6+ months vacuum-sealed. Portion into weekly amounts before freezing so you don't have to thaw the entire batch.
What wood is best for smoking bacon?
Applewood and cherry are the classic choices — mild, slightly sweet, and they complement pork beautifully. Hickory is traditional and stronger. Maple wood is incredible for maple-cured bacon. Avoid mesquite — it's too intense for bacon's long smoke time.
More Charcuterie Guides
What Is Pink Curing Salt? Sodium Nitrite Explained for Home Charcuterie
Pink curing salt is the most essential — and most misunderstood — ingredient in meat curing. This guide explains what it is, why it's pink, how sodium nitrite prevents botulism, proper usage rates, and whether you can cure meat without it.
10 min readHow Long Does Charcuterie Last? Storage Guide for Cured Meats & Cheese
Understanding proper charcuterie storage ensures you enjoy it at peak quality while avoiding food safety risks.
10 min read