How to Cure Meat at Home: A Beginner's Complete Guide
How to Cure Meat at Home: A Beginner's Complete Guide
Curing meat is one of humanity's oldest food preservation techniques — and one of its most rewarding. There's something deeply satisfying about transforming a raw pork belly into silky pancetta, or turning a fresh ham into prosciutto that rivals anything from Parma.
The good news: you don't need a commercial kitchen, expensive equipment, or years of experience to start. With the right salt ratios, some patience, and attention to safety, you can cure restaurant-quality meat in your own home.
What Is Meat Curing?
At its core, curing is the process of preserving meat using salt — sometimes combined with sugar, nitrates/nitrites, smoke, and controlled drying. Salt draws moisture out of the meat, creating an environment where harmful bacteria cannot survive while beneficial bacteria and enzymes develop complex flavors.
There are two fundamental approaches:
- Dry curing: Salt (and other seasonings) are applied directly to the meat's surface. The salt penetrates inward over days or weeks. Used for: pancetta, prosciutto, bresaola, guanciale, duck prosciutto.
- Wet curing (brining): Meat is submerged in a saltwater solution. Used for: corned beef, pastrami (before smoking), brined turkey, Canadian bacon.
Essential Equipment
You can start with surprisingly little:
Must-Have (Under $50 Total)
- Digital kitchen scale (accurate to 0.1g) — Salt ratios are by weight, never by volume. This is non-negotiable.
- Curing salt #1 (Prague Powder #1): 6.25% sodium nitrite, 93.75% table salt. Used for short cures (under 30 days). About $8 for a lifetime supply.
- Curing salt #2 (Prague Powder #2): Contains sodium nitrate, which breaks down slowly over time. Used for long dry cures (salami, prosciutto). About $8.
- Kosher salt: Diamond Crystal or Morton's. Your primary curing salt.
- Zip-lock bags or food-safe containers: For equilibrium curing and wet brining.
- Butcher's twine: For tying and hanging.
Nice-to-Have (For Dry Curing)
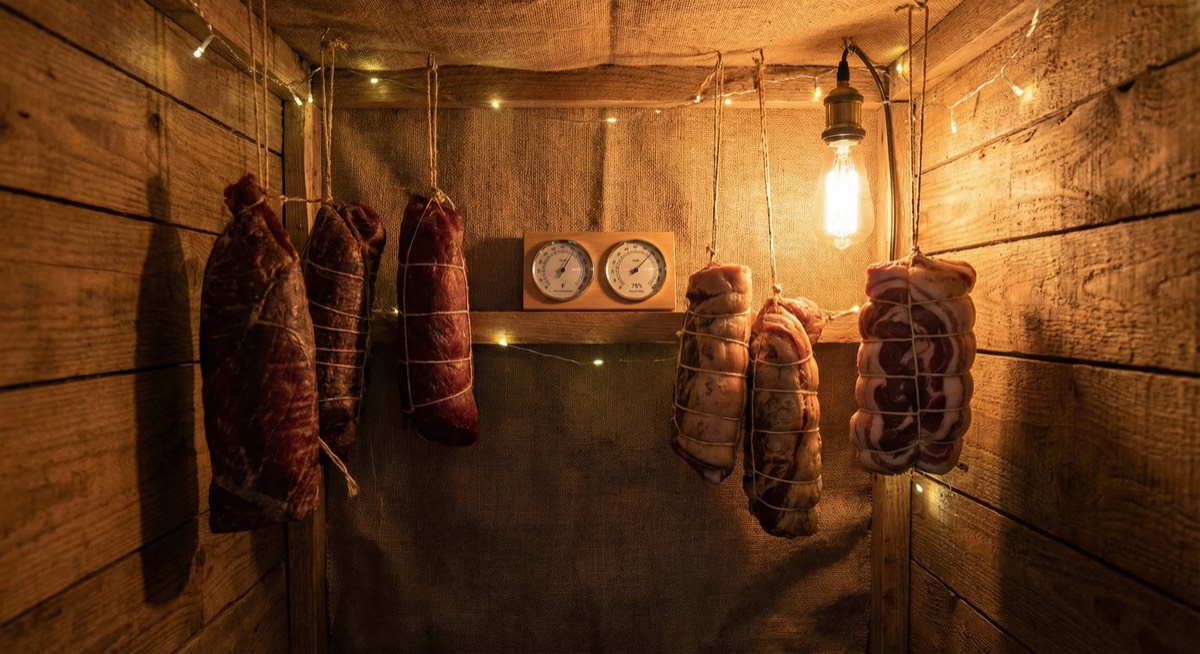
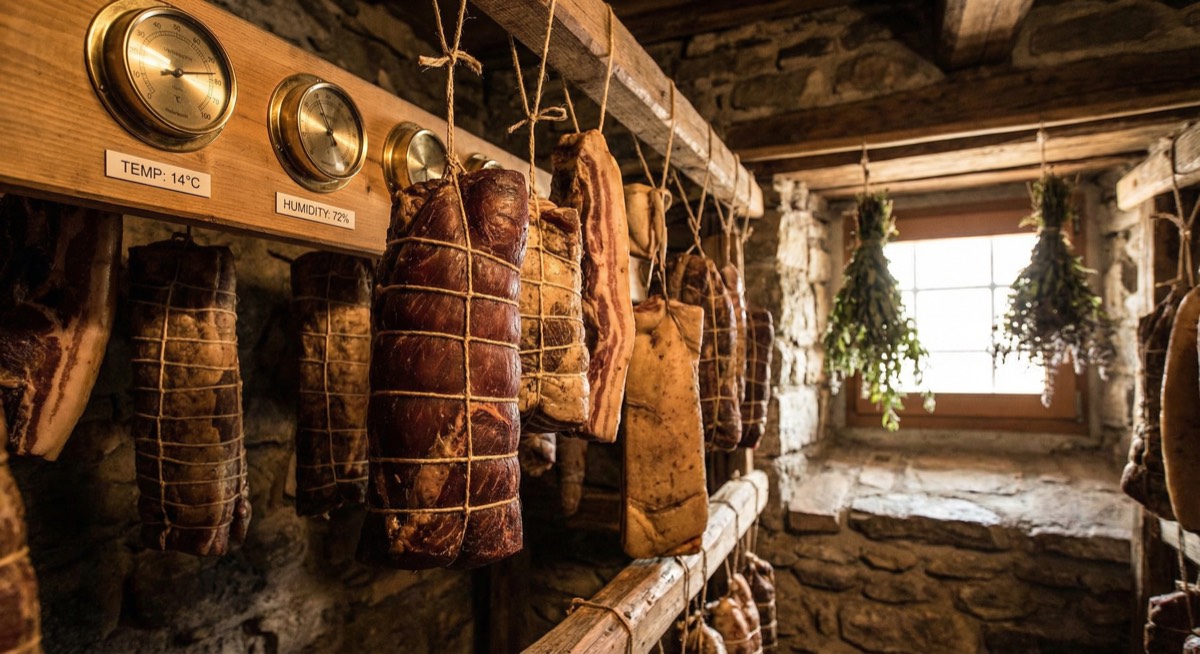
- Curing chamber: A converted mini-fridge with temperature (50-60°F) and humidity (65-80%) control. The gold standard for dry curing. Can be built for $150-300.
- Hygrometer/thermometer: Monitors conditions inside your curing space.
- Meat hooks or S-hooks: For hanging during the drying phase.
- Collagen or natural casings: For salami and sausage projects.
The Three Curing Methods
Method 1: Equilibrium Curing (Recommended for Beginners)
This is the safest and most forgiving method. You calculate an exact percentage of salt based on the meat's weight, seal it in a bag, and wait. The meat can never become over-salted because you've only added exactly the amount of salt it needs.
The formula:
- Weigh your meat
- Calculate 2.5-3% of that weight in kosher salt
- Calculate 0.25% in curing salt #1 (for short cures) or #2 (for long cures)
- Add optional seasonings: black pepper, garlic, herbs, sugar (0.5-1%)
- Coat the meat, vacuum seal or zip-lock (remove all air), refrigerate
- Wait: approximately 1 day per 5mm of thickness, plus 2 days for safety
Example: Curing a 1kg pork belly for pancetta
- Salt: 1000g × 3% = 30g kosher salt
- Curing salt #2: 1000g × 0.25% = 2.5g
- Black pepper: 5g (coarsely ground)
- Brown sugar: 10g
- Garlic powder: 3g
- Cure time: 7-10 days in refrigerator, flipping daily
Method 2: Excess Salt (Traditional Dry Cure)
The old-world method: pack the meat in a thick layer of salt (much more than the meat can absorb), let it cure, then rinse off the excess. This is how prosciutto and country hams have been made for centuries.
The process:
- Coat the meat liberally in salt (no precise measurement needed — use more than enough)
- Place on a rack or in a container, refrigerate
- The meat absorbs what it needs; excess salt stays on the surface
- Cure time: longer than EQ method — typically 2 days per pound
- Rinse thoroughly, soak if needed to reduce surface salt
Pros: Traditional, no math required, very safe.
Cons: Can result in uneven salting, requires rinsing/soaking to balance flavor, more salt waste.
Method 3: Wet Brine
Submerge meat in a saltwater solution. Great for large or irregular pieces where dry salt application would be uneven.
Standard brine ratio: 50g salt per liter of water (5% solution). Add curing salt #1 at 2.5g per liter for color and preservation.
Best for: Corned beef, pastrami, Canadian bacon, brined pork chops, turkey.
Cure time: 5-7 days for a 3-4 lb brisket, refrigerated, flipping daily.
Understanding Curing Salts (Critical Safety)
This is the section you need to read carefully.
Why Use Curing Salts?
Sodium nitrite (in cure #1) and sodium nitrate (in cure #2) serve three purposes:
- Safety: They inhibit Clostridium botulinum — the bacteria that causes botulism. This is especially critical in low-oxygen environments (vacuum-sealed bags, the interior of sausages, whole-muscle cures).
- Color: Nitrite reacts with myoglobin to create the characteristic pink/red color of cured meat. Without it, cured meat turns gray.
- Flavor: That distinctive "cured" taste — the flavor that makes bacon taste like bacon instead of just salted pork — comes from nitrite.
Safety Rules for Curing Salts
- Never exceed 0.25% of meat weight for curing salt #1 or #2. This gives you ~156 ppm ingoing nitrite — the USDA maximum.
- Curing salts are dyed pink so you don't confuse them with regular salt. Never use them as table salt.
- Cure #1 is for short cures (under 30 days): bacon, corned beef, pastrami, Canadian bacon.
- Cure #2 is for long cures (over 30 days): dry-cured salami, prosciutto, bresaola, pancetta you plan to hang-dry.
- Store curing salts away from children and clearly labeled.
Can You Cure Without Nitrites?
For wet brines and short refrigerator cures that you'll cook before eating (like a homemade bacon you'll fry), you can skip curing salt and use only kosher salt. The meat will be gray rather than pink, and the flavor will be more "salted pork" than "bacon," but it's safe because you're cooking it.
For any dry-cured product that will be eaten raw or hang-dried (salami, bresaola, lonza), curing salt is non-negotiable. Botulism risk is real and the consequences are severe.
Your First Project: Duck Breast Prosciutto
This is the perfect beginner project. It's small, fast, forgiving, and the result is spectacular — silky, rosy slices of cured duck that rival anything at a charcuterie bar.
What You Need
- 1 boneless duck breast (Moulard preferred, about 350-400g)
- Digital scale
- Curing salt #2
- Kosher salt
- Black pepper, thyme, bay leaf (optional)
- Cheesecloth
- Butcher's twine
- Your refrigerator
Step-by-Step
Day 1: Apply the cure
- Weigh your duck breast. Write it down.
- Calculate: 3% kosher salt, 0.25% cure #2, 1% black pepper (coarsely ground), 0.5% brown sugar.
- Mix the cure, coat the duck breast evenly on all sides.
- Place in a zip-lock bag, squeeze out all air, seal.
- Refrigerate. Flip once daily.
Days 2-7: Curing phase
- Flip the bag daily. You'll see liquid accumulating — that's moisture being drawn from the meat. Normal.
- The breast will feel noticeably firmer by day 5-7.
- Cure for 7 days total (small breasts may need only 5).
Day 7: Rinse and wrap
- Remove from bag, rinse under cold water, pat completely dry.
- Coat generously in coarsely cracked black pepper and dried thyme.
- Wrap tightly in cheesecloth. Tie with butcher's twine, creating a loop for hanging.
- Weigh and record the weight. Write it on a tag and tie it to the twine.
Days 7-21: Drying phase
- Hang in your refrigerator (tie to a rack). The cold, dry environment of your fridge works well for small pieces.
- Weigh weekly. You're targeting a 30% weight loss from the post-cure weight.
- This typically takes 2-3 weeks depending on your fridge humidity.
Day 21+: Slice and enjoy
- Once you've hit 30% weight loss, unwrap the cheesecloth.
- Slice paper-thin against the grain. A sharp knife is essential.
- Serve on a board with crusty bread, good olive oil, and pickled vegetables.
- Store wrapped in parchment paper in the fridge for up to 3 weeks.
Your Second Project: Homemade Bacon
Once you've nailed duck prosciutto, try bacon — it's almost as easy and infinitely useful.
Equilibrium Cure for Bacon
- Pork belly, skin removed (2-3 lbs is a good starting size)
- 2.5% kosher salt by weight
- 0.25% curing salt #1 by weight
- 1% brown sugar by weight
- 0.5% black pepper by weight
- Optional: maple syrup (2%), smoked paprika, garlic powder
Process
- Mix cure, coat belly, vacuum seal or zip-lock.
- Refrigerate 7 days, flipping daily.
- Rinse, pat dry, place uncovered on a rack in the fridge for 24 hours (forms a pellicle — a tacky surface that takes smoke better).
- Optional smoking: Cold smoke at under 90°F for 4-6 hours, or add 1 tsp liquid smoke to the cure for a shortcut.
- Slice to desired thickness and fry. Freezes beautifully.
Your homemade bacon will be less salty, more porky, and infinitely more satisfying than anything from a grocery store.
Common Mistakes and How to Avoid Them
- Measuring salt by volume instead of weight: A tablespoon of Diamond Crystal weighs half as much as a tablespoon of Morton's. Always use a scale.
- Skipping curing salt on raw-eaten products: If it won't be cooked, it needs nitrite/nitrate. No exceptions.
- Drying too fast: If the outside dries before the inside, you get "case hardening" — a dry shell trapping moisture inside. Maintain 65-80% humidity for dry curing.
- Not enough patience: Curing is slow. Cutting into a cure early means uneven salt penetration and potential safety issues.
- Cross-contamination: Use clean hands, clean surfaces, and clean equipment. Curing preserves meat, but it doesn't sterilize it.
- Ambient temperature curing: Unless you have a proper curing chamber at 50-60°F, use your refrigerator. Room temperature dry curing without controlled conditions is risky.
Building a Curing Chamber
Ready to level up? A dedicated curing chamber gives you precise temperature and humidity control for long-cured products like salami, coppa, and bresaola.
The Basic Setup
- Mini fridge: A standard dorm-size fridge ($80-150). Remove shelves to create hanging space.
- Temperature controller: An Inkbird ITC-308 ($35) overrides the fridge thermostat. Set to 55°F.
- Humidifier: A small ultrasonic humidifier ($20-30) inside the fridge, controlled by a humidity controller.
- Humidity controller: An Inkbird IHC-200 ($35) turns the humidifier on/off to maintain 70-75% RH.
- Small fan: A USB computer fan ($10) for air circulation. Mount inside the fridge.
- Hooks and dowels: For hanging meat. Install a wooden dowel across the top of the fridge interior.
Total cost: $180-300. This setup can cure 10-20 lbs of meat at a time and will last for years.
Safety Summary
Home curing is safe when you follow the rules:
- Weigh everything. Never estimate salt or curing salt amounts.
- Use curing salts for any product eaten without cooking, and for any product cured in a low-oxygen environment.
- Never exceed 0.25% curing salt by meat weight.
- Maintain proper temperatures: Refrigerator (34-40°F) for EQ curing and brining. Curing chamber (50-60°F) for dry curing.
- Target 30-35% weight loss for dry-cured whole muscles before eating.
- When in doubt, don't eat it. Off smells, slimy texture, or unusual colors mean something went wrong. Compost it and start over.
Millions of people around the world cure meat at home safely. The tradition is centuries old. With a scale, the right salts, and respect for the process, you'll be making charcuterie that impresses everyone at the table.
Frequently Asked Questions
Is it safe to cure meat at home?
Yes, home curing is safe when you follow proper salt ratios (2.5-3% by weight), use curing salts (Prague Powder #1 or #2) for products eaten without cooking, maintain proper temperatures, and target 30-35% weight loss for dry-cured items. Always weigh ingredients with a digital scale — never estimate.
What is the difference between curing salt #1 and #2?
Curing salt #1 (Prague Powder #1) contains sodium nitrite and is used for short cures under 30 days — bacon, corned beef, pastrami. Curing salt #2 (Prague Powder #2) contains both sodium nitrite and sodium nitrate, which breaks down slowly over time, making it suitable for long dry cures over 30 days — salami, prosciutto, bresaola.
What is the easiest meat to cure at home for beginners?
Duck breast prosciutto is the ideal beginner project. It is small (cures in 7 days), uses basic equipment (scale, salt, zip-lock bag, cheesecloth), dries in your regular refrigerator in 2-3 weeks, and produces impressive results. Homemade bacon is another excellent beginner project.
How much salt do you need to cure meat?
For equilibrium curing (the recommended beginner method), use 2.5-3% kosher salt by the weight of the meat, plus 0.25% curing salt #1 or #2. For example, a 1 kg piece of meat needs 25-30g kosher salt and 2.5g curing salt. Always measure by weight using a digital scale.
Can you cure meat without nitrates?
For products you will cook before eating (like bacon that you fry), you can skip curing salt and use only kosher salt. The meat will be gray instead of pink and taste more like salted pork than traditional bacon. However, for any product eaten raw or dried without cooking (salami, bresaola, prosciutto), curing salt is essential for preventing botulism.
How long does it take to cure meat at home?
It depends on the method and size. Equilibrium curing in the refrigerator takes about 1 day per 5mm of thickness (7-10 days for bacon or duck breast). Dry-cured whole muscles need additional drying time of 2-8 weeks until they reach 30-35% weight loss. Large projects like prosciutto can take 12-18 months.
More Charcuterie Guides
What Is Pink Curing Salt? Sodium Nitrite Explained for Home Charcuterie
Pink curing salt is the most essential — and most misunderstood — ingredient in meat curing. This guide explains what it is, why it's pink, how sodium nitrite prevents botulism, proper usage rates, and whether you can cure meat without it.
10 min readHow Long Does Charcuterie Last? Storage Guide for Cured Meats & Cheese
Understanding proper charcuterie storage ensures you enjoy it at peak quality while avoiding food safety risks.
10 min read