Charcuterie Curing Chamber: The Complete DIY Build Guide
If you're serious about making dry-cured meats at home—coppa, bresaola, lonza, or whole-muscle salumi—you need a dedicated curing chamber. There's simply no way around it. The controlled environment of a proper charcuterie curing chamber is what separates mediocre attempts from genuinely excellent dry-cured products.
I've been building and using curing chambers for over fifteen years, and I've helped dozens of home charcutiers set up their own. In this guide, I'm going to walk you through everything you need to know to build a reliable, effective curing chamber that'll serve you for years.
What Is a Charcuterie Curing Chamber?
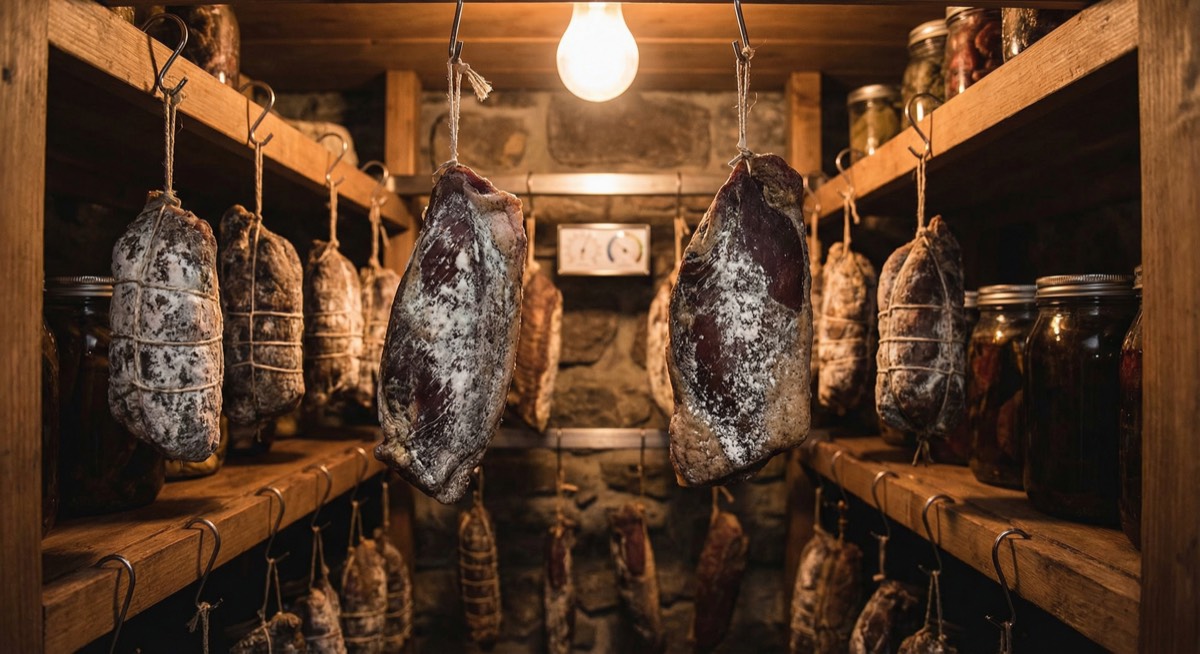
A curing chamber is essentially a controlled environment where you can maintain the precise temperature and humidity conditions needed for dry curing meat. Think of it as a tiny climate-controlled room specifically designed for the slow, safe transformation of raw meat into cured delicacies.
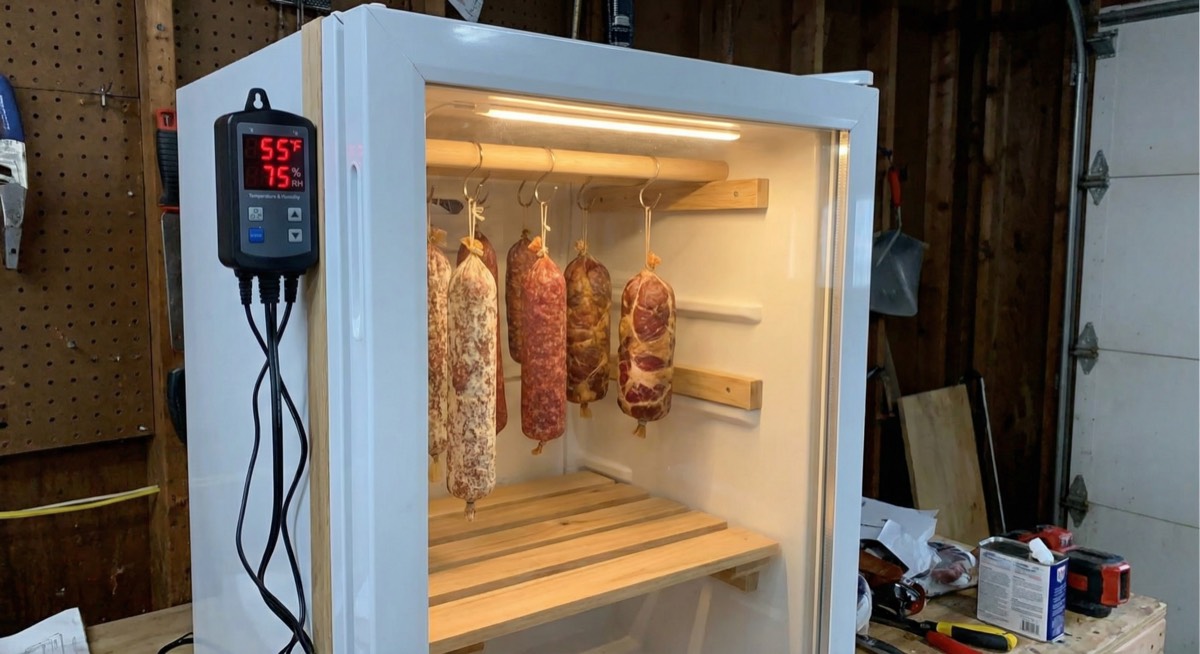
For dry curing, you need to maintain temperatures between 50-60°F (10-15°C) and relative humidity between 65-80%. These conditions allow moisture to slowly escape from the meat while preventing harmful bacterial growth and case hardening—that frustrating condition where the outside dries too fast and traps moisture inside.
Your regular refrigerator runs too cold and too dry. A basement might work in some climates during certain seasons, but it's inconsistent. A dedicated curing chamber gives you year-round control regardless of where you live or what the weather's doing outside.
Why You Need One for Dry Curing
Let me be direct: you cannot reliably dry cure whole muscles without a curing chamber. Here's why:
Temperature Control
At temperatures below 50°F, the curing process slows dramatically. Above 60°F, you risk bacterial growth and fat turning rancid. That 10-degree window is critical, and maintaining it consistently for the 30-90 days required for most dry-cured products demands dedicated equipment.
Humidity Management
This is where most home attempts fail. If humidity is too low, the meat's exterior dries and hardens before moisture can escape from the center—classic case hardening. If it's too high, you get mold problems and potentially dangerous bacterial growth. The 65-80% sweet spot requires active management.
Air Circulation
Stagnant air creates uneven drying and encourages unwanted mold growth. Gentle, consistent airflow ensures even moisture loss across your hanging products and helps beneficial mold colonize the surfaces.
The DIY Mini Fridge Conversion
The most practical and economical approach for home charcutiers is converting a mini fridge into a curing chamber. Here's my proven method that I've refined over hundreds of builds.
Choosing Your Fridge
Not all mini fridges are created equal for this purpose. You want:
- Size: 4.5 cubic feet minimum. This gives you enough space for 3-4 hanging pieces plus equipment
- Compressor-based cooling: Avoid thermoelectric (Peltier) models—they can't maintain stable temperatures
- No freezer compartment: You need the full interior space for hanging
- Removable shelves: You'll be installing dowels or hooks for hanging
I recommend looking for used fridges on Craigslist or Facebook Marketplace. A $50-100 used fridge works just as well as a new one for this purpose, and you're going to modify it anyway.
Essential Equipment List
Here's everything you'll need for a complete build:
- Mini fridge (4.5+ cubic feet)
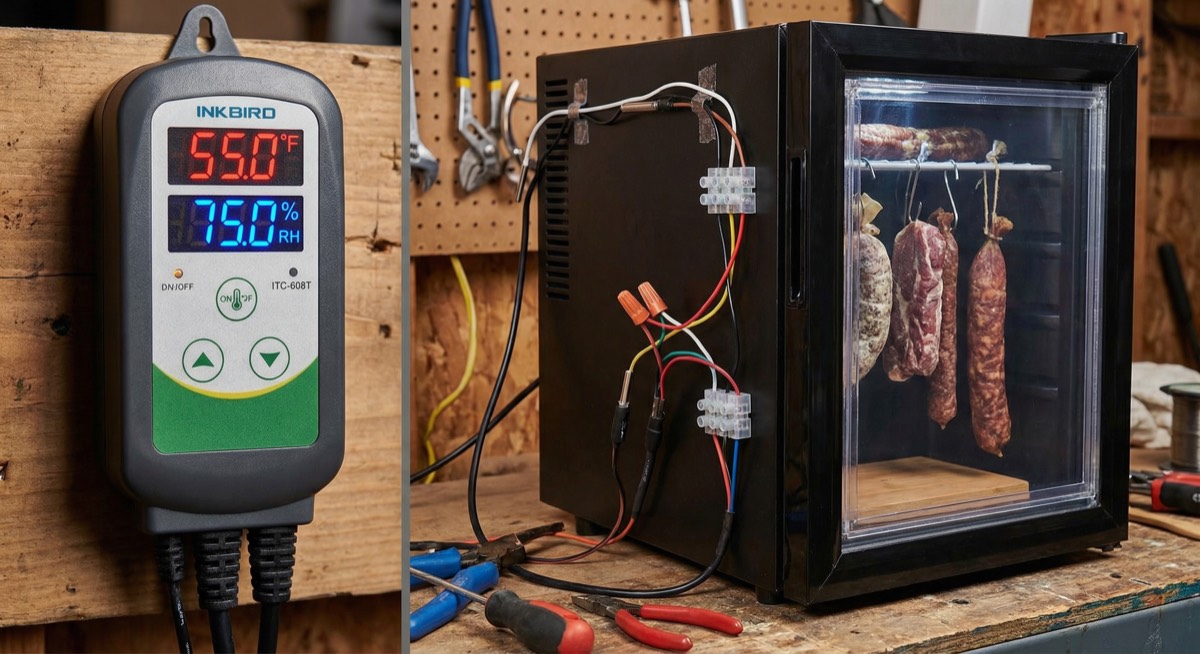
- Temperature controller (Inkbird ITC-308 or similar)
- Humidity controller (Inkbird IHC-200 or similar)
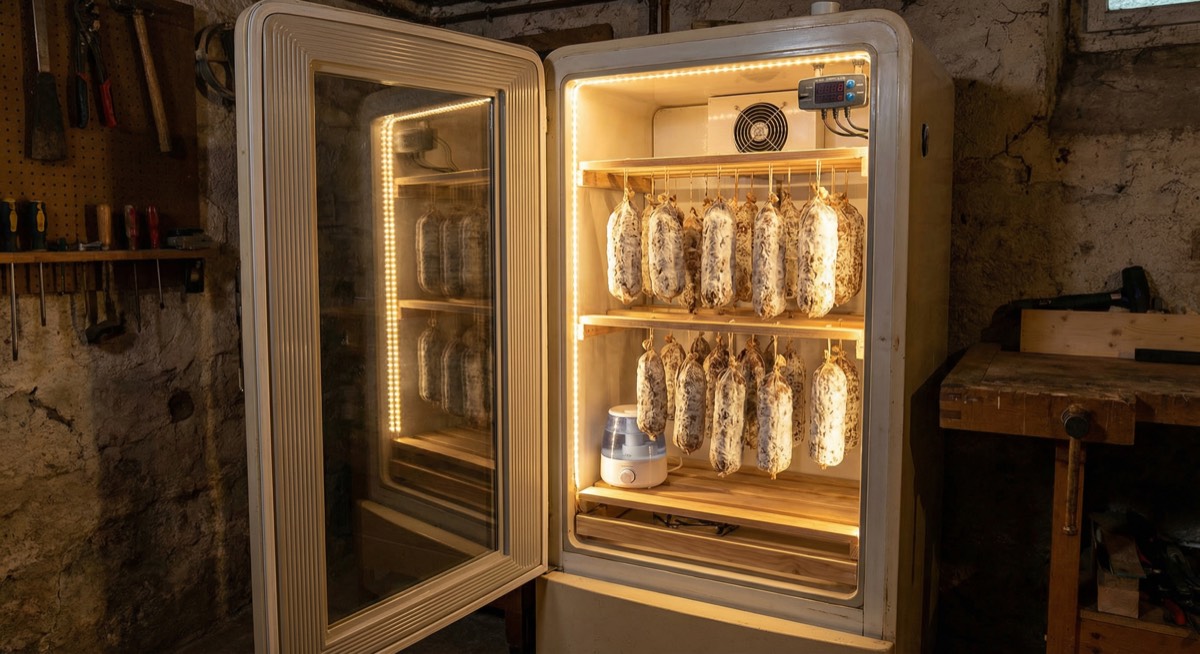
- Small ultrasonic humidifier
- Small computer fan (80mm or 120mm)
- USB power adapter for fan
- Wooden dowels or stainless steel rods for hanging
- S-hooks for hanging meat
- Hygrometer for backup monitoring
- Drill with hole saw attachment
- Silicone sealant
Total cost for everything including a used fridge: $150-250. Compare that to commercial curing cabinets starting at $2,000.
Temperature Controller Setup
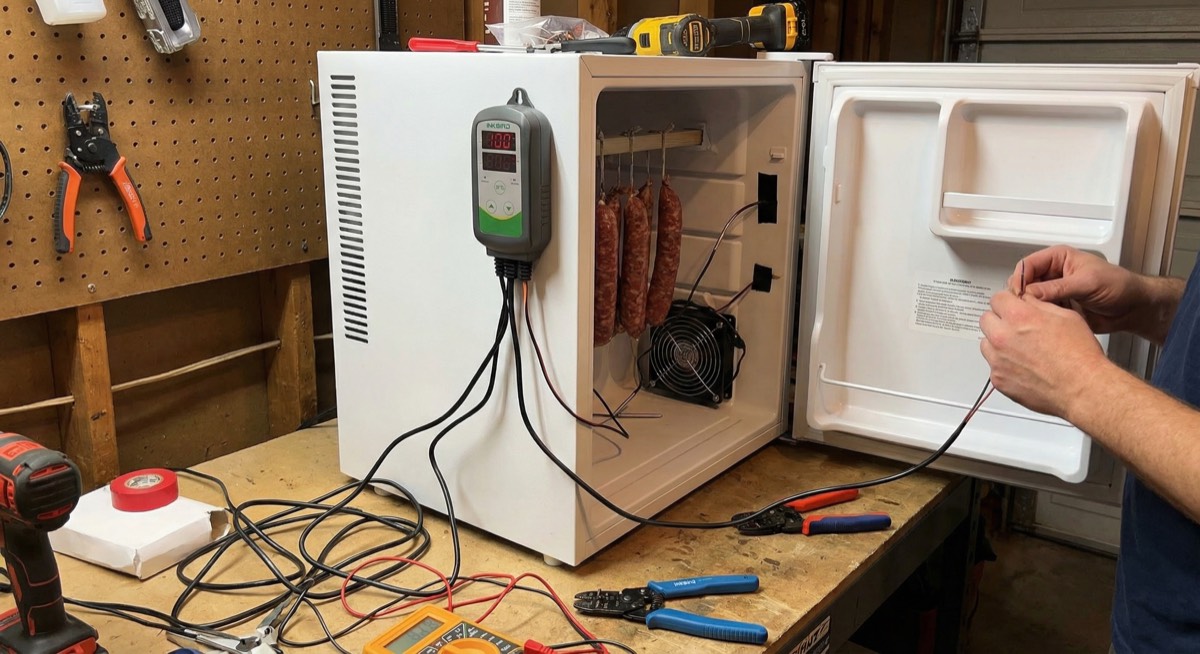
The temperature controller is the brain of your curing chamber. I use the Inkbird ITC-308 because it's reliable, affordable, and has dual outlets for both heating and cooling—though you'll only use the cooling outlet for this application.
Installation Steps
- Plug the fridge into the "cooling" outlet of the controller
- Thread the temperature probe through the fridge's drain hole or drill a small hole in the side
- Position the probe at meat-hanging height, away from the walls
- Seal any holes with silicone
- Set your target temperature to 55°F (13°C)
- Set the differential to 2°F—this prevents the compressor from cycling too frequently
Calibration Tips
Before loading any meat, run your chamber for 48 hours and monitor temperatures with an independent thermometer. The probe position matters—if it's touching the wall or too close to the compressor, you'll get inaccurate readings. I tape my probe to a wooden dowel to keep it suspended in the air at the center of the chamber.
Humidity Controller Setup
Humidity control is where many DIY chambers fail. The Inkbird IHC-200 works on the same principle as the temperature controller but manages a humidifier instead.
The Humidifier
Use a small ultrasonic humidifier—the kind you'd use in a bedroom. Remove any smart features or auto-shutoff mechanisms. You want it to run whenever the controller supplies power, period.
Position the humidifier's output so it doesn't blow directly on your hanging meat. I usually place it on the bottom of the fridge with the mist rising naturally.
Humidity Settings
Start with these settings:
- Target humidity: 75%
- Differential: 5%
The differential prevents constant on/off cycling. With these settings, the humidifier kicks on when humidity drops to 70% and runs until it reaches 80%.
Managing Humidity Fluctuations
Humidity will drop every time the compressor runs because cold air holds less moisture. This is normal. The humidifier compensates during the off-cycle. If you're seeing wild swings, try adding a small dish of water to increase passive humidity, or stuff a damp sponge in the corner.
Air Circulation
Gentle, consistent airflow is essential. A small computer fan running continuously provides exactly what you need.
Fan Installation
Mount an 80mm or 120mm computer fan inside the chamber, angled to create circular airflow without blasting directly at the meat. I use a simple USB-powered fan plugged into a USB adapter that's always on.
The fan doesn't need to move a lot of air—you're not trying to create wind, just prevent stagnant pockets. Position it to encourage air movement around and between your hanging pieces.
Why Air Movement Matters
Without airflow, moisture released from the meat creates a humid microclimate right at the surface. This prevents even drying and encourages problematic mold growth. Gentle circulation breaks up this boundary layer and ensures conditions stay consistent throughout the chamber.
What to Cure First
With your chamber built and dialed in, it's time to cure some meat. But don't start with a two-year aged culatello—begin with forgiving projects that'll teach you how your specific chamber behaves.
Beginner Projects
Duck breast prosciutto: This is my go-to recommendation for first-timers. It cures in 2-3 weeks, uses an affordable cut, and produces impressive results. The small size means quick feedback on your chamber's performance.
Lonza (cured pork loin): Another excellent starter. Pork loin is lean, readily available, and forgiving. Expect 4-6 weeks curing time depending on thickness.
Coppa: Once you've done a few smaller pieces, coppa is the natural next step. The pork collar has beautiful fat marbling and cures into something genuinely special over 2-3 months.
What to Avoid Initially
Hold off on whole-muscle hams, large bresaolas, or anything requiring 6+ months of curing until you've successfully completed several shorter projects. You need to understand how your chamber behaves across different seasons and humidity conditions before committing to long-term cures.
Maintenance
A well-maintained curing chamber is a reliable curing chamber. Here's my maintenance schedule:
Weekly
- Check and refill the humidifier reservoir
- Verify temperature and humidity readings against an independent meter
- Inspect hanging meat for any signs of problematic mold
- Wipe down any excess moisture from walls
Monthly
- Clean the humidifier to prevent mineral buildup and bacterial growth
- Check fan operation and clean dust from blades
- Inspect door seals for any gaps
Between Batches
- Remove everything and wipe down interior with a diluted vinegar solution
- Clean and sanitize all hanging hardware
- Inspect and clean the temperature probe
Troubleshooting Common Issues
Even well-built chambers encounter problems. Here's how to diagnose and fix the most common issues:
Case Hardening
Symptom: Hard, dry exterior with soft, moist interior
Cause: Humidity too low, especially early in the cure
Fix: Increase target humidity to 80-85% for the first week of any new cure. The exterior needs to stay pliable long enough for interior moisture to migrate outward.
Excessive White Mold
Symptom: Thick, fuzzy white coating overwhelming the meat
Cause: Humidity too high, insufficient airflow
Fix: Lower humidity to 70%, increase fan speed, and wipe affected pieces with vinegar-dampened cloth. Some white mold is desirable—it's the thick fuzzy overgrowth you want to prevent.
Green, Blue, or Black Mold
Symptom: Colored mold spots on meat surface
Cause: Contamination, often from airflow issues
Fix: Wipe affected areas with vinegar immediately. If mold penetrates the casing, cut away affected area plus a margin. Improve airflow and sanitize the chamber before your next batch.
Humidity Won't Stay High Enough
Symptom: Humidity consistently below target despite humidifier running constantly
Cause: Chamber leaks, oversized humidifier opening, or compressor running too frequently
Fix: Check door seals, add weatherstripping if needed. Reduce the humidifier's output opening. Consider raising the temperature differential on your controller to reduce compressor cycles.
Temperature Swings
Symptom: Temperature varies more than 5°F from target
Cause: Poor probe placement, door opening too frequently, or controller differential set too wide
Fix: Reposition probe away from walls and compressor. Limit door openings. Narrow the temperature differential setting.
Commercial Alternatives
If DIY isn't your thing, or you want something more polished, commercial options exist—at a price.
Wine Fridges
Some charcutiers use wine fridges as a starting point since they already operate in the right temperature range. However, they still require humidity modification and typically lack adequate airflow. Consider this a semi-DIY option.
Dedicated Curing Cabinets
Purpose-built curing cabinets from manufacturers like Stagionello or Primex run $2,000-5,000+ but offer precise control with minimal setup. If budget isn't a concern and you want plug-and-play reliability, these are worth considering.
Commercial Reach-In Coolers
For serious production, a commercial reach-in cooler converted with proper humidity control offers the space and reliability needed for larger operations. Expect to spend $1,500-3,000 for the unit plus controllers.
Final Thoughts
Building your own charcuterie curing chamber is one of the most rewarding projects for any serious home charcutier. For under $250 and a weekend's work, you gain the ability to produce dry-cured meats that rival—and often exceed—commercial products.
The key is patience, both in building and in using your chamber. Take time to dial in your settings before loading expensive cuts. Monitor conditions closely during your first few cures. Learn how your specific chamber behaves.
Once you've got it dialed in, you'll have a reliable tool that opens up the entire world of dry-cured charcuterie. That first slice of coppa from your own chamber, after months of patient waiting, is a moment you'll never forget.
Frequently Asked Questions
How much does it cost to build a DIY curing chamber?
A complete DIY curing chamber typically costs $150-250, including a used mini fridge ($50-100), temperature controller ($35-40), humidity controller ($35-40), humidifier ($20-30), fan ($10-15), and miscellaneous supplies. This compares favorably to commercial curing cabinets that start around $2,000.
What temperature and humidity should a curing chamber maintain?
The ideal curing chamber maintains temperatures between 50-60°F (10-15°C), with 55°F (13°C) being the sweet spot. Humidity should stay between 65-80%, with 75% being a good starting target. These conditions allow safe, slow moisture loss while preventing case hardening and bacterial growth.
Can I use a regular refrigerator as a curing chamber?
A regular refrigerator runs too cold (typically 35-40°F) and too dry (often below 40% humidity) for proper dry curing. You would need to modify it with a temperature controller to cycle the compressor at higher temperatures and add humidity control. A mini fridge is easier to convert and uses less energy.
How long does meat need to cure in a curing chamber?
Curing times vary by product: duck breast prosciutto takes 2-3 weeks, lonza (pork loin) takes 4-6 weeks, coppa takes 2-3 months, and larger cuts like bresaola or whole hams can take 4-12 months or longer. The general rule is the meat should lose 30-40% of its original weight.
Is white mold on cured meat safe?
Yes, white mold (usually Penicillium nalgiovense or similar species) is beneficial and desirable on dry-cured meats. It protects against harmful bacteria, regulates moisture loss, and contributes to flavor development. However, thick fuzzy overgrowth should be wiped back with vinegar. Green, blue, or black molds should be removed immediately.
Why is my cured meat hard on the outside but soft inside?
This condition is called case hardening, caused by the exterior drying too quickly before interior moisture can escape. It usually results from humidity being too low, especially during the first week of curing. To fix it, increase humidity to 80-85% during the initial curing phase and ensure adequate air circulation to prevent uneven drying.
More Charcuterie Guides
What Is Pink Curing Salt? Sodium Nitrite Explained for Home Charcuterie
Pink curing salt is the most essential — and most misunderstood — ingredient in meat curing. This guide explains what it is, why it's pink, how sodium nitrite prevents botulism, proper usage rates, and whether you can cure meat without it.
10 min readHow Long Does Charcuterie Last? Storage Guide for Cured Meats & Cheese
Understanding proper charcuterie storage ensures you enjoy it at peak quality while avoiding food safety risks.
10 min read